
Recipe: Raspberry Kissed Chocolate Mousse
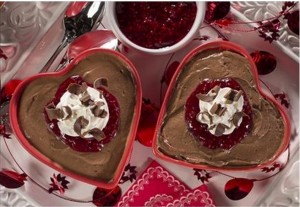
I saw this picture and recipe being shared around my Facebook friends’ feeds, so I knew I had to share it with you all! Poor Mr. Food passed away, but his legacy lives on through his amazing and simple recipes. This Raspberry Kissed Chocolate Mousse would be PERFECT for Valentine’s Day, Sweetest Day, or an anniversary (or anytime!).
Ingredients:
- 1 (12-oz.) pkg. semisweet chocolate chips
- 4 oz. cream cheese, softened
- 2 cups heavy cream
- 1/2 cup confectioners sugar
- 1 1/2 cups frozen raspberries
- 2 Tbsp. granulated sugar
Directions:
1. In a saucepan, melt the chocolate over low heat until smooth, stirring constantly. Spoon into a large bowl and stir in cream cheese until thoroughly mixed.
2. In another large bowl, using an electric mixer, beat heavy cream and confectioners’ sugar until soft peaks form. Spoon the whipped cream into the chocolate mixture and beat on low, just until thoroughly combined.
3. Spoon into individual dessert dishes, cover and refrigerate 2 to 3 hours or until firm.
4. In a small saucepan combine raspberries and sugar. Cook over medium heat 8 to 10 minutes, or until fruit breaks down and sauce has thickened, stirring occasionally.
5. Let cool and refrigerate until chilled. When ready to serve, spoon raspberry sauce on top of chocolate mousse.
Optional: Garnish with whipped cream and chocolate curls.
Recipe: Pretty Princess Heart Cookies

Fit for any princess (or prince!), these adorable princess cookies are perfect for Valentine’s Day or princess-themed party.
Ingredients:
- Batch of sugar cookie dough, homemade or store-bought (Note: For store-bought dough, you may need to add flour to stiffen it so the cookies will hold their shape while baking.)
- Rolling pin, spatula, and cooling rack
- Heart-shaped cookie cutter (a 2 1/4-inch-wide cutter works best)
- Pink colored sugar
- White or pink cookie icing
- Butter knife
- A few pieces of pink taffy or pink StarBurst candies
- Waxed paper
- Kitchen scissors or knife
Directions:
- Roll out the cookie dough and cut out an even number of heart-shaped cookies. Sprinkle half of the cookies with colored sugar. Bake the cookies according to the recipe or package directions.
- Transfer the baked cookies to the rack to cool.
- Turn one of the plain cookies upside down so that the flat bottom faces up. Spread on cookie icing and then set one of the sugar-topped cookies down on top of it. Repeat this step until you’ve assembled all of the sandwich cookies.
- Now it’s time to crown off the cookies with Tiana’s special valentine emblem. Use the rolling pin to roll the taffy or Star Burst candies between waxed paper until it is very thin. (If the candy is too hard to roll, you can soften it in the microwave for 4 to 5 seconds.) Then use kitchen scissors or a knife to cut out a small candy crown for each cookie (a parent’s job).
- Top each cookie with a candy crown, using a small dab of cookie icing to hold it in place.
Homemade Sidewalk De-Icer (Without Salt!)
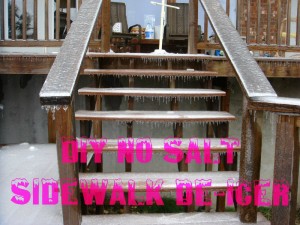
Rock salt or other ways to de-ice your sidewalks, driveways, and steps going into your house can get expensive! Here’s a way to make your own de-icer without the salt that erodes at the cement and wood.
For icy steps and sidewalks in freezing temperatures, mix 1 teaspoon of regular blue Dawn dishwashing liquid, 1 tablespoon of rubbing alcohol, and 1/2 of a gallon hot/warm water and pour over walkways. Just double or triple these ingredients for larger areas. They won’t refreeze!
DIY $3 Wall Projector
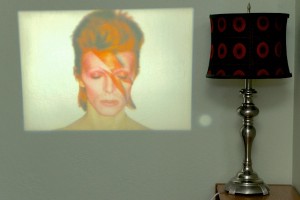
Watching a huge movie on the side of a garage or inside on a large wall is so much fun. It’s just like going to a drive-in, but not everyone has hundreds of dollars to buy one. Here’s a genius hack that only costs $3 and uses your smartphone. If you want visuals on this tutorial click that link above.
What You’ll Need:
- Shoebox or small box
- Small magnifying glass
- Paperclip
- Smartphone Stanley knife
- Duct tape
- Optional: Black paint
Directions:
- Figure out the center of your box. Place your magnifying glass in the middle of the “height side” of the box (where the heel or toes would be) and trace around the lens.
- Use the knife to cut out the circle.
- Stick the magnifying glass into the hole from the inside and duct tape it in securely. Tape all the way around the edges of the circle, too. This will prevent light from getting in.
- To prevent even more light from getting inside the box, paint the inside black until completely opaque and allow to dry.
- Poke a hole at the back of the box and stick your phone charger through it.
- Using a pair of pliers, bend the paperclip into a stand for your phone, or use one you already have.
- The picture of your phone will appear upside down on the wall since it’s reflected through the magnifying glass. To fix it: For an iPhone go to Settings > General > Accessibility and turn on Assistive Touch. Then touch the floating orb thing that’s on your screen and select Device > Rotate Screen. For Android, Screen Rotation Control app or the Ultimate Rotation Control app will flip it correctly.
- Dim the lights,place your phone on its stand in the box, then move the phone back and forth in the box to find your focus point.
- Close the box, turn out the lights, and watch the movie on the large, flat area of your choice! SIMPLE!
Ridiculously Easy No Sew Boot Cuff Tutorial

These boot cuffs are all the rage right now. You can buy a pair for $13 or more, OR you can make them yourself without needing to sew at all! Take an old sweater you don’t wear anymore (or buy one at a thrift store), cut the sleeves off, and put them on over your pants/socks. If you want to make sure it doesn’t unravel, use fabric glue to cuff the part where you cut. That’s it! SO CHEAP AND SO EASY!