
DIY Freeze Pop Cozies Lightsabers
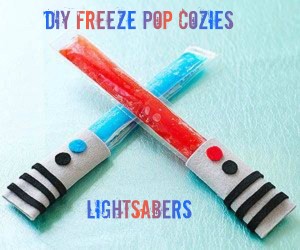
Feel the force with these adorable felt cozies to keep your little ones’ hands warm and clean(ish) while they are enjoying their freeze pops this summer with this quick tutorial from Family Fun. Instructions are for 1 cozy, and they’re very simple, so just repeat with as many as you’d like to make!
- Cut a 3″x4″ rectangle from gray felt.
- Fold it over a freeze pop and use fabric glue to seal the side and bottom edges.
- Clamp the fabric closed with binder clips or clothes pins (optional, but gives a stronger hold to the glue).
- Slip the felt off the pop.
- Glue on stripes and dots of black and colored felt (or use fabric paint if you want it even simpler!).
- Allow to dry fully, then you’re able to battle the dark side! Enjoy!
Recipe: Teddy Bear Beach Bums “Dirt” Cups

We all loved dirt cake growing up, the one with crushed Oreos and gummy worms, but here is a summertime change to the usual dirt cake that everyone will love!
All you have to do is using clear plastic cups, put use blue pudding or jello on the bottom half of the cup. Top the blue dessert with crushed vanilla cookies or vanilla Oreos ( looks like sand). Add sour tape candy cut into strips (the picture shows Airhead Extremes Sour Belts) with a Teddy Graham lying on top enjoying the sunshine. Add a cocktail umbrella and enjoy!
How to Style Elsa’s Braid from Frozen Tutorial

Girls around the world are obsessed with Frozen, and most are particularly in love with Queen Elsa. Make your daughter/niece/neighbor’s or your own day by doing this Elsa’s braid tutorial from Makeup Wearables. It’s a lot simpler than it looks! She has another version of Elsa’s braid, videos, and TONS of gorgeous hair tutorials. I’m glad I discovered it! 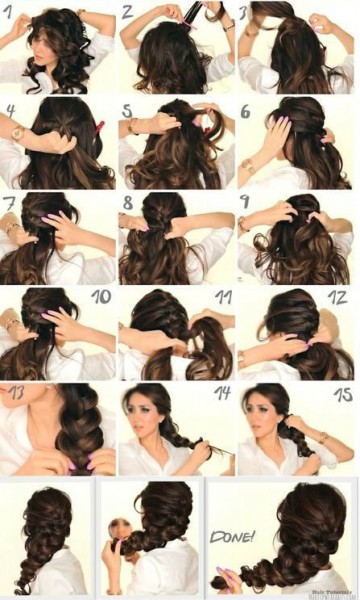
- If our hair is straight, you need to curl it to give it extra body and texture. They used a 1.5″ curling-wand and pinned the curls up to keep the curls stronger for longer.
- Apply hair powder to help with teasing later because it makes your hair sticky.
- Tease your roots everywhere really well, and make sure to use a strong hairspray to set it.
- (Optional) Attach hair-extensions and a couple of hair padding at the back of your head to create Elsa’s cartoon volume. If you don’t have a hair padding, just tease your hair more.
- Gather the back of your crown and make a half-up ponytail, but Leave out the front of your hair.
- Start a normal 3-strand braid with the half-up ponytail.
- Start adding in hair to the side strands to start a French braid: First section, take from the crown, and add it to the right strand, before crossing both strands over the middle strand. (See picture or video for clarification.)
- Take a section of hair from the left side and add it to the left strand, before crossing it over the middle strand.
- Repeat until all the hair is in one big braid.
- After putting the braid in an elastic band, pull out the sides to make the braid bigger.
- Grab a small piece of hair at the end with one hand, and pull up the braid with the other hand towards the crown to scrunch it. This will instantly create more volume in the braid and look more like Elsa’s.
- Tug on the sides to adjust the size and to make the braid even, then spray well with holding hairspray. TAKE PICTURES!!
DIY Spoon Planter Hooks
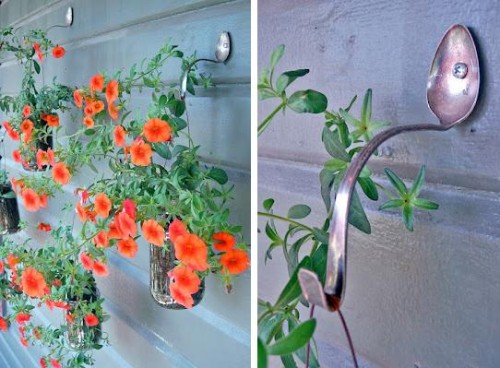
Looking for a creative way to hang some small plants either outside or indoors? Check out these DIY Spoon Planter Hooks. Learn How to bend the spoons properly from WikiHow HERE. Then hang in desired location and display small plants around your house! What a wonderful idea. May be a great way to display your herbs in the kitchen! Have fun with it!
Recipe: Kool-Aid Playdough
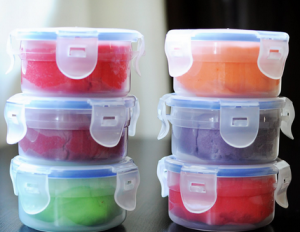

I love using my freebies and awesome deals to make fun low cost activities for the kids. This is a super fun thing that the kids can even help make! It is really easy and you can finish the whole process and be ready to play in about 7 minutes (okay 10 if you have the kids helping). Someone asked if you can make this with Country Time Lemonade and I can say, the last time I tried it, it did not produce as good of results as the Kool-Aide. Plus the KoolAide scent lasted a lot longer.
Ingredients
- 1 cup flour
- ¼ cup salt
- 1 packet Kool-Aid
- 1/2 cup Water
- 1 tbsp oil
Instructions
- Mix the flour, the salt, and the Kool-Aid together.
- Boil the water.
- Add the oil to the water.
- Pour some of the water into the dry ingredients and mix with a spoon. Keep adding water and work the dough until the color is uniform and feels like playdough.
- Be sure to keep stored in a resealable container in the refrigerator – it will last a very long time if you do, and can be used over and over again.