
DIY Chocolate Mint Body Butter
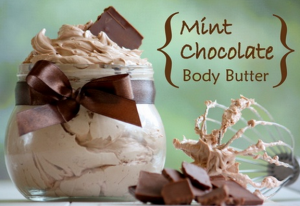
While on Pinterest the other day, I stumbled across this amazing recipe for a DIY Chocolate Mint Body Butter. I sounded like an amazing experiment I once got a container of this for a gift and know that it cost nearly $15 for a small container. This one is a little cheaper to make and you get so much more for your money. Plus you can make it with more organic/chemical free ingredients. The main recipe came from a website called mommypotamus.com. I also found another one (there was no credit on that one) and have sort of combined the two to get the best effect.
- 1/2 cup of cocoa butter (it’s listed as cacao butter sometimes.)
- 1/2 cup mango or shea butter (you can also substitute another 1/2 cup cocoa butter. It will be a little less “light” when whipped up, but it was really amazing…especially for dry skin.)
- 1/2 cup coconut oil
- 1/2 cup of jojoba or a mild olive oil. I used olive oil and that gave outstanding results and was my favorite.
- 1-2 teaspoons peppermint essential oil (the more you add the stronger the mint scent)
- 1 1/2 tablespoons pure cocoa powder (if you would prefer a “white chocolate” version that is not a bronzer, substitute arrowroot powder or non-GMO cornstarch)
- 2 teaspoons naturally derived vitamin E (optional). I pierced some vitamin E capsules and it worked well!
How To Make Whipped Body Butter:
- Prepare an ice bath by filling a large bowl with ice and fitting a smaller bowl inside. The inside bowl needs to be able to hold at least 4-5 cups of liquid. Glass works better than metal.
- Using a double boiler or a pot of boiling water with a smaller pot fitted inside, melt cocoa butter and mango butter over a low simmer. This will prevent it from scalding.
- Add coconut oil and melt until completely liquid.
- Remove cocoa butter/coconut oil mixture from heat.
- Measure 5 teaspoons of cocoa powder into a small bowl and gradually add several tablespoons of jojoba/almond/olive oil. Mix thoroughly and then add to cocoa butter/coconut oil mixture along with remaining jojoba/almond/olive oil.
- Place mixture in chilled bowl (which should still be resting above the ice bowl) and allow to cool for 10-20 minutes.
- Remove mixture from ice bath and whip very well until stiff peaks form. If after a few minutes it does not seem to be thickening return the bowl to the ice bath and whip there.
- Store in an airtight jar – Keep out of sunlight to prevent oxidation. I keep mine in the cupboard a.k.a cool dry place.
- You will also want to store it in a cool place. If your bathroom gets warm, it’s not the place to keep this.
Easy Homemade 3-Ingredient Vanilla Coconut Body Scrub
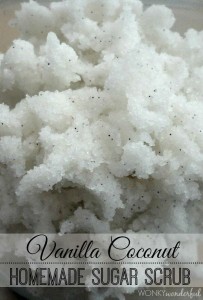
This time of the year, our skin is so dry and flaky. Why spend $30 or more on a body scrub from The Body Shop or other retailer when you can make it at home with only 3 ingredients for pennies and in only a couple of minutes. Oh, and it smells like summer. BLISS!
What You’ll Need:
- 1/2 cup solid coconut oil
- 1 cup white sugar
- Seeds from 1 vanilla pod
Directions:
- Use your whisk attachment on your mixer and whip 1/2 cup solid coconut oil for about 10 minutes. Be sure to stop to scrape down the sides after 5 minutes.
- Add 1 cup white sugar and the seeds from 1 vanilla pod. Mix for another 1-2 minutes.
- Transfer to an air tight container until ready for use.
Smells so good! You’ll love it. Thanks to Wonky Wonderful for the recipe!
Recipe: South of the Border Guacamole
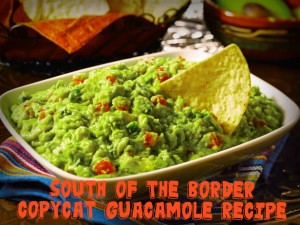
So, Cinco de Mayo is almost over, but guacamole with tortilla chips is something you can eat year round! My family eats it at least biweekly – and avocados are so high potassium and good fats that it makes it seem like we are eating a healthy food, too! Here’s one of the highest rated guacamole recipes on the internet and it’s a copycat of South of the Border Restaurant’s version.
Ingredients:
- 2 large ripe Avocados
- 1 medium Tomato, chopped
- 1 Green Onion, chopped
- 2 Green Chile Peppers, seeded and chopped
- 1/8 tsp. Black Pepper
- 3 Tbsp. Lemon Juice
Instructions:
- Chop avocados coarsely and mash until smooth.
- Add tomato, onion and chiles and mix gently. Add pepper and lemon juice. Stir.
- Cover tightly with plastic wrap until ready to serve. Serve with your favorite tortilla chips.
DIY Chevron Striped Flip Flops
![]()
I love flip flops! I have at least six pairs. The prices for plain colored ones can be only $1 in a lot of stores at various times of the spring and summer (Old Navy is especially known for this sale). If you want ones that have the footbed decorated, they’re going to be at the very least $5 each pair, but likely more. For only a few minutes of your time and some paint markers, you can can decorate your own flip flops to go with any outfit! If you need a visual tutorial, visit Teen Vogue.
What You’ll Need:
- One pair of foam flip flops (your choice of color)
- Blue painters or regular artist tape with a 3/4-inch width
- Scissors
- Oil-based paint markers in your choice of colors (Sharpie makes a large variety of colors and are easy to use)
Directions:
- Cut the painters or artist tape into 15 pieces about 1.5 inches in length. Make the cut at a right angle to the tape edge so that the pieces look like rectangles.
- Starting at the toe of the shoe, place a piece of tape at an angle. Press down firmly around all the edges to be sure it’s secure.
- Place the next piece of tape overlapping the first piece. The long side of the second piece should lay flat over the short side of the first piece. Press firmly around the edges again.
- Continue this tape placement across the shoe creating a chevron stripe.
- Leaving a small gap from the first stripe, start the next row the same way as the first. Continue adding rows and even spacing between each until you’ve covered the footbed.
- Once the footbed is covered, starting in the enter of the toe area of the side of the flip flop, line the edge of the tape with the edge of the footbed, and press tape firmly onto the “wall” or “lift” of the shoe. If the tape is wider than the height of the shoe, then make sure to fold it under the sole of your flip flop, not onto the footbed. Also wrap tape around the part of the strap that connects to the footbed.
- Color in the first stripe with one of the paint markers – you don’t have to be extraordinarily neat. Repeat on the rest of the stripes, alternating your colors or do them all one color. Make it your own!
- Allow the paint to dry, and go over any dull or missed areas with a second marker coat. Some lighter colors may need two coats, and you may want to do a second coat just to have it last a little longer under your feet. Allow to dry fully once the paint is how you like.
- Carefully pull the tape off your flip flop. Allow to dry for a couple of hours to make sure the edges that were touching the tape are fully dry, then enjoy! Try many different designs and color combinations! These would make great gifts, too.
Teacher Appreciation Crayon Wreath
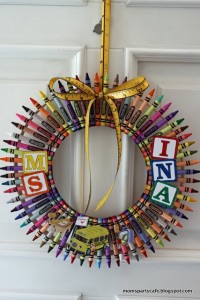
Next week is Teacher Appreciation Week, and I read that teachers love receiving gift cards for school supplies and things with their names on them. This Crayon Wreath would be an inexpensive way to say thank you to your child’s teacher. Thanks to Moms’ Party Cafe for the super cute and imaginative idea!
What You’ll Need:
- 12″ embroidery hoop, or basketry hoop (or a styrofoam wreath cut in half thickness or cardboard cut into a wreath shape, both covered with fabric or painted to cover their colors)
- 8″ embroidery hoop or basketry hoop (or same choices as above)
- box of 64 crayons
- printouts of what you need from this template
- hot glue
- ribbon
Directions:
- Place the 8″ hoop in side the 12″ hoop with equal distance between all edges.
- Arrange the crayons along the 2 hoops. Hot glue the crayons to the hoops. TIP: Keep the unglued crayons arranged on the hoops to keep the spacing accurate.
- Tie the bow around the 2 crayons that you want at the top.
- Create a separate loop and glue the edges together to create the hanging loop.
- Personalize with the teacher’s name and hot glue them on.
- If very careful with the wreath, it should last for years to come!