
DIY Glowing Fairies in a Jar
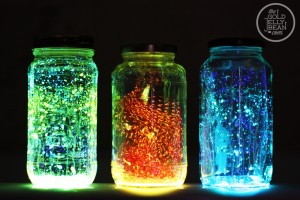
Most of us have seen the picture of fairies in a jar that went viral last year. We all found out that it was fake and photoshopped, much to many kids’ dismay. Here’s a REAL way to do it, no photoshop needed. BIG thanks to The Gold Jelly Bean for helping to make so many kids’ days brighter with this tutorial!!
What You’ll Need:
- Glass jar (cleaned one from spaghetti sauce or similar, or you can buy them at the dollar store)
- Glow sticks
- Rubber gloves
- Scissors
- Eye protector (like goggles or glasses)
- White tulle (optional, but looks better!)
Directions:
- Cut the tulle into a larger size than the jar and stick it inside. The tulle helps it look like the fairies are suspended in the jar, not just stuck on the sides of the glass.
- Put on rubber gloves and crack the glow stick to get the glow to activate, then stick the end of the glow stick into the jar and cut the top off. Be careful with this! There are glass and chemicals inside the stick, so be sure to not touch your eyes.
- Shake the stick all over the inside of the jar. This will take a while because it doesn’t just pour out, it may even get clogged. Use a new one, don’t try to get the glass out.
- After putting in the amount of glow liquid you want, put the cap on and shake. It will probably take 2-3 necklaces or 3-4 bracelet glow sticks to get the right amount.
- Turn out the lights and watch the amazement in your kids’ eyes!
Candy Corn Home Decor
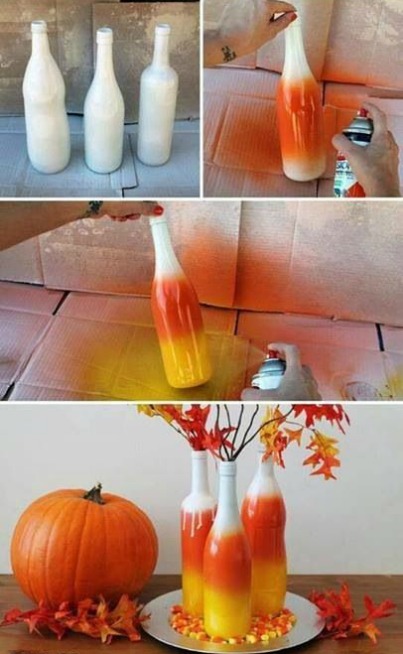
Have some empty wine bottles laying around and you are in need of some cute Halloween Home Decor? This is the perfect DIY Project for you. Super Simple, Easy & Cute all in one package.
Materials:
Empty Wine Bottles
Glossy Spray Paint – White, Orange & Yellow
Fall Foliage
Directions:
1. Make sure Wine Bottles are completely clean & dry.
2. Spray entire bottle with White Spray Paint.
3. Spray 3/4 way up with orange
4. Spray 1/2 way up with Yellow
5. Let dry completely.
6. Fill with Fall Foliage
7. Arrange on your mantle or as a centerpiece for your table!
Happy Fall!!!
How to Make a Hair Bow Picture Frame Holder
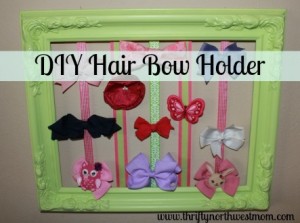
Picture via Thrifty NW Mom
Here is what you will need:
- Hot Glue
- Scissors
- Fabric (enough to cover the picture frame)
- Spools of ribbon (all sizes & textures)
- Spray paint (your choice of color)
- A sturdy picture frame
*Choose whatever size you want, I chose a big one because we have so many bows to put on it. I also have several smaller ones throughout the house. The basic wooden frames at the dollar store will work if you want to keep it simple. I found mine at a thrift store and it was falling apart when I bought it. See pic*
*You will also notice my fabric and ribbon aren’t matchy matchy :) You can choose a theme color, or you can be crazy. Ex. Hot pink and Zebra.


Here is a picture of my picture frame before I did any work to it. Yes, it was falling apart when I bought it! I still knew it would work for what I wanted.
The first thing you want to do is take your frame apart and sand it. After you sand it and wipe it down, spray paint it. I gave mine several coats and because it was an old frame with a lot of dings in it, I used a sand paper strip to give it a distressed looked after the paint dried.
The next step is to get your fabric and cut it to size. Place the fabric on the ground and place the inside of the frame (whether it’s the cardboard, glass, or wood) on top. You want to leave a few inches all the way around so it will fold over to the back where you will hot glue it into place.
After you have cut fabric, make sure the front of the fabric is facing the ground. Have the inside of the picture frame on top and start to hot glue. You will go through several hot glue sticks depending on the size of your frame. Put the glue on the edge and press the fabric to it.
Once the hot glue has dried and the fabric is secured, you can start putting the ribbon on. The purpose of the ribbon is for the hair bows to clip to it for show. You can place the ribbon horizontally, vertically, crisscrossed, or all of the above. Be creative. I did my ribbon crazy! Place a dab of hot glue on the back, put the end of the ribbon on it, then bring it across the front. Put another dab of glue on back and place the other end of the ribbon on it. Repeat this step until the frame is full of ribbon running across the front.
Place the center back into the frame and secure it. If you are using a small frame, place extra fabric or felt on the back to cover the ribbon ends. (It gives it a polished look!)
Now you are ready to add the bows! Check out my hair bow tutorials so you can constantly add to your collection!


DIY Mason Jar Soap & Lotion Dispensers
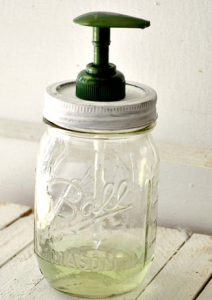
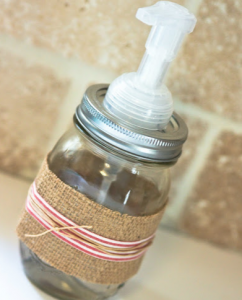
Now that you have learned how to make your own hand soap. You might want to give it as gifts! This is a super cute way to present it as a gift or even to use in your own home! It has always been one of my favorite hostess gifts!
Here is what you need:
- Mason jar with lid
- White or colored paint (if you want to paint the jar lid)
- Outdoor Modge Podge
- Paintbrush
- Nail
- Hammer
- Old Dish or hand soap with pump dispenser
First you need to decide if you want to paint you mason jar lid. If you do then you want to take the two lid parts and pain them, let them dry and then seal them with the Modge Podge sealer. Once that is done you will want to put the lid back on the jar and carefully make a hole in the middle of the lid.
To do this, you will need to use a nail and a hammer and carefully pound the nail through the metal lid making a large enough hole that the pump straw can fit inside.
Then place in the pump and fill with soap or lotion! There you have it!
DIY $3 Dessert & Treat Stand
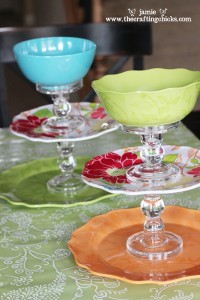
I showed you how to make one for Christmas, but why only have these simple and cheap stands for the holidays? You can make them and use them year round! Get everything either at the Dollar Store or Thrift Store, mix and match the colors, designs, and materials for your tastes and make them shabby chic! You can make them with a plate or a bowl on top, or you can make it with only 2 tiers instead of three. Thanks to Jamie at The Crafting Chicks for the cute and easy tutorial!
What You’ll Need:
- 2 candlestick holders
- A larger plate or platter
- A slightly smaller plate
- A bowl or another platter
- Permanent craft glue (like E6000 or Gorilla Glue)
Directions:
- Use a liberal amount of glue on the bottom of the first candlestick holder and stick it to the bottom plate in the middle (either measure to find exact middle or eyeball).
- Glue top of candlestick holder and place the littler plate on it.
- Repeat with the next candlestick holder and bowl.
- Allow to dry for an hour before use, then enjoy!
HAND WASH AND DRY ONLY!