
How to Make a Hair Bow Picture Frame Holder
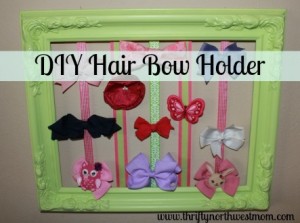
Picture via Thrifty NW Mom
Here is what you will need:
- Hot Glue
- Scissors
- Fabric (enough to cover the picture frame)
- Spools of ribbon (all sizes & textures)
- Spray paint (your choice of color)
- A sturdy picture frame
*Choose whatever size you want, I chose a big one because we have so many bows to put on it. I also have several smaller ones throughout the house. The basic wooden frames at the dollar store will work if you want to keep it simple. I found mine at a thrift store and it was falling apart when I bought it. See pic*
*You will also notice my fabric and ribbon aren’t matchy matchy :) You can choose a theme color, or you can be crazy. Ex. Hot pink and Zebra.


Here is a picture of my picture frame before I did any work to it. Yes, it was falling apart when I bought it! I still knew it would work for what I wanted.
The first thing you want to do is take your frame apart and sand it. After you sand it and wipe it down, spray paint it. I gave mine several coats and because it was an old frame with a lot of dings in it, I used a sand paper strip to give it a distressed looked after the paint dried.
The next step is to get your fabric and cut it to size. Place the fabric on the ground and place the inside of the frame (whether it’s the cardboard, glass, or wood) on top. You want to leave a few inches all the way around so it will fold over to the back where you will hot glue it into place.
After you have cut fabric, make sure the front of the fabric is facing the ground. Have the inside of the picture frame on top and start to hot glue. You will go through several hot glue sticks depending on the size of your frame. Put the glue on the edge and press the fabric to it.
Once the hot glue has dried and the fabric is secured, you can start putting the ribbon on. The purpose of the ribbon is for the hair bows to clip to it for show. You can place the ribbon horizontally, vertically, crisscrossed, or all of the above. Be creative. I did my ribbon crazy! Place a dab of hot glue on the back, put the end of the ribbon on it, then bring it across the front. Put another dab of glue on back and place the other end of the ribbon on it. Repeat this step until the frame is full of ribbon running across the front.
Place the center back into the frame and secure it. If you are using a small frame, place extra fabric or felt on the back to cover the ribbon ends. (It gives it a polished look!)
Now you are ready to add the bows! Check out my hair bow tutorials so you can constantly add to your collection!


Leave a Comment
This is so cute!I like the color too.
Hey Rudy,
How do I find your tutorial? Would love t see more. :)
Hey Rudy,
How do I find your tutorial? I would love to see more. :)