
DIY Elastic FOE Headbands Tutorial

You can either spend $3 or more for one headband on Etsy or other shop, OR you can follow my directions to make adult and/or children’s sized elastic headbands for about $1 or less and in the design of color of your choice. I chose to do it on my own when I found an epic deal on Frozen and Disney Princess FOE for literally less than $1 per yard shipped on a Groopdealz or Jane steal, so I had to figure it out to surprise my girls and use my own pictures as the tutorial! The headbands literally took me less than 2 minutes to make 2-3 and look exactly like what you buy at the stores – and this is my first time making them :)
You can also make your own elastic hair ties with the tutorial I posted previously, and you can make ties with leftover FOE.
Note: Some shops take a long time to ship, so order in plenty of time if you are (or your child is) going to need to wear the headband for a special occasion.
What You’ll Need:
- Fold Over Elastic (FOE) ordered with the designs or colors you want (1 headband: 18″ for big kids & adults, 16″ for baby/toddler)
- Scissors
- Ruler or measuring tape
- Optional: Lighter or matches
Directions:
- Gather all supplies and decide which sized headbands you are making – adults and kids 4+ wear 18-in long FOE, while toddlers and babies wear 16-in long FOE. Use your best judgement on each. It’s better to cut too long then crop down than to cut too short and have to make them into hair ties.
- Measure out your first length of FOE. DO NOT STRETCH THE ELASTIC WHILE MEASURING! This will make the length inaccurate. Double check the length measurement again, then cut the elastic.
- Using the elastic you just cut as your guide, cut as many pieces of the FOE as you’d like to make into headbands.
- Fold in half the first headband and line up the edges. If they aren’t straight, cut them into a straight line.
- Now is the time you can decide to use a lighter or a match to melt the edges together to prevent fraying in the future. I didn’t do it, but I may choose to do it later.
- Holding both ends, tie the headband ends together as closely to the end as you can and tighten into as small of a knot as you can.
- Repeat 4-6 until you are finished with all your headbands. This should only take you a few minutes to make 10 or more headbands!
DIY Cloth & Disposable Baby Wipes Tutorial
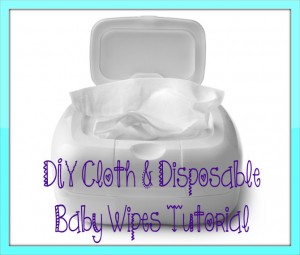
Did you know the average parent uses 4,400 baby wipes and spends $150 or more EVERY YEAR on a baby? That alone is crazy, but also a majority of baby wipes aren’t biodegradable, so they are harmful to the environment. Also, they can contain chemicals like chlorine, synthetic preservatives, fragrances, and dioxin. To save money, baby’s skin, and the environment, you can make your own washable wipes with just a few ingredients and cloths.
See below for DISPOSABLE wipes directions.
What You’ll Need:
- 15-20 pieces of approx. 10″x 10″ cloth cut from old receiving blankets or shirts (many use husband’s old white undershirts)
- 3 cups warm water
- 1 cup baby wash
- 2 tsp baby oil
- Plastic container with lid or old plastic wipes container OR Spray bottle
- Optional: Lavender oil for fragrance
Note: Other recipes use ingredients like aloe vera juice, apple cider vinegar, other essential oils, soap, and more. Experiment with what you like best.
Directions:
- In a bowl, add ingredients and mix gently.
- Next you have the choice:
- In the container to store wipes, stack all the cloth into it, pour the mixture over them, then close the lid, OR
- Put the mixture into a spray bottle, then just spray baby’s bottom and use a clean, dry cloth to wipe them clean.
- When wipes are dirty, store in a plastic or wetbag, then wash with cloth diapers or as a load by themselves.
If you do not want to use cloth/reusable wipes, or you want to have disposable ones in case of really big messes, you can put all the ingredients in a large cylindrical container with a lid (i.e., washed out cleaning wipes container, like Clorox wipes, or cleaned 4 qt ice cream container), mix the ingredients, take the cardboard out of the center of a roll of paper towel of your choice and place the paper into the solution. Cover the container, shake to get the ingredients into the whole paper towel.
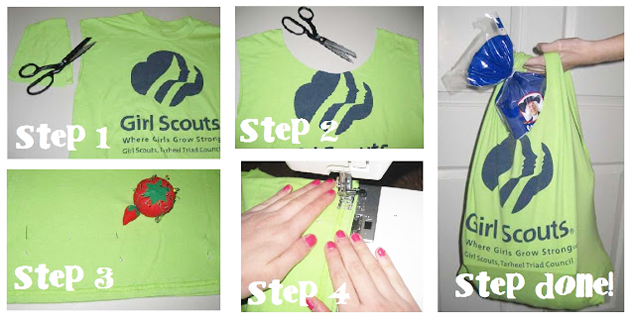
DIY Recycled T-Shirt Bag Tutorial

This GENIUS and nearly free recycled t-shirt bag from One Good Thing by Jillee and Instructables would be a fun thing to make for gifts, to use at the grocery store, or just to carry a lunch instead of a paper bag.
What You’ll Need:
- Heavy weight cotton T-shirt (heavy weight fabric is best)
- 3- 5 straight pins
- Pencil or pen
- Dinner plate
- Scissors
- Sewing machine
Here is a picture tutorial. If you want the full step-by-step tutorial, visit Instructables.
DIY Laundry Powder Detergent
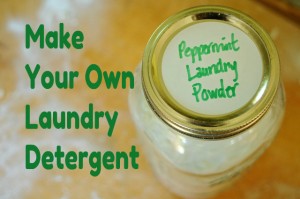
You can save tons of money by making your own laundry detergent. It is surprisingly easy to do so, and actually pretty fun! Here’s how to make laundry detergent at home. This recipe makes approximately 5 cups.
What You’ll Need:
- 2 cups (finely) grated castile soap in scent of your choice (peppermint is a great one!)
- 1 cup borax
- 1 cup baking soda
- 1 cup soda ash (washing soda)
Directions:
- Using a cheese grater, grate the castile soap into a powder.
- Mix everything together and store in a tight jar.
- Depending on your washer, you may need to adjust the soda a bit, and the measurements per load. Try using about 1/8 cup and adjust from there. Also, be sure to shake a little every once in a while to shake the soap back into the powder.
Thanks to SouleMama for the recipe!
Recipe: Easy Ragu Stuffed Peppers

It’s nearly fall and we’re all looking for warm, simple, and filling meals. Here’s an easy recipe for Ragu Stuffed Peppers from The Food Channel that can also be great to be in a tailgating potluck!
Ingredients:
- 4 bell peppers (red, yellow or a mix), halved lengthwise with seeds removed
- 2 tablespoons extra-virgin olive oil
- Kosher salt
- About 3 cups Ragu sauce (or equivalent)
- 1/2 cup couscous
- 3/4 cup golden raisins
- 3/4 cup grated asiago or fontina cheese
- 4 teaspoons red wine vinegar
- 1/2 cup chopped fresh parsley
- 2 tablespoons tomato paste
Directions:
- Preheat the oven to 450*F. Toss the bell pepper halves with 1 tablespoon olive oil and 1/2 teaspoon salt in a large microwave-safe bowl.
- Cover bowl and microwave them until the peppers soften, 10 to 12 minutes.
- Mix the Ragu (or other sauce), couscous, raisins, 1/2 cup cheese, 3 teaspoons vinegar, the parsley and 1/4 teaspoon salt in a bowl.
- Whisk the remaining 1 tablespoon olive oil and 1 teaspoon vinegar, the tomato paste and 3/4 cup water in the bottom of a large nonreactive baking dish.
- Carefully move the peppers, cut-side up, to the baking dish & fill with the couscous mixture. Sprinkle with the remaining 1/4 cup cheese.
- Cover the dish with foil and bake until the peppers are tender and the filling is hot, or about 20 minutes.
- Transfer the stuffed peppers to plates and drizzle with the cooking liquid from the dish.
Recipe: Turtle Cheesecake Dip
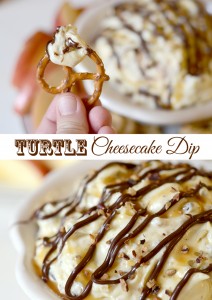
I had another idea for today’s blog, then I found THIS recipe. I am going to hurry and share it and hopefully forget about it or else I can see this being my “hiding in a corner so my kids can’t see me eating it” meal tonight. This delicious dip is from Bubbly Nature Creations. She has a ton of yummy recipes over there. Just a fair warning in case you are trying to watch what you eat. :)
Ingredients:
- 8 oz. cream cheese softened
- ⅓ cup powdered sugar
- 1 box of cheesecake pudding mix
- 2 cups whipped cream
- ¼ cup and 1 Tbsp. chopped and toasted pecans
- ¼ cup of Hershey’s™ Spreads in Chocolate
- ¼ cup caramel sauce
Directions:
- Place cream cheese, powdered sugar, pudding, and whipped cream in a mixing bowl and mix on high until light and fluffy.
- Add ¼ cup of the toasted pecans and mix on low speed until evenly incorporated.
- Place the mixture into your serving bowl and drizzle the Hershey’s Spreads and caramel sauce on top.
- Sprinkle on the remainder of the toasted pecans on top and serve immediately or place in refrigerator up to 2 days.
Homemade Fabric Softener
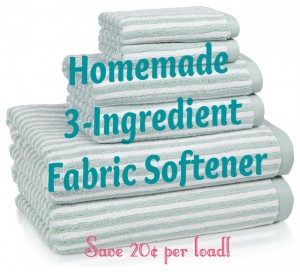
You may already be making Homemade Body Wash and DIY Hand Soap… but if you’ve been wanting to cut costs on Fabric Softener you might want to give this a try. I love my homemade fabric softener and it saves me a ton! I have to say… you’re going to love this Homemade Fabric Softener from Food.com because it is quick and easy. Plus, you can pick your own scent, which is nice! I love apple in the fall!
What You’ll Need:
- 6 cups hot water
- 3 cups white vinegar
- 2 cups hair conditioner
How to Make & Use:
- Mix water, vinegar, and hair conditioner in a 1 gallon container; stir. Do not shake it – it will cause foaming.
- Use the same amount you normally use in a rinse cycle or spritz it on a wash cloth and throw in dryer.
This is a frugal way to save on things that you use every day! We love our homemade fabric softener and have even given it as gifts!
Recipe: Gluten-Free Coconut Banana Bread
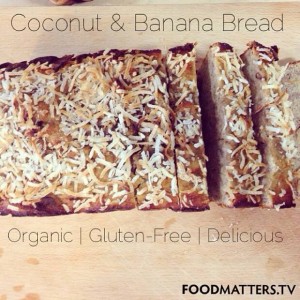
From the book, Food Matters, comes a delicious and wheat and gluten-free bread that can be used for breakfast and dessert! In my opinion, you could toast it and also use it as french toast!
Ingredients:
- 2 bananas; at least 1 heaped cup of chopped banana
- 1/4 cup coconut oil, melted
- 4 organic free-range eggs
- 4 fresh dates, pitted and chopped
- 1 tbsp pure maple syrup or raw honey
- 3/4 cup coconut flour
- 1/2 tsp aluminium-free baking powder
- 1/4 tsp unrefined sea salt
- 1/2 tsp cinnamon powder
Directions:
- Preheat oven to 350F. Mash bananas with the chopped dates.
- In another bowl, whisk the eggs until fluffy and then combine with the mash. Stir through the oil and maple syrup or honey. Add the dry ingredients and combine well.
- Transfer the batter to a loaf pan, greased and lined. The mixture will be quite thick; flatten and smooth with a spatula.
- Bake 35-40 minutes. Ready when a knife comes out clean and the edges are browned. Eat while still warm, or allow to cool completely on a wire rack before storing in an airtight container in the fridge.
Note:
It’s best to use overripe bananas in banana bread! Coconut flourit doesn’t have the glycemic load of grain flours, has no gluten or anti-nutrients, but it also doesn’t yield the ‘fluffiness’ of regular glutenous flours, so it might take some getting used to. This recipe gives the best bread texture without using wheat.
Recipe: Homemade Baked Strawberry French Toast

My kids love breakfast. French Toast is one of their favorites. They will eat slice after slice, covered in fruit and drizzled with a little real maple syrup. I make homemade Challah Bread or other sweet bread and then slice it up, freeze it and then it is all ready to go when the kids want me to make this. It is super simple.
Sometimes when I am up at the crack of dawn, I will fix this up and put it in the oven about 45 minutes before everyone’s set to wake up. The house smells divine…it’s sort of like Christmas Morning…you have that warm fuzzy, it’s going to be an amazing day sort of vibe.
If you don’t have strawberries, peaches, blueberries and other berries work well. You’ll love the recipe…it’s so easy!
Baked Strawberry French Toast
1 loaf day old challah, sliced into 3/4” thick slices
1 cup strawberries, hulled and sliced, plus more for garnish
4 eggs
3 1/2 cups milk
3 teaspoons sugar
1 teaspoon salt
2 teaspoons fresh grated nutmeg
zest of 1 lemon
1 tablespoon vanilla extract
Cinnamon for dusting over the top
Butter a 9 x 13” baking pan. Arrange the challah slices so that they are overlapping, tearing a few pieces in half if needed. Tuck the strawberries between the slices.
In a medium mixing bowl, lightly beat the eggs. Whisk in the milk, sugar, salt, nutmeg, zest, and vanilla. Then pour mixture over the challah.
Make sure that all of the slices are just about covered by the egg mixture–add more milk or rearrange the slices until they are. If refrigerating overnight, cover and chill. Otherwise, cover and refrigerate for a half hour, or longer if you have time.
Then preheat your oven to 350 degrees and take the baking dish out of the fridge. Once the oven is up to temperature, bake for 40 – 45 minutes, until the french toast is a light golden brown and has puffed up nicely.
Slice and serve immediately with maple syrup and sliced strawberries. Sprinkle lightly with cinnamon.
Recipe: Red, White & Blue-Berry Trifle
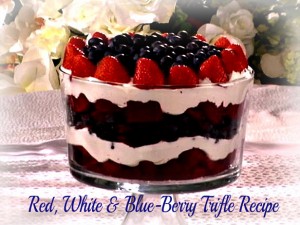
If you’re looking for a delicious dessert for Memorial Day or Independence Day that has simple ingredients and LOTS of fresh and juicy summer berries, you will love this Red, White & Blue-Berry Trifle. Make it any time of year!
Ingredients:
- 1 box red velvet cake mix (Note: Instead of red velvet cake, use 1 box chocolate cake & a bottle of red food coloring)
- 1 (16oz) tub whipped topping
- 2 pints blueberries, washed
- 1 pint strawberries, tops cut off, washed
Directions:
- Bake red velvet cake mix according to package directions. Allow to cool.
- With a serrated knife, cut the cake into 1-inch square pieces.
- Line the bottom of the trifle bowl with half of the cake squares.
- Using a spatula, spread about a 2-inch layer of whipped topping on top of the cake squares.
- Layer about 1 1/2 pints of the blueberries on top of whipped topping.
- Layer the remaining cake pieces on top of the blueberries to create a second layer of cake.
- Using a spatula, spread remaining whipped topping over the top layer of cake.
- Decorate the perimeter (along the bowl sides) with the strawberries by placing the strawberries cut side down.
- Sprinkle the remaining blueberries on top of the trifle inside the strawberry perimeter.