
DIY Elastic FOE Headbands Tutorial
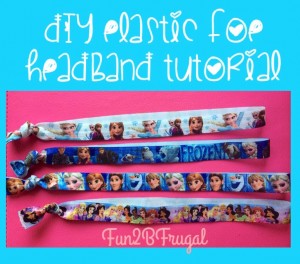
You can either spend $3 or more for one headband on Etsy or other shop, OR you can follow my directions to make adult and/or children’s sized elastic headbands for about $1 or less and in the design of color of your choice. I chose to do it on my own when I found an epic deal on Frozen and Disney Princess FOE for literally less than $1 per yard shipped on a Groopdealz or Jane steal, so I had to figure it out to surprise my girls and use my own pictures as the tutorial! The headbands literally took me less than 2 minutes to make 2-3 and look exactly like what you buy at the stores – and this is my first time making them :)
You can also make your own elastic hair ties with the tutorial I posted previously, and you can make ties with leftover FOE.
Note: Some shops take a long time to ship, so order in plenty of time if you are (or your child is) going to need to wear the headband for a special occasion.
What You’ll Need:
- Fold Over Elastic (FOE) ordered with the designs or colors you want (1 headband: 18″ for big kids & adults, 16″ for baby/toddler)
- Scissors
- Ruler or measuring tape
- Optional: Lighter or matches
Directions:
- Gather all supplies and decide which sized headbands you are making – adults and kids 4+ wear 18-in long FOE, while toddlers and babies wear 16-in long FOE. Use your best judgement on each. It’s better to cut too long then crop down than to cut too short and have to make them into hair ties.
- Measure out your first length of FOE. DO NOT STRETCH THE ELASTIC WHILE MEASURING! This will make the length inaccurate. Double check the length measurement again, then cut the elastic.
- Using the elastic you just cut as your guide, cut as many pieces of the FOE as you’d like to make into headbands.
- Fold in half the first headband and line up the edges. If they aren’t straight, cut them into a straight line.
- Now is the time you can decide to use a lighter or a match to melt the edges together to prevent fraying in the future. I didn’t do it, but I may choose to do it later.
- Holding both ends, tie the headband ends together as closely to the end as you can and tighten into as small of a knot as you can.
- Repeat 4-6 until you are finished with all your headbands. This should only take you a few minutes to make 10 or more headbands!
Leave a Comment