
Recipe: Frozen Strawberry Crunch Cake
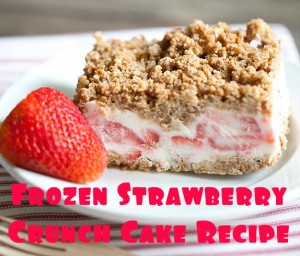
This simple take on an ice cream cake will be a big hit at your next family get together, or even just for dessert tonight! The Frozen Strawberry Crunch Cake from Spoonful calls for Nature Valley bars, but regular granola would work just fine as well.
Ingredients:
- 1 box Nature Valley Granola Bars
- 1/3 cup brown sugar
- 1/2 cup flour
- 6 tablespoons melted butter
- 2 egg whites
- 1/2 cup sugar
- 1 cup heavy whipping cream
- 1 lemon
- 4 ounces cream cheese
- 1 1/2 cups freshly chopped strawberries
Directions:
- Unwrap and put the Nature Valley granola bars (or regular granola) in a food processor until you it becomes a course crumb.
- In a large bowl, add crumbs, brown sugar, flour, and melted butter, then mix together. Spread into an 8×8″ pan covered with parchment paper.
- Bake at 350ºF for 20 minutes. Let cool completely, then divide in half and set aside.
- In a mixing bowl, combine eggs whites and sugar, then mix on high. Add the heavy cream and continue to mix for another 5 minutes.
- Add the lemon juice and softened cream cheese to mixture, then mix on low speed until completely combined.
- Fold the strawberries into the cream mixture until as evenly mixed as possible.
- In a glass cake pan that has been buttered fully, press half of the crumb crust mixture to the bottom, then top with strawberry mix, then add the rest of the granola crumbs to the top.
- Cover and freeze for at least three hours. ENJOY!
Layered Patriotic Non-Alcoholic Drink Recipe
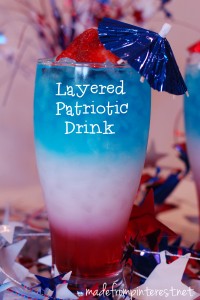
When it comes to the beautiful layered drinks, whether they are adult beverages or not, the way to get the drinks to have the layered look depends on the sugar content of each of the types (colors) of beverages. The higher the sugar content, the lower it needs to be in the glass. Thanks to Made From Pinterest for the easy (and pretty!) recipe!
- To make this beautiful Red, White, and Blue Patriotic and non-alcoholic drink, you just need Cran-Apple juice (of any brand), Sobe White Pina Colada, and Gatorade G2 Blueberry Pomegranate (the last two drinks do make a difference for sugar content and color).
- Grab your pretty glass and fill it almost to the top with crushed ice.
- Pour the Cran-Apple juice down the side of glass as close as you can to leave as little red on the upper parts of the glass as possible. Fill the red juice as high as you’d like it.
- Then pour the Sobe Pina Colada with as much as you’d like of white. You’ll see the Cran-Apple juice stays low since it’s higher in sugar content.
- Finish off the top of your drink with the Blueberry Pomegranate Gatorade.
- Add the straws and any fun patriotic decorations you’d like. Enjoy!!
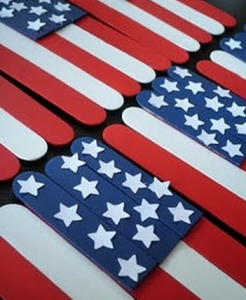
Patriotic Popsicle Sticks American Flag Kids Craft
I just love this craft because it is not only simple, but if you seal it, you can keep them for years to come!
You just need:
- Blue Paint
- White Paint
- Red Paint
- Popsicle Sticks
- Mod Podge (optional, for sealing)
- White Glue
- Cereal box or card board
- White star stickers
Once you have painted your popsicle sticks, you will need to have a small square of cardboard. I used an empty cardboard box for mine. Glue the dried, painted popsicle sticks directly to the cardboard so they have a nice foundation. Then layer on the second layer of painted popsicle sticks and secure with glue. Add the stars by painting them or using stickers.
Once dry, the flags can be glued onto another popsicle stick to “wave” or put into the ground as decorations. Another option is to tie them onto a string and make them into patriotic garland that you can use year after year!
This is a super cute holiday craft!
Check out this cute patriotic table cloth!
Homemade Vanilla Pudding

Vanilla Pudding is rather simple when you make it from scratch & it tastes amazing also. So just because JELLO pudding was on sale and you have a ton of it. Give this recipe a try and save the JELLO for another time.
Homemade Vanilla Pudding Recipe
1/3 cup sugar
1 Tbsp Cornstarch
1/4 tsp nutmeg
1 1/2 cups half and half
2 egg yolks
1 Tbsp butter
2 tsp vanilla
Optional: Sliced bananas, 8 Oreo Cookies or Nilla Wafers
Whisk together sugar, cornstarch and nutmeg. Pour in the half and half and egg yolks and place over medium heat. Whisk constantly until the pudding thickens and it comes to a boil. Remove from heat and then whisk in the butter and vanilla. Refrigerate until cold – about 3 hours. Garnish with Cookies (any kind will do) or sliced bananas (or your favorite fruit)
That’s It! Enjoy!
DIY Duct Tape Rose Pen Tutorial
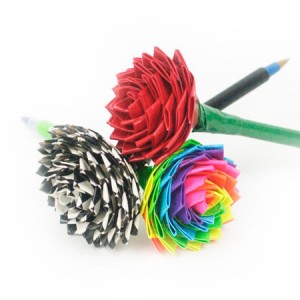
If you aren’t aware, there are dozens of designs in duct tape now. People are using it more than for just fixing pipes – they’re making projects like these really cute flower pens! This is like origami for duct tape. Make these for gifts, fun teacher presents, for decorations, and with tons of different combinations! Thanks to CraftFoxes for the tutorial. There is a visual tutorial if it will help with your craft! What You’ll Need:
- Green duct tape (for stems and leaves)
- Designed or colored duct tape (for petals)
- Plain pen
Directions:
- Take your pen and cover it in green tape lengthwise. This works best if you roll the pen across the tape, sticky-side up.
- To make petals, cut several strips of 2-inch long squares out of the colored or designed tape. Fold one edge over itself sticky side up, leaving some stickiness exposed on the side and bottom. It ends up looking like a sail on a boat because of the sticky edge left out instead of a perfect triangle.
- Take the other edge and fold it over, leaving only stickiness on the bottom of the strip.
- Wrap the petal tightly around the top of the pen stem.
- Repeat steps 2-5 with duct tape, wrapping the petals around the top. Continue until you’ve reached the size of rose you want.
- For the leaves under the base of the rose, repeat steps 2 – 4 with the green duct tape. Wrap these pieces around the stem at the base of the flower to cover up the tape edge.
DIY Jewelry Cleaner

Never buy jewelry cleaner again! You can make it yourself for a fraction of the price with this recipe. The below jewelry cleaner works well for gold-filled, brass, German (nickel) silver, sterling silver, freshwater pearls, shell cameos and mother of pearl.
What You’ll Need:
- 1 tablespoon salt
- 1 tablespoon baking soda
- 1 tablespoon dish detergent
- 1 cup water
- 1 piece aluminum foil
Directions:
- Heat water in the microwave for 1 or 2 minutes.
- Cut a piece of aluminum foil that roughly covers the bottom of a small bowl (like a cereal bowl).
- Pour hot water into bowl. Place salt, soda, and dish-washing liquid into bowl. Place jewelry on top of foil and let it sit for 5 to 10 minutes. If it has dirt or debris in the little crevices of your jewelry, use a very soft toothbrush to reach in and clean.
- Rinse jewelry in cool water and dry jewelry completely with soft cloth. Discard solution after use and make a new batch next time.
Recipe: Homemade Taco Bell Mexican Pizzas
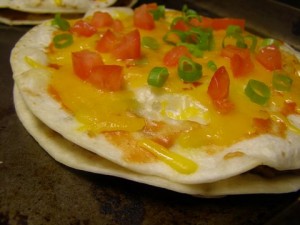
Skip the drive-thru the next time you have a Taco Bell craving! Make this amazing copycat Homemade Taco Bell Mexican Pizza recipe at home with ingredients you actually know and can pronounce. Thanks to Kate at Stolen Moments Cooking for the recipe!
Ingredients:
- 8 flour tortillas, soft taco sized
- Oil for frying
- 1/2 lb. ground beef
- 2 t. chili powder
- 2 t. cumin
- 1 t. salt
- 1 t. garlic powder
- 1 can or 1 1/2 c. homemade refried beans
- 1/3 c. taco sauce
- 2 c. shredded cheese
- 1/4 c. diced tomato
- 1/4 c. sliced green onions
Directions:
1. In a small skillet, heat 1/2 inch oil over medium heat. Add the tortillas one at a time and cook about 20 – 30 seconds per side, until lightly browned and crispy. Set aside.
2. In a small saucepan, cook ground beef. Drain. Stir in seasonings. Add 1/4 c. water, bring to a boil and simmer until thickened. Remove meat with a slotted spoon and add refried beans to pan. Cook over low heat until warmed.
3. Take 4 crisped tortillas and spread with the refried beans on each. Add the ground beef and evenly spread over each tortilla. Top each with a second tortilla. Spoon an even amount of taco sauce over the tortillas and top with shredded cheese. Bake at 350 degrees for 8 – 10 minutes, until cheese is melted. Or place under a broiler just until the cheese melts.
4. Sprinkle each with diced tomatoes and green onions. Cut into quarters before serving, and that’s it!
Recipe: Nutella No Bake Bites
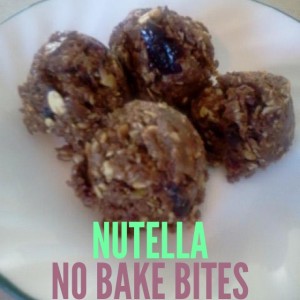
A take on the favorite recipe of peanut butter and chocolate no bake cookies, this recipe adds the addicting and amazing NUTELLA spread, too! These cookies can be made gluten-free if you make sure the oats are certified GF and not cross-contaminated. YUM!
Ingredients:
- 1 cup oats
- 1/2 cup peanut butter
- 1/2 cup nutella
- 1/3 cup honey
- 1/2 cup flax
- 1/3 cup coconut
- 1/3 cup cranberries or raisins
- 1/2 cup mini chocolate chips
- 1/4 tsp salt
- 1 tsp vanilla
Directions:
- In a large bowl, add all ingredients. Mix ingredients together well.
- Once fully mixed, spoon out the mix onto a tray. It’s totally up to you how large you want the bites to be.
- Refrigerate and serve!
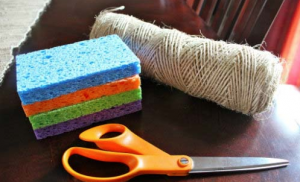
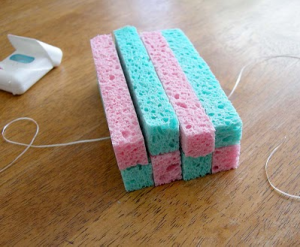
Sponge Balls Cheap Summer Fun
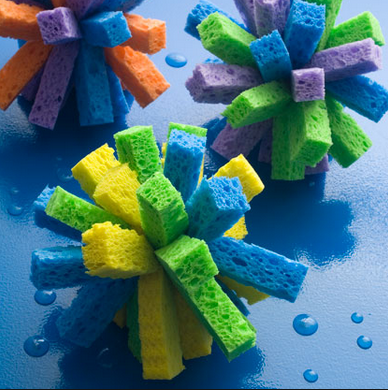
I always look for fun, easy and inexpensive things to do with the kids over the summer. These are perfect! You can grab the materials at your local Dollar Store or in the Dollar Bins at Target. I made a whole bucket of them for just a few bucks and they lasted for a while. The kids had a blast and we were able to stay cool during the sumer months.
All you need are sponges, some twine and a knife or scissors to cut the sponges with. Then you just tie the strips together. It’s so easy and best of all the kids can help!
Recipe: Creamy 3-Ingredient Nutella Popsicles
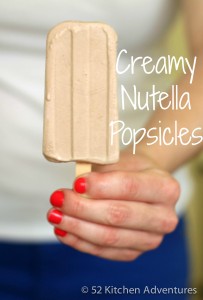
Change up the ice or fruit popsicles and makes these SUPER easy Creamy Nutella Popsicles instead. Just make sure you have popsicle molds (you can even get them at some dollar stores!), a blender, and patience to wait for them to harden in the mold. Thanks to 52 Kitchen Adventures for the recipe!
Ingredients: (Makes 3 Popsicles, so you will probably want to double the ingredients)
- 1 cup of Cool Whip (or other whipped topping)
- 1/2 cup of milk
- 3 Tbsp of Nutella
Directions:
- Place all ingredients in a blender. Process until blended.
- Pour mixture into popsicle molds.
- Freeze for several hours (overnight or from morning until evening are easiest way to know they’re fully frozen), serve and enjoy.