
Recipe: No-Bake GF Chocolate Chip Cheesecake Dip
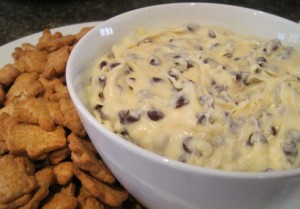
I’m warning you: If you make this, hide it from the kids and your husband. Hide in the bathroom and eat it. I’m only warning you because it’s so good, and you won’t want to share it. If you are the giving type, this Chocolate Chip Cheesecake Dip recipe is perfect for a family get-together or work potluck. Oh, and it’s gluten-free!
Thanks to New to Veggie World for sharing the recipe. Check her website out for more addicting recipes!
Ingredients:
- 8 ounces cream cheese, softened
- 1/2 cup unsalted butter, softened
- 3/4 cup powdered sugar
- 2 tablespoons brown sugar
- 1 teaspoon vanilla
- 1 cup miniature chocolate chips
- Graham cracker sticks or teddy grahams (if you are GF, choose a GF variety)
Directions:
- In a small bowl, beat together cream cheese and butter until smooth.
- Add sugars and vanilla.
- Stir in chocolate chips.
- Refrigerate until ready to eat. Serve with graham cracker sticks or teddy grahams.
DIY Sea Salt Beachy Hair Spray & How-To Style Tutorial

I love the look of beach waves, but to buy a bottle of sea salt beach hair spray can cost upwards of $12. This tutorial will cost you only a couple of dollars, works just as well, and will smell even better!
What You’ll Need:
- Plastic spray bottle (you can grab these at the dollar store)
- 1 tsp sea salt (NOT table salt!)
- 8 oz water
- 1/2 tsp coconut oil, olive oil or light conditioner (coconut oil is the best and smells most beachy!)
- 3 drops essential oil of your choice
- Lemon juice (optional)
Directions:
- Remove the top from the spray bottle. Pour water into the plastic spray bottle.
- Add sea salt to the bottle. The more salt you add, the more “crunchy,” textured and beachy your hair will feel, but dryer as well.
- Add moisturizer to combat the drying factor of the salt. Use coconut oil, olive oil or light conditioner. Avoid adding more than a teaspoon because it can weigh down your hair instead of adding wavy volume.
- Add essential oil for fragrance and additional benefits of your choice. For example, rose essential oil aids hydration and peppermint helps with headaches. Choose your favorite oil based on scent and healing properties.
- Close the top of the bottle tightly and shake the bottle’s ingredients vigorously for ingredients to mix. If you don’t shake the bottle VERY HARD, the oil will remain on the surface and the salt on the bottom.
- Spray all over hair until it becomes very damp. Scrunch your damp locks with your fingers to accentuate its natural wave. Let your hair air dry. Note: If your hair is naturally straight, twist your locks to achieve better results. Twist locks of your hair into buns. Pin them on your head with hair pins. When your hair is almost dry, unwrap your locks and let them out of the buns gently. Let air dry fully.
- Style as you’d like or leave as is. Spray with a layer of hairspray for extra support.
- Store the spray bottle and mixture in the fridge when not in use. Shake very hard before each use.
Simple Upcycled T-Shirt Produce Bag Tutorial
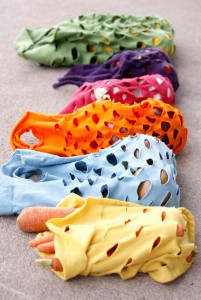
Going to the local farmer’s market is a great way to get fresh produce and support local growers, but you definitely need produce bags to keep your food safe. Instead of pay $5 or more per bag, create your own using old t-shirts and very little sewing. All you need is a t-shirt, scissors, a sewing machine, and a pen.
This amazing and simple tutorial comes from Delias Creates. She has a visual, step-by-step tutorial for extra help if you need it.
- Turn an old, clean t-shirt inside out, then draw a shape for the bad you like – square or round – and as large as you want it. You can make 2 out of one t-shirt if you make them small, or a large one out of a whole t-shirt.
- Sew the 2 sides together using either a straight stitch or narrow zig-zag going around the edges, leaving 1 side open.
- Flip it right side out, then finish the seams by straight stitching around the edges again.
- Now, draw lines sporadically across the bag in lines about 2-3″ long, spaced at least an inch between each line both sideways and on top and bottom apart.
- Draw the shape of a hole for your handle at the top of the fabric.
- Now, cut the lines and handle through the 2 layers. Be careful to not cut too far and combine 2 cuts together.
- Now, stretch the fabric out and it’s ready to use! So simple!
Recipe: Cauliflower Buffalo Bites
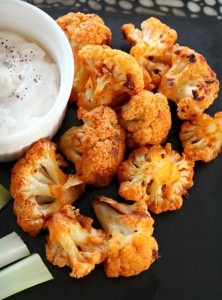
Buffalo wings are super popular for parties, but they’re so greasy and high in calories. Here is another option for a gluten-free and low-calorie snack that is delicious! Thanks to Good Dinner Mom for the recipe!
Ingredients:
- 1 large head cauliflower, cut into bite-size florets
- Olive oil to drizzle
- 2 teaspoons garlic powder
- ¼ teaspoon salt
- ⅛ teaspoon pepper
- 1 tablespoon melted butter (optional)
- ½ to 3/4 cup Frank’s Buffalo Wing Style hot sauce or other hot wing sauce of choice
- 1 gallon or larger size plastic bag
Directions:
- Preheat oven to 450F degrees
- Place cauliflower florets into plastic bag. Drizzle olive oil over florets to barely coat. Add garlic powder, salt and pepper. Close bag and toss ingredients around so all florets are coated.
- Place on ungreased cookie sheet or baking pan and bake on middle rack for 15 minutes, turning florets once during baking. Check them at the 10 minute mark for desired tenderness. You don’t want them to be soggy!
- Remove florets from oven. Melt butter in medium glass bowl. Add hot sauce to butter. Toss cauliflower and stir to cover all florets with hot sauce.
- Return to oven and cook for additional 5 minutes.
- Serve with any dip you like, ranch dressing or Blue Cheese dip. ENJOY!
Homemade Air Freshener Gel

This homemade air freshener gel is so easy to make and would make a great gift!
What You’ll Need:
- 3-4 jars, capable of holding 1/2-cup of fluid each (this site used 4 baby food jars which hold 1/2 cup of mixture)
- Food Coloring
- Essential Oil or Room Fragrance drops
- 2 cups of water, divided into two 1 cup amounts
- 4 envelopes of unflavored gelatin
- 1 tablespoon of salt
- Kitchen equipment: whisk, a pan to boil water, funnel, and spoons
Directions:
- Pour a few drops of food coloring into each jar.
- Pour 1 teaspoon (minimum) of essential oil into each jar. The more you pour, the stronger the scent.
- Bring 1 cup of water to a rapid boil.
- Add all 4 of the gelatin to the water and whisk until fully dissolved (about 1 minute).
- Add the other cup of water to the pan and the salt. Stir to dissolve the salt.
- Remove the pan from the heat. Pour the mixture into the jars within a couple of minutes of removing from the heat.
- Use a funnel to pour an equal amount into each jar.
- Stir the mixture quickly before it solidifies.
- Let cool and solidify for at least 24 hours. The gel air freshener should last between 4-6 weeks and you can do it again!
Thanks to Instructables for the awesome idea and instructions!
Recipe: Easy Jello Rainbow Cookies

These Jell-O rainbow cookies are such a hit with kids! The cookie will take and become the flavor and color of the Jell-O you choose. Fun as a party snack and would be great for a party favor, too! Here is the super simple recipe.
Ingredients:
- 3/4 c butter
- 1/2 c sugar
- pack of any flavor Jell-o or store brand gelatin
- 2 eggs
- 1 tsp vanilla
- 2 1/2 c flour
- 1 tsp baking soda
- 1 tsp salt
Directions:
- Preheat oven to 350° F.
- Mix together the butter, sugar, gelatin powder and eggs until creamy.
- Mix in rest of ingredients until fully blended.
- Roll dough into balls, place on a greased cookie sheet, and flatten balls with a fork.
- Bake for 6-8 min and enjoy!
Homemade Weed Killer Recipe
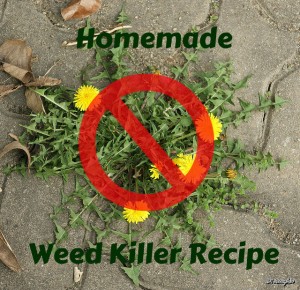
Depending on where you live, weeds are a really big nuisance and buying weed killer can start costing you a lot over the summer season, especially ones that are safe around kids and dogs. Here’s one that you can make at home that has a lot of positive reviews.
Ingredients:
- 1 Gallon of Vinegar
- 2 cups of Epson Salt
- 1/4 cup Original Blue Dawn Dish Soap
Directions:
- Mix all ingredients together in a large container by stirring so it will have less suds.
- Pour into a spray bottle or watering can.
- Pour or spray the weed killer over the weeds in the morning after the dew has dried. By evening, the weeds should be dead or wilted significantly.
Homemade Orange Cream Pops
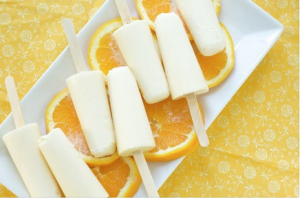
When I spied these yummy pops this morning on Pinterest, I almost fell over. I had found this recipe last year, tried it, loved it and then lost the link to the site! I was so excited to see it pop up today on one of the pages that I follow.
These are so good. I mean, you will want to eat a couple of them good! Make sure you let them freeze really well before you serve them! Thanks to OvenLove for the great post…and to whom ever out there in the Pinterest landscape for pinning it for the world to see! I made a slight change to the recipe but it is good either way!
Ingredients
- 1 cup orange juice (fresh or frozen. you could also use orange juice concentrate for a stronger orange flavor)
- 1 cup heavy cream (you could also substitute melted/very soft vanilla ice cream, Dreyer’s Slow churn works really well)
- 3 tablespoons honey, use a mild flavored honey sage or wild flower is best
- ¼ teaspoon orange extract
- ½ teaspoon vanilla extract (you can also use vanilla bean paste…it’s amazing!)
- 3/4 cup Mini Chocolate Chips (optional but amazing)
Instructions
- In a medium bowl, whisk all ingredients together. Then add the chips if you are using them.
- Pour mixture into popsicle molds. Let set for 30-60 minutes, then add popsicle sticks. Freeze for another 4-6 hours or until frozen.
- When you’re ready to serve, run some warm water along your popsicle mold to loosen the popsicles and serve immediately.
One of my friends melted the chocolate chips and then coated the insides of the popsicle molds with melted chocolate drizzles before pouring in the mixture. This also worked well!
Homemade Ice Cream in a Bag Recipe
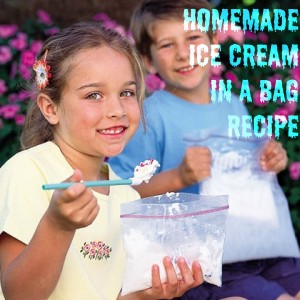
Its finally warm outside and the kids can get all their energy out by playing outside. Use this to your advantage and your whole family can make ice cream in bags by running around! Note: This recipe is enough for ONE serving, so you’ll need all of the listed ingredients for each person.
Ingredients & Other Things You’ll Need:
- Ice cubes (enough to fill each gallon-size bag about half full)
- 1 cup half and half
- 1/2 cup salt (The bigger the granules, the better. Kosher or rock salt works best, but table salt is fine.)
- 2 tablespoons sugar
- 1/2 teaspoon vanilla extract
- 1 pint-size ziplock bag (this can also be done in tupperware type containers)
- 1 gallon-size ziplock bag
- Your favorite ice cream toppings or ingredients, like chocolate chips, cereal, fruit, marshmallows, etc.
Directions:
- Combine the sugar, half and half, and vanilla extract in the pint-size bag and seal it tightly. Double check it’s sealed completely.
- Place the salt and ice in the gallon-size bag, then place the sealed smaller bag inside as well. Seal the larger bag. Now shake the bags and/or have the kids run around while shaking their bags until the mixture hardens which is about 5 minutes. Feel the small bag to check when it’s hardened enough.
- Take the smaller bag out of the larger one, add toppings, and eat the ice cream right out of the bag. Toss the bag when you’re done eating – super easy cleanup!
Recipe: Frozen 100% Fruit Pops
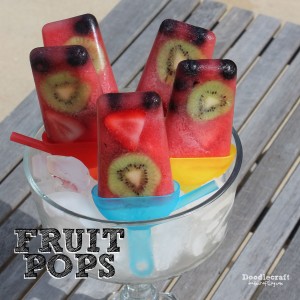
Kids love eat popsicles during these hot summer days. So many of the frozen treats are filled with sugar and have nothing healthy in them. This recipe for Fruit Pops from Doodlecraft uses 100% fruit – even down to pureeing fruit with a food processor, not using juice, so it’s even more healthy. The kids will think it’s a treat, but you’ll know it’s super healthy.
What You’ll Need:
- Plastic popsicle molds
- About 3 cups of sliced watermelon (be sure there are no seeds)
- Sliced strawberries
- Sliced kiwi
- Large handful of blueberries
Note: Any kind of melon will work instead of watermelon, and juice will work if you want to make this process easier.
Directions:
- Puree the watermelon fully to make it as watery as possible.
- Put 2-4 blueberries at the bottom of the plastic mold, a slice or two of kiwi (so they show on the side of the mold), 2-4 slices of strawberry, then a couple more blueberries as the last of the fruit.
- Fill the molds to the edge with the watermelon juice.
- Press the popsicle mold lids on securely, then freeze overnight.
- When fully frozen, the popsicle should slide right out of the mold, but if it sticks, run the plastic under a little warm water.