
DIY Duct Tape Rose Pen Tutorial
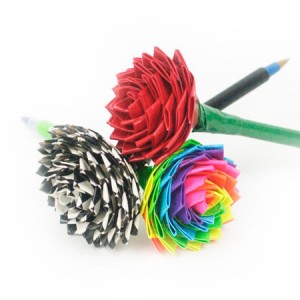
If you aren’t aware, there are dozens of designs in duct tape now. People are using it more than for just fixing pipes – they’re making projects like these really cute flower pens! This is like origami for duct tape. Make these for gifts, fun teacher presents, for decorations, and with tons of different combinations! Thanks to CraftFoxes for the tutorial. There is a visual tutorial if it will help with your craft! What You’ll Need:
- Green duct tape (for stems and leaves)
- Designed or colored duct tape (for petals)
- Plain pen
Directions:
- Take your pen and cover it in green tape lengthwise. This works best if you roll the pen across the tape, sticky-side up.
- To make petals, cut several strips of 2-inch long squares out of the colored or designed tape. Fold one edge over itself sticky side up, leaving some stickiness exposed on the side and bottom. It ends up looking like a sail on a boat because of the sticky edge left out instead of a perfect triangle.
- Take the other edge and fold it over, leaving only stickiness on the bottom of the strip.
- Wrap the petal tightly around the top of the pen stem.
- Repeat steps 2-5 with duct tape, wrapping the petals around the top. Continue until you’ve reached the size of rose you want.
- For the leaves under the base of the rose, repeat steps 2 – 4 with the green duct tape. Wrap these pieces around the stem at the base of the flower to cover up the tape edge.
Leave a Comment