
DIY Scented Bath Bombs

Women are super in love with bath bombs (or bath fizzies) right now. I have a lot of friends that buy them at LUSH and they’re $5 EACH. So, they’re paying $5 every time they take a bath. That’s crazy to me. Here is a really simple, natural way to make your own bath bombs from Vitacost at home in minutes and for literally a few cents each bomb!
What You’ll Need:
- ½ cup of citric acid
- 1 cup of baking soda
- 3 oz. witch hazel
- Small spray bottle
- Rubber ice cube trays or molds
- Essential oil of your choice (lavender works really well)
- ½ cup of Epsom salt or sea salt
- Cocoa butter
Directions:
- Stir together the citric acid, Epsom or sea salt, and the baking soda until very well blended. Make sure all of your dry ingredients are well combined, or your bomb may turn into more of a dud.
- Fill the spray bottle with the witch hazel and a small amount of cocoa butter. This will help bind the bomb together, and also help with moisture.
- Add a few drops of your favorite essential oil.
- Spray the liquid mixture into the dry ingredients, stirring well, until it starts to clump. When the mixture holds shape, quickly transfer it to your mold.
- Let your bombs dry for a short time (about 10 to 15 minutes), then remove them from the mold. Try lightly tapping the underside if they don’t come out easily.
- Let bombs dry overnight before use.
- Then just plop your bomb into the bathtub and be whisked away to a land of bliss!
Recipe: Cinnamon-Masarpone Pudding
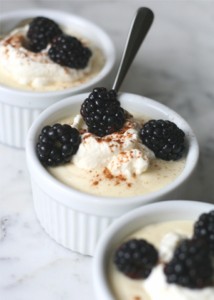
Pudding is all grown up! No longer do we adults need to suffer will the peel off lids! With this recipe from PureWow, we can devour a grown-up version of a kids’ favorite. Recipe makes 6-8 servings.
Ingredients:
Pudding –
- ½ cup sugar
- 1½ tablespoons cornstarch
- 1 cup whole milk
- 3 egg yolks
- 1 teaspoon pure vanilla extract
- ½ teaspoon ground cinnamon, plus extra for garnish
- 2 cups mascarpone cheese
Topping –
- 1 cup heavy cream
- 3 tablespoons granulated sugar
- 1 cup fresh berries (like blackberries, raspberries, and strawberries)
Directions:
Place 6 to 8 small bowls onto a baking sheet. In a small mixing bowl, whisk sugar with the cornstarch to combine.
In a medium pot, combine milk with the sugar mixture and whisk to combine. Bring to a simmer over medium heat.
While the milk is heating up, whisk the egg yolks in a medium bowl. When the milk has reached a simmer, slowly pour it over the eggs, whisking constantly. Continue whisking for a few moments after all the milk has been added, then return the mixture to the pot.
Cook the pudding over medium-low heat, whisking constantly, until the mixture begins to bubble from the very center of the pot. This will be at least 1 to 2 minutes more.
Remove the pot from the heat and add in the vanilla, cinnamon and mascarpone cheese. Mix until completely smooth.
Pour the pudding into the prepared vessels. Cover the tray with plastic wrap and refrigerate until cool (at least 30 minutes).
When ready to serve, whip the heavy cream with the sugar to medium peaks. Place 1 tablespoon whipped cream on top of each pudding and garnish with a sprinkle of cinnamon and some fresh berries.
Recipe: Nutella Banana Bread
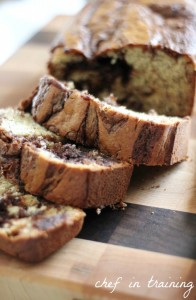
Nutella added INTO banana bread? Yes! It’s a simple recipe to make such delicious bread that you’ll never go back to “regular” banana bread again. Thanks to Chef In Training for the yummy recipe!
Ingredients:
- 1 cup sugar
- 2 large eggs
- 1 1/4 cup mashed ripe bananas
- 1 tsp. vanilla
- 1/3 cup milk
- 3/4 heaping cup Nutella
- 2 cups flour
- 3/4 tsp. baking soda
- 1/2 tsp. salt
- 1/4 cup softened butter
Directions:
- Preheat oven to 350 degrees and spray an 8×4-inch loaf pan with nonstick spray.
- Whisk together flour, baking soda and salt in a medium sized bowl.
- Beat sugar and butter in another large bowl with an electric mixer at medium speed until fully blended. Add the eggs, one at a time, beating well after each one. Add banana, milk and vanilla, then beat until blended. Add the flour mixture from the other bowl and beat at low speed just until flour is mixed in, but not too blended.
- Put the Nutella into a small dish and warm in the microwave for 15 seconds. Add 1 cup of the banana bread batter to the Nutella in the bowl and stir them together until well blended.
- Add this newly made Nutella batter, then the plain banana bread batter in alternating layers into the bread pan. Lightly swirl the two types of batter with a knife.
- Bake at 350 degrees for 50 to 60 minutes. The bread will seem a little underbaked, but that’s what makes it so good and moist! Let the bread cool for at least 15 minutes in the pan before taking it out of the pan to cool completely.
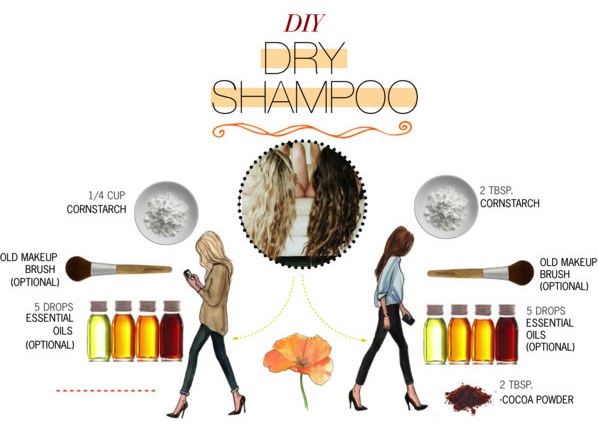
DIY Dry Shampoo For Both Light & Dark Hair
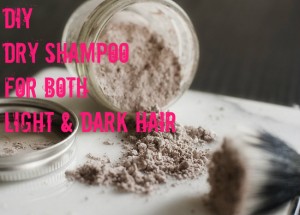
From Blossom Everyday, find this and many other tutorials and hints for style and beauty! This recipe for dry shampoo will save you A LOT of money on dry shampoo (that stuff can cost $5 for a tiny bottle!). Just store this mixture in an old plastic container or some prefer spice containers to place directly onto your head.
To make it more “your hair shade” add as little or as much cocoa powder as you need. Medium brunettes may not need as much as someone with dark hair. Experiment and enjoy!
Recipe: 2-Ingredient Pumpkin Cake with Apple Cider Glaze
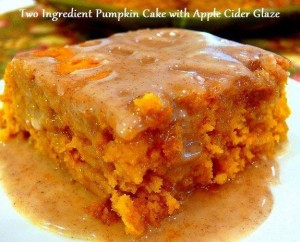
Seriously, only 2-ingredients for the cake! You can’t go wrong. This is going to be a yearly recipe. Pin it so you can save it for years to come!
Ingredients:
Cake:
- 1 box of yellow cake mix
- 1 can (15 oz) of pumpkin puree
Glaze:
- 1 1/2 cups of powdered sugar
- 3 Tbsp apple cider
- 3/4 tsp pumpkin pie spice
Directions:
- Empty the contents of the boxed cake mix and pumpkin puree into a large bowl. Using a hand or stand mixer, beat until well mixed together. The batter will be very thick, but it will mix well.
- Pour batter into a greased 7 x 11 x 2 pan (the small rectangular pan). Bake at 350-degrees for 28 minutes or until toothpick inserted into center comes out clean. DO NOT OVER BAKE!
- Let cool for 5-10 minutes in the pan, then flip cake onto a plate. While waiting for the cake to cool in the pan, make the gaze.
- Combine powdered sugar, apple cider, and pumpkin pie spice. Glaze should be thick, but thin enough to pour. Add more sugar or apple cider to find the right consistency.
- Pour glaze over the cake while it’s still warm to allow it to harden onto the cake.
- Make more glaze or set aside some to pour onto each piece when served.
DIY Tiara of Queen Elsa from Frozen
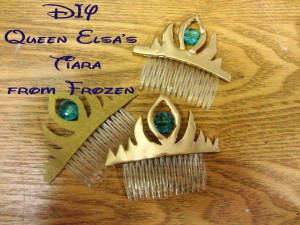
Unless you live under a rock, you know of the amazing Disney movie, Frozen. It’s the hottest animated movie of all time and literally every Frozen-themed item is either completely sold out or being sold for 4 to 10x the original price. People are even upset they can’t buy beach towels! I’m here to help with that, at least a little bit. You can make a Queen Elsa of Arendelle tiara yourself in about half an hour and for about $10 (yay!).
What You’ll Need:
- Wax paper
- Hot glue gun (and LOTS of glue sticks)
- Metallic gold spray paint
- Blue, faceted aqua colored beads
- Wire cutters
- Floral wire
- Plastic hair piece comb
- Print the template
- Scissors
- Xacto Knife
- Optional: For easier versions, use felt or cardboard cut out instead of glue
Directions:
- Print out the PDF of the template from Instructables, then tape it to the back of some waxed paper. (For the easier felt versions, tape the template to some felt and trace it onto the felt by holding it up to a light source, or trace and cut out cardboard).
- Hot glue all over the stencil showing through the wax paper and put the comb into the bottom so it will be nice and strong. Try to complete a whole section at once so the glue will be even and not show layers.
- Once glue is cooled. cut it out using some sharp scissors to get really clean edges. Refine the shape with an Xacto knife to get sharp tips on the tiara,
- Once the crown is as you like, spray with gold spray paint.
- For the jewel, cut a length of wire that will reach from one side of the middle of the teardrop center to the other. Put the jewel on the wire and hot glue the wire to the tiara.
- Do your hair up like Queen Elsa on Coronation Day, and you’ve got yourself some happy kids!
10 Homemade Copycat Starbucks Recipes
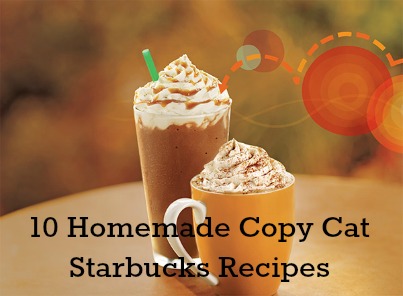
Everyone has gone through those moments of considering dropping the daily rounds to Starbucks in order to cut back on spending. Well, now you can make those tasty Starbucks Coffee Drinks at home and Save money while doing it. Check out these recipes for 10 Homemade Starbucks Copy Cat Drinks!
- Homemade Pumpkin Spice Latte from Mom Advice
- Mocha Cookie Crumble Frappaccino from The Dallas Socials
- Caramel Macchiato from Snapguide
- Cinnamon Dolche Latte from Ambivalent Attorney
- Passion Fruit & Lemon Tea from It’s the Life
- Chai Tea Latte from Cheerios and Latte’s
- Frappaccino from Cheerios and Latte’s
- Strawberries and Creme Frappaccino from ReplicaRecipes
- Iced Green Tea Latte from So, hi
- Caramel Mocha Frappuccino from Recipe Tips
Recipe: Candy Corn Poke Cake
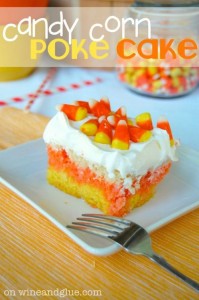
Isn’t this SO CUTE!? The blog, Wine and Cake, has perfected this poke cake. I’ve seen it made by Taste of Home and Betty Crocker, but hers is by far the prettiest and easiest to make. Go over to her and say hi and thank you for the recipe!
Ingredients:
- 1 box of white cake mix, and all the ingredients necessary to make the cake included on the box (eggs, oil, etc.)
- food coloring (yellow & orange)
- 14 oz sweetened condensed milk
- whipped topping (whipped cream in a tub)
- candy corn
Directions:
- Make the cake batter as directed and divide it into 3 equal parts in bowls: Color one yellow, one orange, and leave one uncolored. Make sure you add food coloring enough to make the cake layers really vibrant.
- Spray the bottom of a 9 x 13 pan. Spread the yellow layer evenly across the bottom, and then stick it in the freezer (make sure it is sitting flat) and leave it for 20 minutes.
- As soon as you pull it out, very carefully add the orange layer, pouring it as evenly as possible around the pan, and gently spreading it out to cover the yellow. Put the cake back in the freezer for another 20 minutes.
- Preheat your oven to the temperature on the cake mix.
- Take out the cake batter pan again, and carefully spread the white layer. Let it sit on top of the preheating oven for at least 30 minutes. Bake the cake according to package directions.
- As soon as the cake comes out of the oven, poke holes throughout the cake with the end of a wooden spoon. Pour the sweetened condensed milk evenly over the cake, making sure to fill each hole.
- Refrigerate cake overnight, then top with whipped topping, candy corn, and enjoy!
Recipe: Low Calorie Dark Chocolate Pretzel Turtles
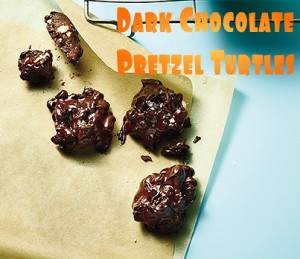
I love chocolate, and I love that dark chocolate is considered healthy (in moderate quantities, obviously). The magnesium alone is worth eating dark chocolate for. This recipe from Women’s Health Magazine is low in calories and fat, plus surprisingly has fiber and protein. It’s a really easy recipe, too. Note: Instead of regular mini pretzels, if you opt for gluten-free mini pretzels, these turtle treats will be 100% GF!)
Directions:
- Line a baking sheet with parchment paper and spray the paper with nonstick cooking spray.
- In a heatproof bowl, melt 22 dark chocolate kisses in 30 second increments in the microwave.
- Crumble 10 mini pretzels into pieces and gently fold into chocolate, along with 2 tablespoons dried currants.
- Drop 8 spoonfuls of the mixture onto the baking sheet. Sprinkle each with a pinch of sea salt.
- Refrigerate for at least 1 hour before serving.
MAKES 4 SERVINGS
Serving =2 turtles: 140 cal, 8 g fat (5 g sat), 22 g carbs, 120 mg sodium, 2 g fiber, 2 g protein
Recipe: Copycat P.F. Chang’s Mongolian Beef
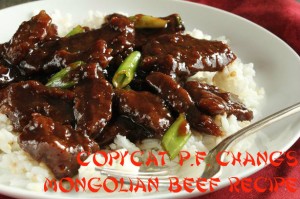
P.F. Chang’s is known for their delicious take on Chinese food, and their Mongolian Beef is one of their most popular dishes. Serve the Mongolian Beef with steamed broccoli and rice for a complete meal! Note: If you use a gluten-free soy sauce in this recipe, then the beef, served with broccoli and rice will be all gluten-free!
Ingredients (Serves 2):
- 2 teaspoons vegetable oil
- 1/2 teaspoon ginger, minced
- 1 tablespoon garlic, chopped
- 1/2 cup soy sauce
- 1/2 cup water
- 3/4 cup dark brown sugar
- vegetable oil for frying (about 1 cup)
- 1 lb flank steak
- 1/4 cup cornstarch
- 2 large green onions, sliced on the diagonal into one-inch lengths
Directions:
- Make the sauce by heating 2 tsp of vegetable oil in a medium saucepan over med/low heat. Don’t let the oil get too hot.
- Add ginger and garlic to the pan and quickly add the soy sauce and water before the garlic scorches.
- Dissolve the brown sugar in the sauce, then raise the heat to about medium and boil the sauce for 2-3 minutes or until the sauce thickens. Once thickened, remove sauce from heat.
- Slice the flank steak against the grain into 1/4″ thick bite-size slices (Note:Tilt the blade of your knife at about a forty five degree angle to the top of the steak so that you get wider cuts).
- Dip the steak pieces into the cornstarch to apply a very thin dusting to both sides of each piece of beef, then place on a plate. Let the beef sit for about 10 minutes so that the cornstarch sticks.
- As the beef sits, heat up 1 cup of oil in a wok (Using a skillet is fine as long as the beef will be mostly covered with oil).
- Heat the oil over medium heat until it’s hot, but not smoking.
- Add the beef to the oil and sauté for just two minutes, or until the beef just begins to darken on the edges. (Note: The meat will be heated once again after this step, so it doesn’t need to be cooked thoroughly.)
- Stir the meat around a little so that it cooks evenly.
- After a couple minutes, use a large slotted spoon to take the meat out and onto paper towels, then pour the oil out of the wok or skillet.
- Put the pan back over the heat, dump the meat back into it and simmer for one minute.
- Add the sauce, cook for one minute while stirring, then add all the green onions.
- Cook for one more minute, then remove the beef and onions with tongs or a slotted spoon to a serving plate or bowl and eave the excess sauce behind in the pan.