
DIY Elastic FOE Headbands Tutorial
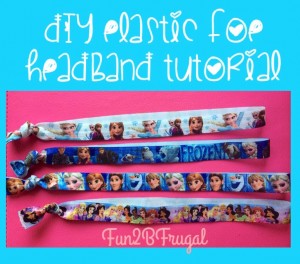
You can either spend $3 or more for one headband on Etsy or other shop, OR you can follow my directions to make adult and/or children’s sized elastic headbands for about $1 or less and in the design of color of your choice. I chose to do it on my own when I found an epic deal on Frozen and Disney Princess FOE for literally less than $1 per yard shipped on a Groopdealz or Jane steal, so I had to figure it out to surprise my girls and use my own pictures as the tutorial! The headbands literally took me less than 2 minutes to make 2-3 and look exactly like what you buy at the stores – and this is my first time making them :)
You can also make your own elastic hair ties with the tutorial I posted previously, and you can make ties with leftover FOE.
Note: Some shops take a long time to ship, so order in plenty of time if you are (or your child is) going to need to wear the headband for a special occasion.
What You’ll Need:
- Fold Over Elastic (FOE) ordered with the designs or colors you want (1 headband: 18″ for big kids & adults, 16″ for baby/toddler)
- Scissors
- Ruler or measuring tape
- Optional: Lighter or matches
Directions:
- Gather all supplies and decide which sized headbands you are making – adults and kids 4+ wear 18-in long FOE, while toddlers and babies wear 16-in long FOE. Use your best judgement on each. It’s better to cut too long then crop down than to cut too short and have to make them into hair ties.
- Measure out your first length of FOE. DO NOT STRETCH THE ELASTIC WHILE MEASURING! This will make the length inaccurate. Double check the length measurement again, then cut the elastic.
- Using the elastic you just cut as your guide, cut as many pieces of the FOE as you’d like to make into headbands.
- Fold in half the first headband and line up the edges. If they aren’t straight, cut them into a straight line.
- Now is the time you can decide to use a lighter or a match to melt the edges together to prevent fraying in the future. I didn’t do it, but I may choose to do it later.
- Holding both ends, tie the headband ends together as closely to the end as you can and tighten into as small of a knot as you can.
- Repeat 4-6 until you are finished with all your headbands. This should only take you a few minutes to make 10 or more headbands!
DIY Cloth & Disposable Baby Wipes Tutorial
Did you know the average parent uses 4,400 baby wipes and spends $150 or more EVERY YEAR on a baby? That alone is crazy, but also a majority of baby wipes aren’t biodegradable, so they are harmful to the environment. Also, they can contain chemicals like chlorine, synthetic preservatives, fragrances, and dioxin. To save money, baby’s skin, and the environment, you can make your own washable wipes with just a few ingredients and cloths.
See below for DISPOSABLE wipes directions.
What You’ll Need:
- 15-20 pieces of approx. 10″x 10″ cloth cut from old receiving blankets or shirts (many use husband’s old white undershirts)
- 3 cups warm water
- 1 cup baby wash
- 2 tsp baby oil
- Plastic container with lid or old plastic wipes container OR Spray bottle
- Optional: Lavender oil for fragrance
Note: Other recipes use ingredients like aloe vera juice, apple cider vinegar, other essential oils, soap, and more. Experiment with what you like best.
Directions:
- In a bowl, add ingredients and mix gently.
- Next you have the choice:
- In the container to store wipes, stack all the cloth into it, pour the mixture over them, then close the lid, OR
- Put the mixture into a spray bottle, then just spray baby’s bottom and use a clean, dry cloth to wipe them clean.
- When wipes are dirty, store in a plastic or wetbag, then wash with cloth diapers or as a load by themselves.
If you do not want to use cloth/reusable wipes, or you want to have disposable ones in case of really big messes, you can put all the ingredients in a large cylindrical container with a lid (i.e., washed out cleaning wipes container, like Clorox wipes, or cleaned 4 qt ice cream container), mix the ingredients, take the cardboard out of the center of a roll of paper towel of your choice and place the paper into the solution. Cover the container, shake to get the ingredients into the whole paper towel.
DIY Recycled T-Shirt Bag Tutorial
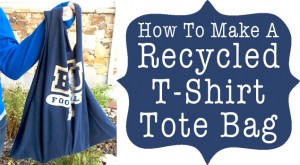
This GENIUS and nearly free recycled t-shirt bag from One Good Thing by Jillee and Instructables would be a fun thing to make for gifts, to use at the grocery store, or just to carry a lunch instead of a paper bag.
What You’ll Need:
- Heavy weight cotton T-shirt (heavy weight fabric is best)
- 3- 5 straight pins
- Pencil or pen
- Dinner plate
- Scissors
- Sewing machine
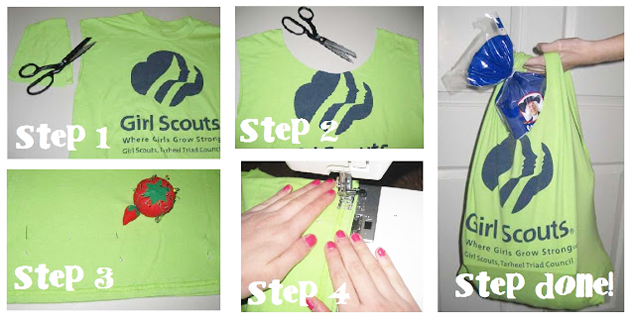
Here is a picture tutorial. If you want the full step-by-step tutorial, visit Instructables.
DIY Laundry Powder Detergent
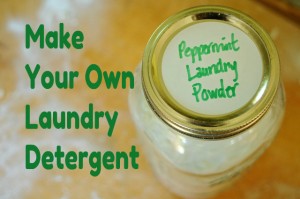
You can save tons of money by making your own laundry detergent. It is surprisingly easy to do so, and actually pretty fun! Here’s how to make laundry detergent at home. This recipe makes approximately 5 cups.
What You’ll Need:
- 2 cups (finely) grated castile soap in scent of your choice (peppermint is a great one!)
- 1 cup borax
- 1 cup baking soda
- 1 cup soda ash (washing soda)
Directions:
- Using a cheese grater, grate the castile soap into a powder.
- Mix everything together and store in a tight jar.
- Depending on your washer, you may need to adjust the soda a bit, and the measurements per load. Try using about 1/8 cup and adjust from there. Also, be sure to shake a little every once in a while to shake the soap back into the powder.
Thanks to SouleMama for the recipe!
Homemade Fabric Softener
You may already be making Homemade Body Wash and DIY Hand Soap… but if you’ve been wanting to cut costs on Fabric Softener you might want to give this a try. I love my homemade fabric softener and it saves me a ton! I have to say… you’re going to love this Homemade Fabric Softener from Food.com because it is quick and easy. Plus, you can pick your own scent, which is nice! I love apple in the fall!
What You’ll Need:
- 6 cups hot water
- 3 cups white vinegar
- 2 cups hair conditioner
How to Make & Use:
- Mix water, vinegar, and hair conditioner in a 1 gallon container; stir. Do not shake it – it will cause foaming.
- Use the same amount you normally use in a rinse cycle or spritz it on a wash cloth and throw in dryer.
This is a frugal way to save on things that you use every day! We love our homemade fabric softener and have even given it as gifts!