DIY Jewelry Cleaner
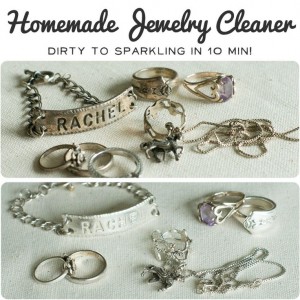
Never buy jewelry cleaner again! You can make it yourself for a fraction of the price with this recipe. The below jewelry cleaner works well for gold-filled, brass, German (nickel) silver, sterling silver, freshwater pearls, shell cameos and mother of pearl.
What You’ll Need:
- 1 tablespoon salt
- 1 tablespoon baking soda
- 1 tablespoon dish detergent
- 1 cup water
- 1 piece aluminum foil
Directions:
- Heat water in the microwave for 1 or 2 minutes.
- Cut a piece of aluminum foil that roughly covers the bottom of a small bowl (like a cereal bowl).
- Pour hot water into bowl. Place salt, soda, and dish-washing liquid into bowl. Place jewelry on top of foil and let it sit for 5 to 10 minutes. If it has dirt or debris in the little crevices of your jewelry, use a very soft toothbrush to reach in and clean.
- Rinse jewelry in cool water and dry jewelry completely with soft cloth. Discard solution after use and make a new batch next time.
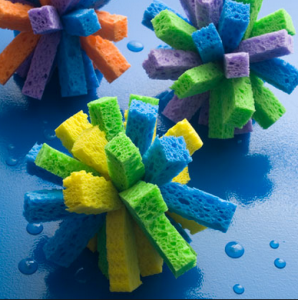
Sponge Balls Cheap Summer Fun
I always look for fun, easy and inexpensive things to do with the kids over the summer. These are perfect! You can grab the materials at your local Dollar Store or in the Dollar Bins at Target. I made a whole bucket of them for just a few bucks and they lasted for a while. The kids had a blast and we were able to stay cool during the sumer months.
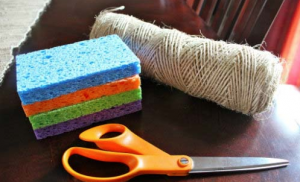
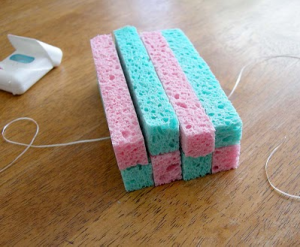
All you need are sponges, some twine and a knife or scissors to cut the sponges with. Then you just tie the strips together. It’s so easy and best of all the kids can help!
DIY Sidewalk Chalk Paint

We all love using sidewalk chalk, but have you heard of using sidewalk paint? It’s easy to make, and just like its chalk counterpart, you can jut rinse it off with water once you’re finished. Here’s the recipe from About.com. Thanks to One Perfect Day Blog for the cute pic!
What You’ll Need:
- 1/2 Cup Water
- 1/2 Cup Cornstarch
- Approximately 12 Drops of Food Coloring (Adjusted until you get your desired color)
- Jar With Lid
- Paint brushes, Foam Brushes, and/or sponges
Instructions:
- Measure the water, cornstarch, and food coloring and pour into a jar. Place the lid on the jar tightly, then shake jar until the paint is completely mixed.
- Repeat #1 for every color you want to use and paint with.
- The paint is now ready to use!
- Use paint brushes and foam brushes to make roads, games, and even huge murals on your sidewalk. You can also make fun shapes using sponges.
- If the paint gets a little too dry, simply add a little bit of water.
- When you’re done playing, rinse off with water or wait until it rains again. It will wash off skin and clothes, too!
DIY Wire Bow Ring

Wire rings are HUGE right now. You can buy them on etsy for $10 or more, OR spend a few bucks and a few minutes and make as many as you want in any size! Make them for your kids, midi rings, toe ring… Endless ideas. Thanks to My DIY for the tutorial. If you are more of a visual person, she has a step-by-step picture tutorial in addition to other wire ring designs.
What You’ll Need:
- Round Jewelry Pliers
- Wire (you can get any kind you want, but sterling or gold will last longer)
- Chapstick tube or other small, rounded item
Directions:
- Cut 6″ of wire to start your ring.
- Right in the center of your wire, wrap it around your finger that you want to wear it on. Then use a Chapstick tube to make it evenly rounded.
- With your round pliers, grab the top and bend over the top of the pliers to create the right loop of the bow.
- Next grab the bottom wire and bend over the top of the pliers to create the second loop.
- Adjust the wire so your loops are even.
- Take the end of the left loop, and wrap around the center, through the ring.
- Trim the ends of the wire evenly to a shorter length and file the edges if they are sharp.
Recipe: Homemade Nutella (Even Better Than Packaged!)
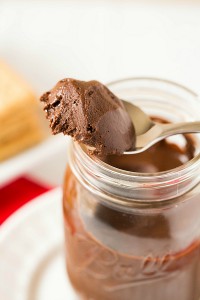
If you love Nutella and want to try to make it yourself? The recipe below by Brown Eyed Baker is amazingly somehow better than the Nutella you buy at the store!
Recipe makes: 1½ cups Prep time: 15 minutes Cook time: 15 minutes
Ingredients:
- 2 cups (or 8 ounces) hazelnuts
- 1 cup powdered sugar
- ⅓ cup Dutch-processed cocoa powder
- 2 tablespoons hazelnut oil
- 1 teaspoon vanilla extract
- ⅛ teaspoon salt
Directions:
1. Preheat oven to 375* F. Spread the hazelnuts out on a single layer on a rimmed baking sheet and roast until dark brown and fragrant, 12 to 15 minutes, rotating the baking sheet halfway through baking. Keep a close eye on them, as they can go from perfect roasted to burnt in a short amount of time. Transfer the hazelnuts to a medium-sized bowl.
2. Once the hazelnuts are cool enough to handle, place a second bowl upside-down on top of the bowl with the hazelnuts. Shake vigorously for about 30 seconds to remove the skins of the hazelnuts. It may take a few times to get all of the skins off; each time, remove the hazelnuts that have lost their skin to the bowl of a food processor, then continue shaking.
3. Process the hazelnuts in a food processor until their oil is released and they form a smooth, loose paste, 2 to 5 minutes, scraping down the bowl often.
4. Add the powdered sugar, cocoa powder, hazelnut oil, vanilla extract and salt and process until fully incorporated, scraping the bowl as needed, about 2 minutes. The mixture will loosen and become glossy. Transfer the spread to a jar with a tight-fitting lid or an airtight container. You can store it in the refrigerator or at room temperature for up to 1 month.


