
DIY Threaded Rhinestone Hoop Earrings

You can buy your own pair of fun threaded rhinestone earrings for $5-$15 each pair, but that gives you just ONE pair. If you want to get a pair for many different outfits or for different seasons, then you’ll go broke! Spend a few minutes and make them yourself with this tutorial from Just B.
What You’ll Need:
- Rhinestone chain (can be purchased at art supply or craft stores)
- Hoop earrings (in the same metal color as whatever the rhinestone chain comes on)
- Embroidery floss (whichever color you’d like!)
- Hot glue gun

Directions:
- Cut the rhinestone chain into 2 strips of the length of about half of the hoop earring.
- Lightly apply hot glue to the rhinestone chain and place onto the bottom half of the hoop (or if you’d like to show more rhinestone, then put it more toward the front of the hoop). Doesn’t need to be neat since the thread will be going over the glued part.
- Tie a knot around the earring on the BACK of the hoop with the floss. Put it between the first 2 rhinestones.
- Wrap the floss between each rhinestone (back and forth) making sure to wrap the side of the floss that sticks out from the knot back into the rhinestones. You don’t want to cut the end because the floss will unravel.
- When you reach the end, switch directions and go back toward the other side of the rhinestone chain. This should cover the whole chain.
- When you’re back to the other end, double knot the end of the floss and snip. Since this is the back of the earring, it will be barely noticeable.
- Put them on -TAH-DAH!!! Makes a great gift. So easy you could make DOZENS of them.
DIY Elastic FOE Headbands Tutorial
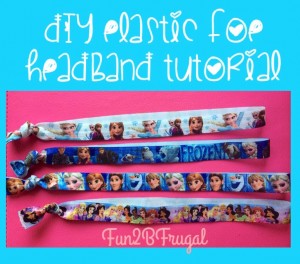
You can either spend $3 or more for one headband on Etsy or other shop, OR you can follow my directions to make adult and/or children’s sized elastic headbands for about $1 or less and in the design of color of your choice. I chose to do it on my own when I found an epic deal on Frozen and Disney Princess FOE for literally less than $1 per yard shipped on a Groopdealz or Jane steal, so I had to figure it out to surprise my girls and use my own pictures as the tutorial! The headbands literally took me less than 2 minutes to make 2-3 and look exactly like what you buy at the stores – and this is my first time making them :)
You can also make your own elastic hair ties with the tutorial I posted previously, and you can make ties with leftover FOE.
Note: Some shops take a long time to ship, so order in plenty of time if you are (or your child is) going to need to wear the headband for a special occasion.
What You’ll Need:
- Fold Over Elastic (FOE) ordered with the designs or colors you want (1 headband: 18″ for big kids & adults, 16″ for baby/toddler)
- Scissors
- Ruler or measuring tape
- Optional: Lighter or matches
Directions:
- Gather all supplies and decide which sized headbands you are making – adults and kids 4+ wear 18-in long FOE, while toddlers and babies wear 16-in long FOE. Use your best judgement on each. It’s better to cut too long then crop down than to cut too short and have to make them into hair ties.
- Measure out your first length of FOE. DO NOT STRETCH THE ELASTIC WHILE MEASURING! This will make the length inaccurate. Double check the length measurement again, then cut the elastic.
- Using the elastic you just cut as your guide, cut as many pieces of the FOE as you’d like to make into headbands.
- Fold in half the first headband and line up the edges. If they aren’t straight, cut them into a straight line.
- Now is the time you can decide to use a lighter or a match to melt the edges together to prevent fraying in the future. I didn’t do it, but I may choose to do it later.
- Holding both ends, tie the headband ends together as closely to the end as you can and tighten into as small of a knot as you can.
- Repeat 4-6 until you are finished with all your headbands. This should only take you a few minutes to make 10 or more headbands!
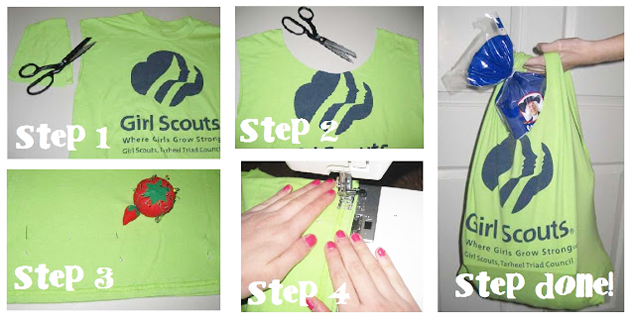
DIY Recycled T-Shirt Bag Tutorial
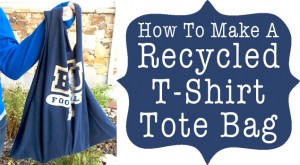
This GENIUS and nearly free recycled t-shirt bag from One Good Thing by Jillee and Instructables would be a fun thing to make for gifts, to use at the grocery store, or just to carry a lunch instead of a paper bag.
What You’ll Need:
- Heavy weight cotton T-shirt (heavy weight fabric is best)
- 3- 5 straight pins
- Pencil or pen
- Dinner plate
- Scissors
- Sewing machine
Here is a picture tutorial. If you want the full step-by-step tutorial, visit Instructables.
DIY Laundry Powder Detergent
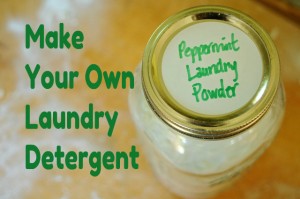
You can save tons of money by making your own laundry detergent. It is surprisingly easy to do so, and actually pretty fun! Here’s how to make laundry detergent at home. This recipe makes approximately 5 cups.
What You’ll Need:
- 2 cups (finely) grated castile soap in scent of your choice (peppermint is a great one!)
- 1 cup borax
- 1 cup baking soda
- 1 cup soda ash (washing soda)
Directions:
- Using a cheese grater, grate the castile soap into a powder.
- Mix everything together and store in a tight jar.
- Depending on your washer, you may need to adjust the soda a bit, and the measurements per load. Try using about 1/8 cup and adjust from there. Also, be sure to shake a little every once in a while to shake the soap back into the powder.
Thanks to SouleMama for the recipe!
DIY Duct Tape Rose Pen Tutorial
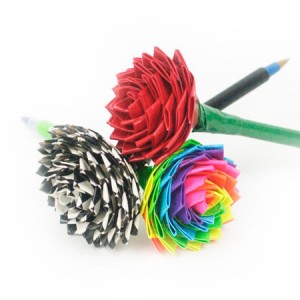
If you aren’t aware, there are dozens of designs in duct tape now. People are using it more than for just fixing pipes – they’re making projects like these really cute flower pens! This is like origami for duct tape. Make these for gifts, fun teacher presents, for decorations, and with tons of different combinations! Thanks to CraftFoxes for the tutorial. There is a visual tutorial if it will help with your craft! What You’ll Need:
- Green duct tape (for stems and leaves)
- Designed or colored duct tape (for petals)
- Plain pen
Directions:
- Take your pen and cover it in green tape lengthwise. This works best if you roll the pen across the tape, sticky-side up.
- To make petals, cut several strips of 2-inch long squares out of the colored or designed tape. Fold one edge over itself sticky side up, leaving some stickiness exposed on the side and bottom. It ends up looking like a sail on a boat because of the sticky edge left out instead of a perfect triangle.
- Take the other edge and fold it over, leaving only stickiness on the bottom of the strip.
- Wrap the petal tightly around the top of the pen stem.
- Repeat steps 2-5 with duct tape, wrapping the petals around the top. Continue until you’ve reached the size of rose you want.
- For the leaves under the base of the rose, repeat steps 2 – 4 with the green duct tape. Wrap these pieces around the stem at the base of the flower to cover up the tape edge.