
DIY Tiara of Queen Elsa from Frozen
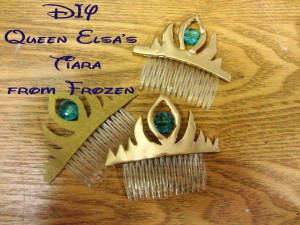
Unless you live under a rock, you know of the amazing Disney movie, Frozen. It’s the hottest animated movie of all time and literally every Frozen-themed item is either completely sold out or being sold for 4 to 10x the original price. People are even upset they can’t buy beach towels! I’m here to help with that, at least a little bit. You can make a Queen Elsa of Arendelle tiara yourself in about half an hour and for about $10 (yay!).
What You’ll Need:
- Wax paper
- Hot glue gun (and LOTS of glue sticks)
- Metallic gold spray paint
- Blue, faceted aqua colored beads
- Wire cutters
- Floral wire
- Plastic hair piece comb
- Print the template
- Scissors
- Xacto Knife
- Optional: For easier versions, use felt or cardboard cut out instead of glue
Directions:
- Print out the PDF of the template from Instructables, then tape it to the back of some waxed paper. (For the easier felt versions, tape the template to some felt and trace it onto the felt by holding it up to a light source, or trace and cut out cardboard).
- Hot glue all over the stencil showing through the wax paper and put the comb into the bottom so it will be nice and strong. Try to complete a whole section at once so the glue will be even and not show layers.
- Once glue is cooled. cut it out using some sharp scissors to get really clean edges. Refine the shape with an Xacto knife to get sharp tips on the tiara,
- Once the crown is as you like, spray with gold spray paint.
- For the jewel, cut a length of wire that will reach from one side of the middle of the teardrop center to the other. Put the jewel on the wire and hot glue the wire to the tiara.
- Do your hair up like Queen Elsa on Coronation Day, and you’ve got yourself some happy kids!
DIY Mason Jar Soap & Lotion Dispensers
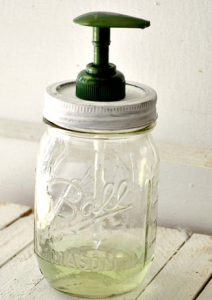
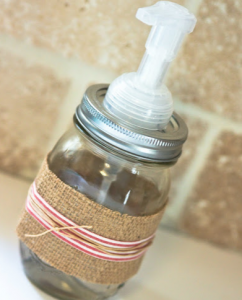
Now that you have learned how to make your own hand soap. You might want to give it as gifts! This is a super cute way to present it as a gift or even to use in your own home! It has always been one of my favorite hostess gifts!
Here is what you need:
- Mason jar with lid
- White or colored paint (if you want to paint the jar lid)
- Outdoor Modge Podge
- Paintbrush
- Nail
- Hammer
- Old Dish or hand soap with pump dispenser
First you need to decide if you want to paint you mason jar lid. If you do then you want to take the two lid parts and pain them, let them dry and then seal them with the Modge Podge sealer. Once that is done you will want to put the lid back on the jar and carefully make a hole in the middle of the lid.
To do this, you will need to use a nail and a hammer and carefully pound the nail through the metal lid making a large enough hole that the pump straw can fit inside.
Then place in the pump and fill with soap or lotion! There you have it!
DIY $3 Dessert & Treat Stand
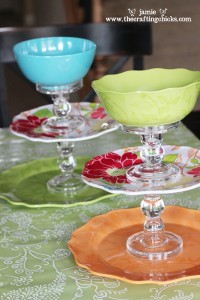
I showed you how to make one for Christmas, but why only have these simple and cheap stands for the holidays? You can make them and use them year round! Get everything either at the Dollar Store or Thrift Store, mix and match the colors, designs, and materials for your tastes and make them shabby chic! You can make them with a plate or a bowl on top, or you can make it with only 2 tiers instead of three. Thanks to Jamie at The Crafting Chicks for the cute and easy tutorial!
What You’ll Need:
- 2 candlestick holders
- A larger plate or platter
- A slightly smaller plate
- A bowl or another platter
- Permanent craft glue (like E6000 or Gorilla Glue)
Directions:
- Use a liberal amount of glue on the bottom of the first candlestick holder and stick it to the bottom plate in the middle (either measure to find exact middle or eyeball).
- Glue top of candlestick holder and place the littler plate on it.
- Repeat with the next candlestick holder and bowl.
- Allow to dry for an hour before use, then enjoy!
HAND WASH AND DRY ONLY!
DIY Bath Paint for Kids
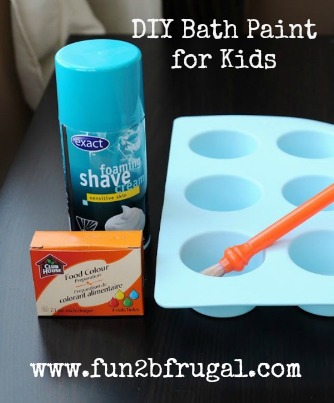
Have you spent tons of money on buying fun things to do for your kids or grandkids in the bath tub? With all the fancy toys, coloring crayons, paints etc they have on the market now. You could probably spend a pretty penny on just bath entertainment for kids alone. Here is a fun, quick, and of course frugal way to letting your kids have some bath time fun, and saving your money. Mommy is happy = Everyone is happy.
DIY Bath Paint for Kids
Needed:
1. Inexpensive Shaving Cream – buy whatever is on sale, or get some at your local Dollar Store.
2. Food Coloring
Directions:
1. Mix chosen food coloring into a small bowl of shaving cream. Or if you are going to make up more than one color a muffin tin works perfectly.
2. Give to child to have fun.
That’s it! How simple was that!!!!
Have fun!
DIY 5-Minute Fashion Pearl Statement Necklace
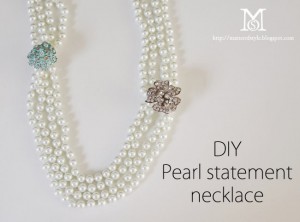
Statement necklaces are so popular right now, and the pearl ones are super expensive. They are obviously faux, but even then, they can be upwards of $30 or more. Make them into a statement necklace by yourself with just a few inexpensive pieces that you can find at craft stores, thrift stores, or even around the house in only 5 minutes! Thanks to A Matter of Style for the super cute tutorial!
What You’ll Need:
- Four pearl necklaces about 26″ long (or a long string of pearls cut into four 26″ long strands and a double string clasp, both from craft stores)
- Two fashion costume rings (at least one adjustable in size)
- 2 pieces of metallic wire
Directions:
- Put a strand of pearls through one of the rings (doubled up). Then put the other necklace through the same ring, so there are four lines of pearls through one ring.
- Do the same on the opposite side of the strands with the other ring.
- Fasten the rings to the strings with the metallic wire.
- If you are making the necklace yourself, attach the strings to the clasp, otherwise make sure that the necklace is long enough to fit over your head.
- Wear the necklace and keep the rings slightly asymmetrical, one lower than the other.