
Recipe: Teddy Bear Beach Bums “Dirt” Cups
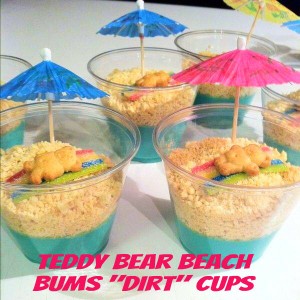
We all loved dirt cake growing up, the one with crushed Oreos and gummy worms, but here is a summertime change to the usual dirt cake that everyone will love!
All you have to do is using clear plastic cups, put use blue pudding or jello on the bottom half of the cup. Top the blue dessert with crushed vanilla cookies or vanilla Oreos ( looks like sand). Add sour tape candy cut into strips (the picture shows Airhead Extremes Sour Belts) with a Teddy Graham lying on top enjoying the sunshine. Add a cocktail umbrella and enjoy!
How to Style Elsa’s Braid from Frozen Tutorial
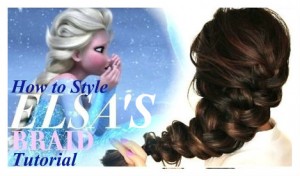
Girls around the world are obsessed with Frozen, and most are particularly in love with Queen Elsa. Make your daughter/niece/neighbor’s or your own day by doing this Elsa’s braid tutorial from Makeup Wearables. It’s a lot simpler than it looks! She has another version of Elsa’s braid, videos, and TONS of gorgeous hair tutorials. I’m glad I discovered it! 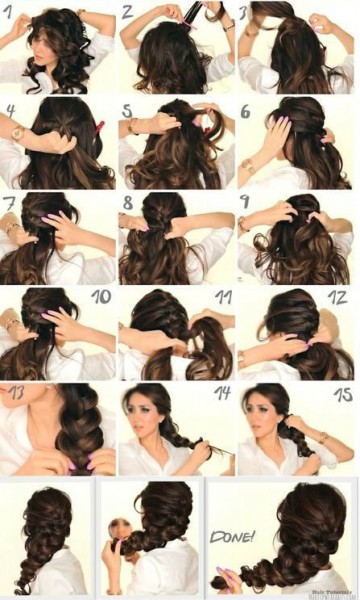
- If our hair is straight, you need to curl it to give it extra body and texture. They used a 1.5″ curling-wand and pinned the curls up to keep the curls stronger for longer.
- Apply hair powder to help with teasing later because it makes your hair sticky.
- Tease your roots everywhere really well, and make sure to use a strong hairspray to set it.
- (Optional) Attach hair-extensions and a couple of hair padding at the back of your head to create Elsa’s cartoon volume. If you don’t have a hair padding, just tease your hair more.
- Gather the back of your crown and make a half-up ponytail, but Leave out the front of your hair.
- Start a normal 3-strand braid with the half-up ponytail.
- Start adding in hair to the side strands to start a French braid: First section, take from the crown, and add it to the right strand, before crossing both strands over the middle strand. (See picture or video for clarification.)
- Take a section of hair from the left side and add it to the left strand, before crossing it over the middle strand.
- Repeat until all the hair is in one big braid.
- After putting the braid in an elastic band, pull out the sides to make the braid bigger.
- Grab a small piece of hair at the end with one hand, and pull up the braid with the other hand towards the crown to scrunch it. This will instantly create more volume in the braid and look more like Elsa’s.
- Tug on the sides to adjust the size and to make the braid even, then spray well with holding hairspray. TAKE PICTURES!!
Recipe: Rachael Ray’s Whiskey BBQ Sauce
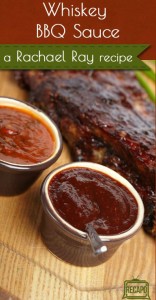
This recipe is originally from Rachel Ray to be made with her Whiskey BBQ Brisket Sandwiches. It was slightly altered by the blog, Recapo, to make it a little simpler and taste just a bit better.
Ingredients:
- 1 cup of good quality organic ketchup
- 1/2 cup of tomato passata or purée
- 1/2 cup of beef stock
- 3 shots of bourbon whiskey
- 1/4 cup of Worcestershire sauce
- 2 tablespoons of light brown sugar
- 2 tablespoons of cider vinegar
- 1 teaspoon of coarse black pepper
- 1 teaspoon of celery seed
- 1 tablespoon of chili powder or hot paprika
- 1 rib of minced celery with leafy tops
- 1/4 cup of grated onion
- 2 large of grated and finely chopped cloves garlic
Directions:
Combine the sauce ingredients in a small pot and reduce over a low bubble for about 30 minutes.
DIY Glitter Sandals Tutorial

Have a pair of boring sandals that aren’t getting worn enough? This tutorial will teach you how to easily and very inexpensively glam your sandals up and make sure you’ve got sparkly feet this summer!
What You’ll Need:
- A pair of basic flat sandals
- Glitter (a large container of glitter in the color of your choice)
- Tacky glue (from the craft store)
- Foam brush
- Clear sealant
Directions:
- Use a brush to apply a layer of glue over the areas of the sandal you are going to apply glitter. Do 1 sandal at a time.
- Sprinkle glitter generously over the glued area while the glue is still wet. Be sure to put pour the glitter on the sandal over newspaper, paper, or other way to collect the leftover glitter.
- Gently shake off extra glitter. To keep the remaining glitter in place, spray on a light coat of clear sealant. Or if you’re out of sealant, use a light coat of clear fingernail polish.
- Repeat steps 1-3 on the other sandal.
- Allow your sandals to dry fully overnight, then admire your new glitzy footwear!
DIY Plastic Spoon Garden Markers
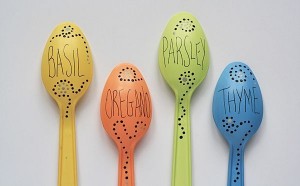
I love gifts that are handmade, useful, cute, and CHEAP! This Plastic Spoon Garden Markers tutorial is written to look just like their spoons, but it would also be very cute to use kids’ decorations and handwriting – for a gift for grandparents or parents, it would mean more that way. If you don’t have little ones handy, just follow the tutorial below. For visuals, click the link above.
What You’ll Need:
- 4 white plastic spoons
- Multi-Surface Satin paint in Gray, Brown, plus 4 others in your choice of colors (Note: You can use any type of paint if you choose to use clear top coat spray instead)
- Sandpaper
- Paintbrush
- Toothpick
- Fine point black art pen
- Clear enamel top coat spray (MUST for regular paint, or Optional: To seal in finished paint for the multi-surface)
Directions:
- Sand each spoon to knock off the shine. This will make the spoon easier to paint.
- Paint each spoon with a thin coat of paint, leaving the bottom 2″ of the handles unpainted. This is where the spoon will go into the ground.
- When dry, paint a second coat and allow to dry completely.
- Use art pen to write herb names on the spoons.
- Use a toothpick to dot on designs using the gray and brown paints.
- Spray with top coat sealing spray on both sides and all areas of the spoon, paying special attention to the deeper parts and painted areas. Allow to dry for an hour, then spray again.
- Let these dry for a full 48 hours before exposing to the outdoor elements.