Make Your Own Make Up Remover

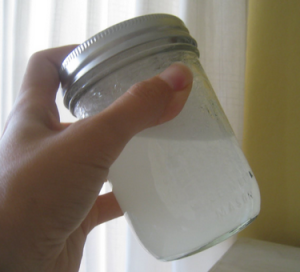
Removing your makeup can be be a pain and some of those products just seem to dry your skin out. This gentle recipe is great for removing your makeup with out being irritating. Use cotton balls or a washcloth with the makeup remover and rub very gently to remove all the makeup off your face.
What You’ll Need:
- 2 cups warm water
- 1-2 Tbsp of liquid coconut oil (not the same measurement as in its solid form)
- Face wash soap or baby body wash
- Container for storage
Directions:
- Start by pouring warm water into the storage container.
- Add a tbsp. (or two) of coconut oil that has been melted in it’s liquid state.
- Next, add a squirt of face wash and stir everything together.
- You may need to shake the container before each use, but it will keep for several months.
DIY Glowing Fairies in a Jar

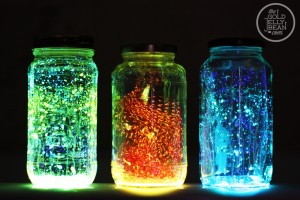
Most of us have seen the picture of fairies in a jar that went viral last year. We all found out that it was fake and photoshopped, much to many kids’ dismay. Here’s a REAL way to do it, no photoshop needed. BIG thanks to The Gold Jelly Bean for helping to make so many kids’ days brighter with this tutorial!!
What You’ll Need:
- Glass jar (cleaned one from spaghetti sauce or similar, or you can buy them at the dollar store)
- Glow sticks
- Rubber gloves
- Scissors
- Eye protector (like goggles or glasses)
- White tulle (optional, but looks better!)
Directions:
- Cut the tulle into a larger size than the jar and stick it inside. The tulle helps it look like the fairies are suspended in the jar, not just stuck on the sides of the glass.
- Put on rubber gloves and crack the glow stick to get the glow to activate, then stick the end of the glow stick into the jar and cut the top off. Be careful with this! There are glass and chemicals inside the stick, so be sure to not touch your eyes.
- Shake the stick all over the inside of the jar. This will take a while because it doesn’t just pour out, it may even get clogged. Use a new one, don’t try to get the glass out.
- After putting in the amount of glow liquid you want, put the cap on and shake. It will probably take 2-3 necklaces or 3-4 bracelet glow sticks to get the right amount.
- Turn out the lights and watch the amazement in your kids’ eyes!
Recipe: “Stained Glass” Sugar Cookies

This is the coolest and most creative use of hard candies I’ve seen since the DIY Christmas platters using peppermint candies I posted back in December. They’re beautiful, fun to look at, easy to make, and completely, 100% edible! Make them for your next potluck, for holidays, or just for fun. I can’t wait to hear how you like them!
Ingredients & Tools:
- Jolly Ranchers Hard Candies (Any hard candy will work, but cannot be sugar-free candy)
- Your favorite sugar cookie recipe (either premade or made from scratch, both work)
- 2 sizes of cookie cutters (these were hearts, but you can use your choice of 2 of the same shape, but different sizes)
- Baking sheet
- Wire racks
- Waxed paper
Directions:
- Roll out sugar cookie dough and cut out the cookies with a large cookie cutter. Use a spatula to move them to the baking sheet.
- Using the small cookie cutter, remove the centers of the large cookies that are on the baking sheet.
- Place 2 Jolly Ranchers (or other hard candy) of different colors inside the new empty center of the cookies. Choosing 2 different colors gives the stained glass look.
- Bake cookies with candy centers according to your cookie recipe’s instructions.
- Let the cookies cool on the baking sheet for 5 minutes to allow the candy center to harden before you then transfer them to wire racks to cool completely.
- Once fully cooled, you can move them onto a plate or into a storage container, but to prevent the hard candies from sticking together place waxed paper between layers of cookies. Enjoy!
Homemade 3-Ingredient Toilet Bowl Cleaner

A lot of people use bleach or other cleaners in their bathroom, but some feel that they want to control the ingredients they use around their families. By combining the fizzy power of baking soda and tea tree oil in this toilet bowl cleaner recipe from All You, you can clean your toilet naturally, in about 2 minutes, and spend almost nothing (only $.48 per cleaning)!
What You’ll Need:
- Measuring cup
- Toilet brush
- 1/2 cup baking soda
- 10 drops tea tree oil
- 1/2 cup distilled white vinegar
Directions:
- Pour baking soda directly into the toilet. Immediately add oil then vinegar—in that order exactly.
- Let water fizz for several minutes.
- Scrub bowl with brush until clean.
- Flush.
DIY Cereal Box Stencil Halloween Candy Tote Bags

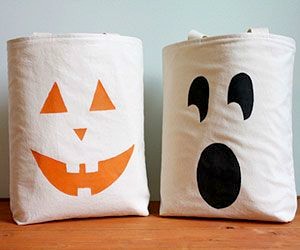
Update a classic fabric tote with easy-to-make stencils and sponge painting with this tutorial from Parents Magazine. Make these adorable tote bags and reuse them for years to come!
What You’ll Need:
- Fabric tote (get at any art supply store such as JoAnn’s or Michaels)
- Fabric paint
- Stencil brush or sponge
- Cereal box
- Crafts knife and cutting mat
- Masking tape
Directions:
- Cut one of the largest rectangles out from your cereal box.
- Either you or your child can sketch jack-o’-lantern shaped faces onto the box. Using a craft knife, an adult will now cut out the jack-o’-lantern shapes on a cutting mat.
- Next, tape your rectangle template with the faces cut out onto the fabric bag. Have your child dab on the paint using a stencil brush or sponge painting it as evenly colored as possible. You could also use the end of a sponge paint roller. NOTE: The trick to getting the paint on neatly is to hold the brush or sponge end perpendicular to the surface.
- Let dry fully for at least 12 hours (overnight would be best). To be safe, spray with waterproofing spray and then can be used in any Halloween weather for many years to come!


