
Baked Mini Pumpkins
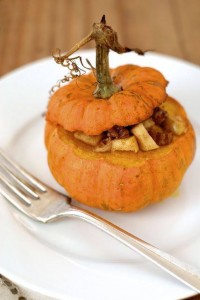
Many places across the country are getting storms for Halloween! The kids (and parents!) are going to be soaked and cold after Trick-or-Treating, so make this delicious recipe for Baked Mini Pumpkins to warm up! This recipe serves 4.
Ingredients:
- 4 mini pumpkins
- 1/4 teaspoon salt, divided
- 1 cup diced, unpeeled apple
- 3 tablespoons chopped pecans
- 2 tablespoons melted butter
- 2 tablespoons brown sugar
- 1 teaspoons vanilla extract
- 1/4 teaspoons ground cinnamon
- pinch nutmeg
- pinch ginger
Directions:
1. Preheat oven to 350`. Carefully cut off top 1/2-inch of pumpkins with a serrated knife. Scoop out seeds and membranes in pumpkins; discard. Sprinkle 1/8 teaspoon salt evenly among cavities of pumpkins.
2. Combine apple and remaining ingredients in a medium bowl; sprinkle with remaining 1/8 teaspoon salt. Stir well to combine. Fill pumpkin cavities with apple mixture. Replace tops of pumpkin on top of apple mixture.
3. Place pumpkins on a baking sheet lined with parchment paper. Bake at 350` for 55 minutes or until pumpkins are tender when pierced with a fork.
Recipe: Spooky Halloween Bones Candy
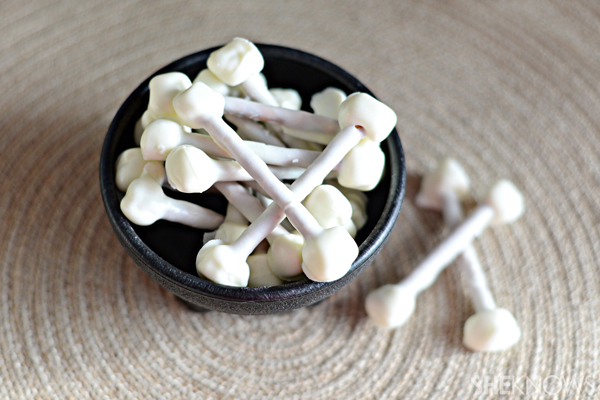
Here are some more cute Halloween Treats that your kids will be sure to love! So simple as always!
What you need:
- Half package (7 ounces) white meltable candy wafers
- 36 pretzel sticks and thin rods of various lengths
- 72 mini marshmallows (about 1 cup)
Directions:
1. Follow the instructions on the candy wafers package to melt the candy in a wide bowl. For each bone, press marshmallows onto both ends of a pretzel stick or rod, with the marshmallows’ flat sides parallel to the pretzel.
2. Dip each pretzel into the melted candy to coat it. Lift it out with a fork, letting the excess drip back into the bowl. Place the bone onto a sheet of waxed paper to set at room temperature.
Courtesy: FamilyFun Magazine
Creepy Finger Pizza
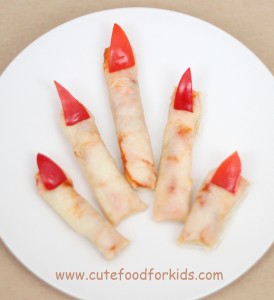
Here’s a fun dinner to make for Halloween! They’re very simple and surprisingly scary-looking finger pizza slices. You just need to bake a cheese pizza then cut into strips or sticks. You can use pepperoni, red pepper, green pepper, or olives as cut into nail shapes. Cut the pizza even smaller and make them into toes! Too fun and kids will love them.
Thanks to Cute Food For Kids for the idea!
Recipe: “Stained Glass” Sugar Cookies

This is the coolest and most creative use of hard candies I’ve seen since the DIY Christmas platters using peppermint candies I posted back in December. They’re beautiful, fun to look at, easy to make, and completely, 100% edible! Make them for your next potluck, for holidays, or just for fun. I can’t wait to hear how you like them!
Ingredients & Tools:
- Jolly Ranchers Hard Candies (Any hard candy will work, but cannot be sugar-free candy)
- Your favorite sugar cookie recipe (either premade or made from scratch, both work)
- 2 sizes of cookie cutters (these were hearts, but you can use your choice of 2 of the same shape, but different sizes)
- Baking sheet
- Wire racks
- Waxed paper
Directions:
- Roll out sugar cookie dough and cut out the cookies with a large cookie cutter. Use a spatula to move them to the baking sheet.
- Using the small cookie cutter, remove the centers of the large cookies that are on the baking sheet.
- Place 2 Jolly Ranchers (or other hard candy) of different colors inside the new empty center of the cookies. Choosing 2 different colors gives the stained glass look.
- Bake cookies with candy centers according to your cookie recipe’s instructions.
- Let the cookies cool on the baking sheet for 5 minutes to allow the candy center to harden before you then transfer them to wire racks to cool completely.
- Once fully cooled, you can move them onto a plate or into a storage container, but to prevent the hard candies from sticking together place waxed paper between layers of cookies. Enjoy!
DIY Cereal Box Stencil Halloween Candy Tote Bags
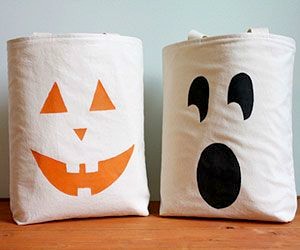
Update a classic fabric tote with easy-to-make stencils and sponge painting with this tutorial from Parents Magazine. Make these adorable tote bags and reuse them for years to come!
What You’ll Need:
- Fabric tote (get at any art supply store such as JoAnn’s or Michaels)
- Fabric paint
- Stencil brush or sponge
- Cereal box
- Crafts knife and cutting mat
- Masking tape
Directions:
- Cut one of the largest rectangles out from your cereal box.
- Either you or your child can sketch jack-o’-lantern shaped faces onto the box. Using a craft knife, an adult will now cut out the jack-o’-lantern shapes on a cutting mat.
- Next, tape your rectangle template with the faces cut out onto the fabric bag. Have your child dab on the paint using a stencil brush or sponge painting it as evenly colored as possible. You could also use the end of a sponge paint roller. NOTE: The trick to getting the paint on neatly is to hold the brush or sponge end perpendicular to the surface.
- Let dry fully for at least 12 hours (overnight would be best). To be safe, spray with waterproofing spray and then can be used in any Halloween weather for many years to come!