
Fall Owl Wreath Tutorial
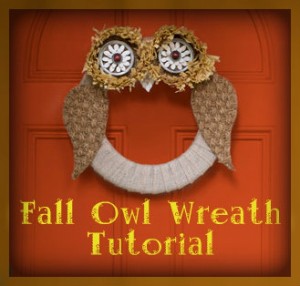
Try something new for your Fall decorations this year by making this simple owl wreath from Country Living. Here’s how:
Wreath base: Wrap burlap ribbon around a 16″ Styrofoam wreath form.
Eyes:
- For the first eye, using utility scissors, cut a 5″ circle from a sisal linen doormat.
- Trim a 2″ strip from the edge of a raffia table skirt, then hot glue along the outer edge.
- Next, hot glue the outer ring of a 4 1/2″-inch Mason jar lid inside the raffia, securing it to the sisal circle.
- Hot glue a metal bottle cap at the center of the ring and glue the circle with dried pumpkin seeds.
- Hot-glue a red wood bead inside bottle cap.
- Repeat for second eye.
Wings: Cut two 8″x 5″ teardrop shaped pieces from the sisal linen doormat.
Beak: Cut a 3″ triangle from the doormat, then hot glue with dried pumpkin seeds.
Assembly: In this order, attach the beak, then the eyes, and then wings, with hot glue. Enjoy your new Fall wreath!
Recipe: Apple Pie “French Fries”
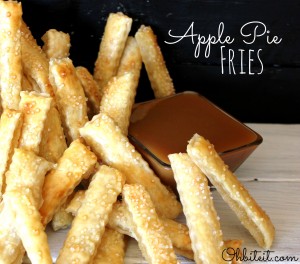
Okay, so maybe these Apple Pie “French Fries” aren’t the healthiest snack, but how cute are they? They look like real French fries with salt and shape. These would be really fun to have at a birthday party. The recipe below from Oh Bite It! serves 25-30 “fries”, so you may need more than that for parties.
Ingredients:
- 1 pkg of Pillsbury refrigerated pie crusts (2 ct., but brand doesn’t matter)
- 1.5 cups of Apple Pie Filling
- 1 Egg
- Sparkle sugar for sprinkling “salt” onto the fries
- Caramel sauce and/or ice cream for dipping
- Optional: Food processor, Decorative edge roll-cutter
Directions:
- Chop up apple pie filling as best as you can, or use food processor and save tons of time.
- Unroll the 2 pie crusts. On 1 of the crusts, spread the apple filling around leaving 1/8″ at edge, then lightly press the other crust onto the top of it to secure it.
- Make egg wash by combining an egg with a splash of water.
- Brush egg wash across the entire top of the crust and sprinkle with the sparkle sugar.
- Cut the crust into 1/2″ strips then again into “fries” shape and size. Place very carefully onto parchment paper lined baking sheet.
- Bake at 350-degrees for 12 minutes or until slightly golden and firm.
- Serve with caramel and/or ice cream for dipping.
Recipe: “BLOW YOUR MIND” Healthy, No-Strain Tomato Basil Pasta!
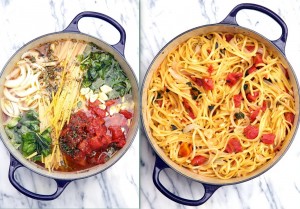
I’ve seen this recipe floating around my Facebook page for a while, but I couldn’t ignore it anymore. It’s amazing! You just add all the ingredients into one big pot, stir and simmer until it’s fully cooked. No straining, no waste, and only takes FIFTEEN MINUTES! It’s called “Summer Pasta” because it doesn’t take a lot of work to make, but it absolutely could be made year-round (and should because it’s so healthy!). Here’s the great recipe from MyFridgeFood (check the link for calories and in the comments section for what others added for recipe ideas).
Ingredients:
- 12 oz pasta
- 1 can (15 oz) diced tomatos with liquid (You can use fresh if you would rather)
- 1 large sweet onion, cut in julienne strips
- 4 cloves garlic, thinly sliced
- 1/2 teaspoon red pepper flakes
- 2 teaspoons dried oregano leaves
- 2 large sprigs basil, chopped
- 4 1/2 cups vegetable broth (regular broth and NOT low sodium)
- 2 tablespoons extra virgin olive oil
- Parmesan cheese for garnish
Directions:
- Place pasta, tomatoes, onion, garlic, basil, in a large stock pot. Pour in vegetable broth. Sprinkle on top the pepper flakes and oregano. Drizzle top with oil.
- Cover pot and bring to a boil. Reduce to a low simmer and keep covered and cook for about 10 minutes, stirring every 2 minutes or so.
- Cook until almost all liquid has evaporated (an inch or less, as desired).
- Season to taste with salt and pepper, stirring pasta several times to distribute the liquid in the bottom of the pot.
- Serve garnished with parmesan cheese.
Homemade Shea Butter Deep Conditioner
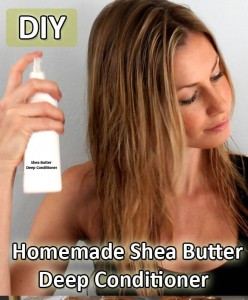
This time of year wrecks havoc on everyone’s hair – dry, staticky, frizzy, yuck. You can go to the salon and get a deep condition for $60, buy some at the store that is full of chemicals for $20, OR spend a couple of bucks and make enough deep conditioner to last you many uses. Thanks to Home Remedy Shop for the super easy tutorial!
Ingredients:
- ½ cup pure Shea butter
- 1 cup virgin coconut oil
- ½ cup grape seed oil
- A few drops of your choice of essential oil
Directions:
- Combine the Shea butter, coconut oil, and grape seed oil into a microwavable bowl. Microwave for 30 second increments, stirring between times, until they are fully evenly blended.
- Add the essential oil to the bowl. Prepare an ice bath in a pan and add the bowl into it and start blending the liquid with a blender. As you whip the mix, the texture will get creamy and will look like lotion.
- Transfer the contents into a plastic jar or bottle. Keep this bottle in your bathroom and use the conditioner whenever you need!
Recipe: DIY Turkey Cookie Pops
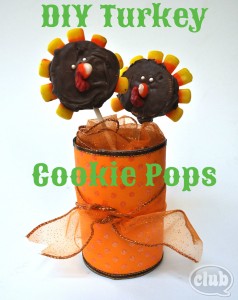
Here’s a simple and delicious “craft” from Chica Circle that you can do with the kids and give as gifts (or eat them yourselves!). Stop over at Chica Circle for the visual tutorial on these cookie pops, then also do the cute recycled aluminum can craft in the picture! Would be a great addition to the cookie pops to give as a gift!
Ingredients & What You’ll Need:
- chocolate (brown) and red candy melts
- candy corn
- popsicle sticks
- wax paper
- Oreo cookies (chocolate or vanilla)
- Candy pearls
Directions:
- Melt chocolate candy melts in a bowl for one minute and stir until smooth. Dip one end of lollipop stick in melted candy and stick in center of sandwich cookie.
- Place on wax paper and let cool in refrigerator for 5 minutes until hardened.
- Either dip cookie into melted candy or use a knife to spread on all sides of cookie. While chocolate is still soft, arrange 8 candy corn pieces along edge starting at the top on one side.
- Finish arranging all 8 candy corn pieces all the back of one side and place on wax paper, candy corn side down.
- For face, place one candy corn sticking up in center for beak. Place two candy pearl dots for eyes. Let harden in refrigerator again for 5 minutes.
- For the turkey’s wattle, place a few red candy melts into a small ziplock bag. Melt for about 20-30 seconds and squish in bag until smooth. Clip one end of bag and squeeze a tiny bit on one side of the candy corn. Let harden.
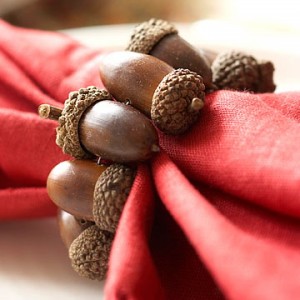
DIY Easy Acorn Napkin Ring Tutorial
Now that Halloween is over, it’s time to start thinking of how you want to decorate for the rest of Autumn and for Thanksgiving!
This super simple napkin ring from BHG is made from real acorns and takes only a couple of minutes to make. Doesn’t it look really difficult? It will impress guests for sure, plus they can be used year after year!
To make this natural napkin ring, drill tiny holes through the sides of nine or 10 acorns. Using wire, thread the acorns together, alternating the acorns top-to-bottom so they nestle together tightly. When you get to the end, just tie the wire in a little twist and hide behind an acorn. All set and ENJOY!
20+ Recipes for Homemade Flavored Coffee Creamer
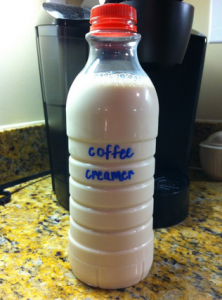
My hubby and I love coffee in the morning with that lovely and oh so expensive flavored coffee creamer. It is super expensive and it seems that prices are continuing to rise. You can make this for just over 1/2 the cost of those that you buy in the store. If you can grab the ingredients on sale, grab it for less than half the cost.
Ingredients for the Base:
- 14oz sweetened condensed milk
- 1 3/4 cup milk or cream (whole, lowfat, skim, almond, soy, heavy cream, half & half etc – whatever your preference, however the more fat, the more creaminess)
Then you need to choose which is your flavor choice. If the flavor your choose has an ingredant that is powdered (like cinnamon or cocoa) then heat about 1.2 cup of the base and disolve the power in that first…it helps so that your creamer is not grainy!
Choose Your Flavor
French Vanilla Creamer
- 2 teaspoons vanilla extract OR vanilla coffee syrup (most grocery stores have this now where they sell coffee or get it at Stabucks)
Vanilla Bean Coffee Creamer
- 2 teaspoons vanilla bean paste (vanilla extract will not work)
Chocolate
- 2-3 tablespoons chocolate syrup (any brand, I like Hershey’s)
- 1 tsp vanilla extract
Chocolate Almond
- 1 tablespoon cocoa powder
- 1 teaspoon almond extract
DIY Teeth Whitening
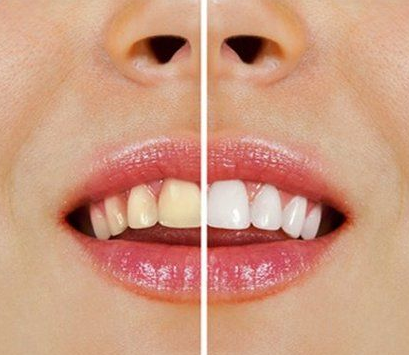
Are you a regular coffee drinker? Looking for a way to brighten your smile just a little bit more? If so, check out this awesome DIY Teeth Whitening that you can do all by yourself without having to spend tons of money on all those special treatments. Be proud of the smile that you have and Smile bigger.
What you will need:
- Hydrogen Peroxide
- Baking Soda
- Regular Mouthwash
- Toothpaste
Directions:
1. Mix 1/2 hydrogen peroxide with 1/2 regular mouthwash
2. Gargle the mixture for a minute and rinse
3. Brush your teeth with toothpaste and baking soda mixture combined (to do this mix some toothpaste with 1 tsp baking soda, and 1/2 tsp water, mix thoroughly until you reach the consistency of a paste)
4. Brush your teeth with the mixture.
It’s that simple.
Fun & Fruity Turkey Tutorial
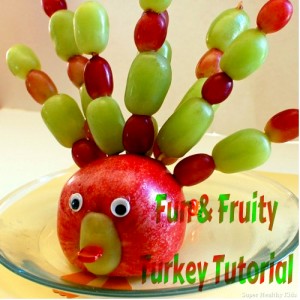
Get kids excited about Thanksgiving and make them a super healthy and delicious snack at the same time! These fruity turkeys are easy and fun.
What You’ll Need:
- Wooden skewers
- Bento toothpick and regular toothpicks
- Googly eyes
- Grapes and/or other fruits to add to the skewers.
Directions:
- Cut the side off from an apple to make it sit flat.
- Affix the googly eyes with peanut butter or use something else to make eyes. Use half of a grape as the beak and stick a Bento toothpick into it over the stem part of the apple.
- Put fruits on the skewers and stick them in the hind part of the apple to make the tail.
- Use toothpicks to stabilize the hind part of the apple since the skewers make it back-heavy.
- Give to kids and enjoy!
Thank you to Super Healthy Kids for the fun snack idea!
DIY Glitter Ballet Flats

Don’t spend $50 on a pair of glitter flats, especially when you can buy cheap, plain ones and Mod Podge the sparkles onto them yourself for a couple of bucks! Follow this super simple tutorial from She Knows for your own pair.
What You’ll Need:
- Shoes (plain or some ones that might be a little scratched up and you can cover it!)
- Mod Podge
- Glitter
- Clear Con-Tact paper
- 2 paintbrushes
- Utility knife
- Bowl
- Acrylic spray sealer (optional)
Directions:
- Find a design or shape that you like and print it out. Lay the contact paper over it and tape it down to keep it secure.
- Using a utility knife, cut the shape out of the center. You will be using this interior part as the shape onto the shoe.
- take the back off the contact paper and lay it over where you want it to be on your shoe. Make sure they are straight and even with the one on the other shoe.
- Mix the Mod Podge with the glitter you want to use in about a 1 to 1 ratio. Paint a thin and even coat over the template.
- Allow to dry completely, then repeat as necessary to make sure it is fully opaque.
- Use an acrylic spray to seal the glitter on or use another thin coat of just mod podge.
- Remove the contact paper and allow to dry again. All done! A few minutes and you’ve got truly unique and adorable shoes!