
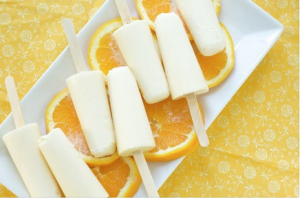
Homemade Orange Cream Pops
When I spied these yummy pops this morning on Pinterest, I almost fell over. I had found this recipe last year, tried it, loved it and then lost the link to the site! I was so excited to see it pop up today on one of the pages that I follow.
These are so good. I mean, you will want to eat a couple of them good! Make sure you let them freeze really well before you serve them! Thanks to OvenLove for the great post…and to whom ever out there in the Pinterest landscape for pinning it for the world to see! I made a slight change to the recipe but it is good either way!
Ingredients
- 1 cup orange juice (fresh or frozen. you could also use orange juice concentrate for a stronger orange flavor)
- 1 cup heavy cream (you could also substitute melted/very soft vanilla ice cream, Dreyer’s Slow churn works really well)
- 3 tablespoons honey, use a mild flavored honey sage or wild flower is best
- ¼ teaspoon orange extract
- ½ teaspoon vanilla extract (you can also use vanilla bean paste…it’s amazing!)
- 3/4 cup Mini Chocolate Chips (optional but amazing)
Instructions
- In a medium bowl, whisk all ingredients together. Then add the chips if you are using them.
- Pour mixture into popsicle molds. Let set for 30-60 minutes, then add popsicle sticks. Freeze for another 4-6 hours or until frozen.
- When you’re ready to serve, run some warm water along your popsicle mold to loosen the popsicles and serve immediately.
One of my friends melted the chocolate chips and then coated the insides of the popsicle molds with melted chocolate drizzles before pouring in the mixture. This also worked well!
Homemade Ice Cream in a Bag Recipe
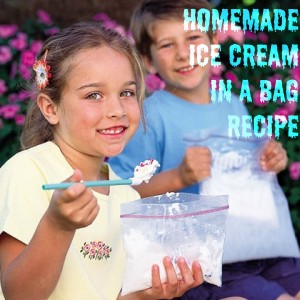
Its finally warm outside and the kids can get all their energy out by playing outside. Use this to your advantage and your whole family can make ice cream in bags by running around! Note: This recipe is enough for ONE serving, so you’ll need all of the listed ingredients for each person.
Ingredients & Other Things You’ll Need:
- Ice cubes (enough to fill each gallon-size bag about half full)
- 1 cup half and half
- 1/2 cup salt (The bigger the granules, the better. Kosher or rock salt works best, but table salt is fine.)
- 2 tablespoons sugar
- 1/2 teaspoon vanilla extract
- 1 pint-size ziplock bag (this can also be done in tupperware type containers)
- 1 gallon-size ziplock bag
- Your favorite ice cream toppings or ingredients, like chocolate chips, cereal, fruit, marshmallows, etc.
Directions:
- Combine the sugar, half and half, and vanilla extract in the pint-size bag and seal it tightly. Double check it’s sealed completely.
- Place the salt and ice in the gallon-size bag, then place the sealed smaller bag inside as well. Seal the larger bag. Now shake the bags and/or have the kids run around while shaking their bags until the mixture hardens which is about 5 minutes. Feel the small bag to check when it’s hardened enough.
- Take the smaller bag out of the larger one, add toppings, and eat the ice cream right out of the bag. Toss the bag when you’re done eating – super easy cleanup!
DIY Bouncing Bubbles
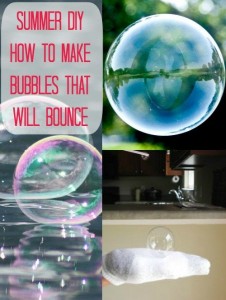
Kids love bubbles, and they are a huge part of summer play. Try something new with the kids and make them amazing bouncing bubbles! Skip the “Deluxe Bouncing Bubbles Kit” that costs $35 or more. You can make it at home with just a few ingredients with the tutorial from Play at Home Mom.
- 1 C distilled drinking water
- 1 Tablespoon dish soap
- 1 Teaspoon of glycerin (you can buy at craft stores or in the first aid aisle)
- something to blow bubbles with (straw, yarn, bubble blower wands, etc.)
- 1 clean glove (or sock to keep the bubbles from popping)
Mix ingredients together and let stand for at least 24 hours. Have fun!
DIY 4th of July Pinwheels
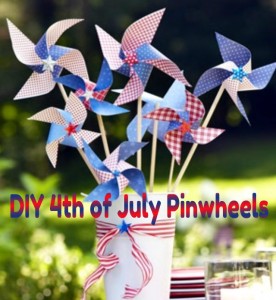
Sparklers can cause some pretty nasty burns on little hands, so instead of sparklers this year, make them these pretty 4th of July pinwheels – or just make them for fun and decorations!
What You’ll Need:
- Double-sided patriotic patterned scrapbook paper
- Wooden dowels
- Straight pins
- Beads
- Hot glue gun and hot glue
- Double-sided tape
- Scissors
- Star stickers
- Spray adhesive (if needed)
- (Optional: Plain white scrapbook paper to decorate yourself or by kids)
Directions:
- To create dual-sided pinwheels, gather your double-sided scrapbook papers in patriotic colors, or create your own (better yet, have the kids decorate them and have them involved in the celebration!). Use the spray adhesive to adhere them together.
- Cut paper into square shapes – 8-in and 6-in squares – to create different sized pinwheels.
- Fold squares in half diagonally to create a triangle, then press to crease.
- Open the triangle and fold diagonally the opposite way, then press to crease.
- Open up the triangle and flatten out the square.
- Cut along each diagonal fold three-quarters of the way to the center.
- Pull the tip of every other corner toward the center. Use double-sided tape or white craft glue to adhere the first tip to the center, then each folded-in tip on top of each other. When you finish, you’ll have the pinwheel shape.
- If you want your pinwheel to spin, skip to step 10. If not and will be used for decorations only, hot glue the pinwheel to your wooden dowel. Skip cutting down wooden dowels from the hardware or craft store and use inexpensive flag dowels (removing the flags, of course).
- Finish your pinwheel with a decorative star sticker in the center.
- If you want your pinwheel to spin, you’ll need to push a pin through the center (a straight pin works), then a bead beneath the pinwheel. You’ll drive the pin into your dowel with a hammer.
- If needed, fold over (or cut and then fold over) any part of the pin that sticks through to the back to prevent injuries.
How to Style Elsa’s Braid from Frozen Tutorial
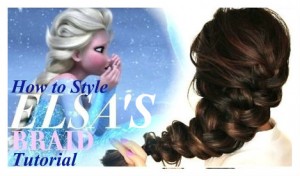
Girls around the world are obsessed with Frozen, and most are particularly in love with Queen Elsa. Make your daughter/niece/neighbor’s or your own day by doing this Elsa’s braid tutorial from Makeup Wearables. It’s a lot simpler than it looks! She has another version of Elsa’s braid, videos, and TONS of gorgeous hair tutorials. I’m glad I discovered it! 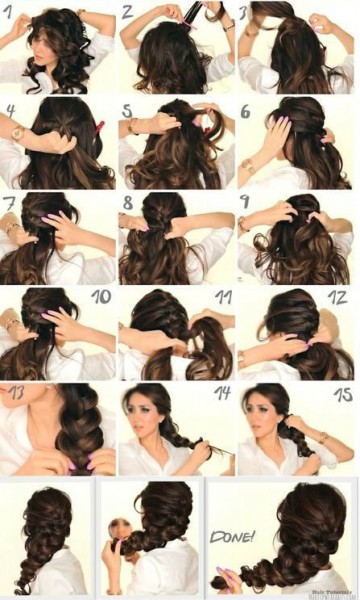
- If our hair is straight, you need to curl it to give it extra body and texture. They used a 1.5″ curling-wand and pinned the curls up to keep the curls stronger for longer.
- Apply hair powder to help with teasing later because it makes your hair sticky.
- Tease your roots everywhere really well, and make sure to use a strong hairspray to set it.
- (Optional) Attach hair-extensions and a couple of hair padding at the back of your head to create Elsa’s cartoon volume. If you don’t have a hair padding, just tease your hair more.
- Gather the back of your crown and make a half-up ponytail, but Leave out the front of your hair.
- Start a normal 3-strand braid with the half-up ponytail.
- Start adding in hair to the side strands to start a French braid: First section, take from the crown, and add it to the right strand, before crossing both strands over the middle strand. (See picture or video for clarification.)
- Take a section of hair from the left side and add it to the left strand, before crossing it over the middle strand.
- Repeat until all the hair is in one big braid.
- After putting the braid in an elastic band, pull out the sides to make the braid bigger.
- Grab a small piece of hair at the end with one hand, and pull up the braid with the other hand towards the crown to scrunch it. This will instantly create more volume in the braid and look more like Elsa’s.
- Tug on the sides to adjust the size and to make the braid even, then spray well with holding hairspray. TAKE PICTURES!!