
DIY Glitter Sandals Tutorial

Have a pair of boring sandals that aren’t getting worn enough? This tutorial will teach you how to easily and very inexpensively glam your sandals up and make sure you’ve got sparkly feet this summer!
What You’ll Need:
- A pair of basic flat sandals
- Glitter (a large container of glitter in the color of your choice)
- Tacky glue (from the craft store)
- Foam brush
- Clear sealant
Directions:
- Use a brush to apply a layer of glue over the areas of the sandal you are going to apply glitter. Do 1 sandal at a time.
- Sprinkle glitter generously over the glued area while the glue is still wet. Be sure to put pour the glitter on the sandal over newspaper, paper, or other way to collect the leftover glitter.
- Gently shake off extra glitter. To keep the remaining glitter in place, spray on a light coat of clear sealant. Or if you’re out of sealant, use a light coat of clear fingernail polish.
- Repeat steps 1-3 on the other sandal.
- Allow your sandals to dry fully overnight, then admire your new glitzy footwear!
DIY Chocolate Mint Body Butter
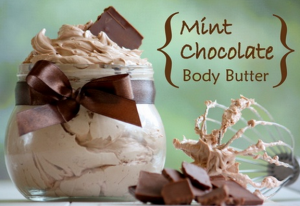
While on Pinterest the other day, I stumbled across this amazing recipe for a DIY Chocolate Mint Body Butter. I sounded like an amazing experiment I once got a container of this for a gift and know that it cost nearly $15 for a small container. This one is a little cheaper to make and you get so much more for your money. Plus you can make it with more organic/chemical free ingredients. The main recipe came from a website called mommypotamus.com. I also found another one (there was no credit on that one) and have sort of combined the two to get the best effect.
- 1/2 cup of cocoa butter (it’s listed as cacao butter sometimes.)
- 1/2 cup mango or shea butter (you can also substitute another 1/2 cup cocoa butter. It will be a little less “light” when whipped up, but it was really amazing…especially for dry skin.)
- 1/2 cup coconut oil
- 1/2 cup of jojoba or a mild olive oil. I used olive oil and that gave outstanding results and was my favorite.
- 1-2 teaspoons peppermint essential oil (the more you add the stronger the mint scent)
- 1 1/2 tablespoons pure cocoa powder (if you would prefer a “white chocolate” version that is not a bronzer, substitute arrowroot powder or non-GMO cornstarch)
- 2 teaspoons naturally derived vitamin E (optional). I pierced some vitamin E capsules and it worked well!
How To Make Whipped Body Butter:
- Prepare an ice bath by filling a large bowl with ice and fitting a smaller bowl inside. The inside bowl needs to be able to hold at least 4-5 cups of liquid. Glass works better than metal.
- Using a double boiler or a pot of boiling water with a smaller pot fitted inside, melt cocoa butter and mango butter over a low simmer. This will prevent it from scalding.
- Add coconut oil and melt until completely liquid.
- Remove cocoa butter/coconut oil mixture from heat.
- Measure 5 teaspoons of cocoa powder into a small bowl and gradually add several tablespoons of jojoba/almond/olive oil. Mix thoroughly and then add to cocoa butter/coconut oil mixture along with remaining jojoba/almond/olive oil.
- Place mixture in chilled bowl (which should still be resting above the ice bowl) and allow to cool for 10-20 minutes.
- Remove mixture from ice bath and whip very well until stiff peaks form. If after a few minutes it does not seem to be thickening return the bowl to the ice bath and whip there.
- Store in an airtight jar – Keep out of sunlight to prevent oxidation. I keep mine in the cupboard a.k.a cool dry place.
- You will also want to store it in a cool place. If your bathroom gets warm, it’s not the place to keep this.
Easy Homemade 3-Ingredient Vanilla Coconut Body Scrub
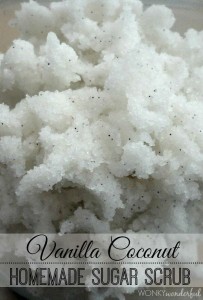
This time of the year, our skin is so dry and flaky. Why spend $30 or more on a body scrub from The Body Shop or other retailer when you can make it at home with only 3 ingredients for pennies and in only a couple of minutes. Oh, and it smells like summer. BLISS!
What You’ll Need:
- 1/2 cup solid coconut oil
- 1 cup white sugar
- Seeds from 1 vanilla pod
Directions:
- Use your whisk attachment on your mixer and whip 1/2 cup solid coconut oil for about 10 minutes. Be sure to stop to scrape down the sides after 5 minutes.
- Add 1 cup white sugar and the seeds from 1 vanilla pod. Mix for another 1-2 minutes.
- Transfer to an air tight container until ready for use.
Smells so good! You’ll love it. Thanks to Wonky Wonderful for the recipe!
Leftover Easter Candy Bark

If you’re anything like me, you have Easter candy coming out your ears right now and are finding yourself eating it all the time. Yes, I know you’re sneaking it just like I am! Instead of sneaking handfuls of candy, make this fun candy bark! Bring it to work or to someone else’s house and really get rid of the candy! :)
Ingredients:
- 26 ounces white chocolate (or white chocolate melts)
- 8 Peeps, chopped or cut into 1/8ths
- 1 cup Easter candies (M&Ms, Reese’s Pieces, etc.), crushed
Directions:
- Line a baking sheet with foil, shiny-side up; smooth out the creases.
- Crush the candies by placing them in a resealable bag and gently rolling a mug or rolling pin over the bag. It’s fine if some of the candies are left whole.
- Create a double boiler by putting a glass or metal bowl over a saucepan of barely simmering water, making sure the bowl doesn’t touch the water. Add the chocolate and stir until melted and smooth. Do not overheat the chocolate or it will seize. NOTE: You can also microwave in 30 second increments, stirring between. This will be the way you do it with the white chocolate melts.
- Remove the bowl from the pan and wipe the condensation from the bottom. Pour the white chocolate onto the prepared baking sheet; use the rubber spatula to spread it into a 10-to-12-inch circle, about 1/4 inch thick.
- Press the chopped Peeps and crushed candies into the chocolate, arranging them so each bite has a mix of flavors, colors and textures. Refrigerate the chocolate for 1 hour to completely set before breaking it into large pieces.
- Break into pieces and store in an airtight container at room temperature for 1 to 2 weeks.
5-Star Simple Homemade Egg Salad
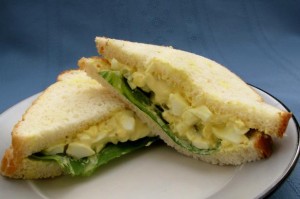
Here’s a great recipe for all those hard boiled Easter eggs if yours are still good. Instead of just tossing them out, make this highly rated Egg Salad recipe from Food.com. It was the highest rated egg salad recipe I could find on the internet – Enjoy!
Ingredients:
(This makes 2 servings)
- 4 hard-boiled eggs
- 2 tablespoons mayonnaise (Light mayo is good, too! Use more mayo if needed)
- 2/3 tablespoon mustard (Regular yellow mustard)
- 2/3 tablespoon relish
- 4 slices whole wheat bread (any type will do)
- Optional: 2/3 to taste pepper & 2/3 to taste Lettuce
Directions:
- Finely chop boiled eggs.
- Mix in mayo 1 tablespoon at a time, so not to add too much.
- Mix in mustard, relish and pepper.
- Put egg salad mixture on bread (toasted bread or on rolls are great as other options).
- Top sandwich with lettuce.