Fall Owl Wreath Tutorial
Try something new for your Fall decorations this year by making this simple owl wreath from Country Living. Here’s how:
Wreath base: Wrap burlap ribbon around a 16″ Styrofoam wreath form.
Eyes:
- For the first eye, using utility scissors, cut a 5″ circle from a sisal linen doormat.
- Trim a 2″ strip from the edge of a raffia table skirt, then hot glue along the outer edge.
- Next, hot glue the outer ring of a 4 1/2″-inch Mason jar lid inside the raffia, securing it to the sisal circle.
- Hot glue a metal bottle cap at the center of the ring and glue the circle with dried pumpkin seeds.
- Hot-glue a red wood bead inside bottle cap.
- Repeat for second eye.
Wings: Cut two 8″x 5″ teardrop shaped pieces from the sisal linen doormat.
Beak: Cut a 3″ triangle from the doormat, then hot glue with dried pumpkin seeds.
Assembly: In this order, attach the beak, then the eyes, and then wings, with hot glue. Enjoy your new Fall wreath!
Homemade Shea Butter Deep Conditioner
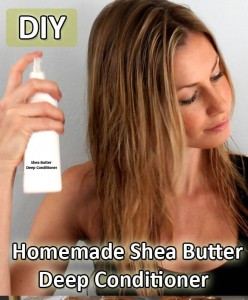
This time of year wrecks havoc on everyone’s hair – dry, staticky, frizzy, yuck. You can go to the salon and get a deep condition for $60, buy some at the store that is full of chemicals for $20, OR spend a couple of bucks and make enough deep conditioner to last you many uses. Thanks to Home Remedy Shop for the super easy tutorial!
Ingredients:
- ½ cup pure Shea butter
- 1 cup virgin coconut oil
- ½ cup grape seed oil
- A few drops of your choice of essential oil
Directions:
- Combine the Shea butter, coconut oil, and grape seed oil into a microwavable bowl. Microwave for 30 second increments, stirring between times, until they are fully evenly blended.
- Add the essential oil to the bowl. Prepare an ice bath in a pan and add the bowl into it and start blending the liquid with a blender. As you whip the mix, the texture will get creamy and will look like lotion.
- Transfer the contents into a plastic jar or bottle. Keep this bottle in your bathroom and use the conditioner whenever you need!
Recipe: DIY Turkey Cookie Pops

Here’s a simple and delicious “craft” from Chica Circle that you can do with the kids and give as gifts (or eat them yourselves!). Stop over at Chica Circle for the visual tutorial on these cookie pops, then also do the cute recycled aluminum can craft in the picture! Would be a great addition to the cookie pops to give as a gift!
Ingredients & What You’ll Need:
- chocolate (brown) and red candy melts
- candy corn
- popsicle sticks
- wax paper
- Oreo cookies (chocolate or vanilla)
- Candy pearls
Directions:
- Melt chocolate candy melts in a bowl for one minute and stir until smooth. Dip one end of lollipop stick in melted candy and stick in center of sandwich cookie.
- Place on wax paper and let cool in refrigerator for 5 minutes until hardened.
- Either dip cookie into melted candy or use a knife to spread on all sides of cookie. While chocolate is still soft, arrange 8 candy corn pieces along edge starting at the top on one side.
- Finish arranging all 8 candy corn pieces all the back of one side and place on wax paper, candy corn side down.
- For face, place one candy corn sticking up in center for beak. Place two candy pearl dots for eyes. Let harden in refrigerator again for 5 minutes.
- For the turkey’s wattle, place a few red candy melts into a small ziplock bag. Melt for about 20-30 seconds and squish in bag until smooth. Clip one end of bag and squeeze a tiny bit on one side of the candy corn. Let harden.
DIY Easy Acorn Napkin Ring Tutorial

Now that Halloween is over, it’s time to start thinking of how you want to decorate for the rest of Autumn and for Thanksgiving!
This super simple napkin ring from BHG is made from real acorns and takes only a couple of minutes to make. Doesn’t it look really difficult? It will impress guests for sure, plus they can be used year after year!
To make this natural napkin ring, drill tiny holes through the sides of nine or 10 acorns. Using wire, thread the acorns together, alternating the acorns top-to-bottom so they nestle together tightly. When you get to the end, just tie the wire in a little twist and hide behind an acorn. All set and ENJOY!
DIY Teeth Whitening
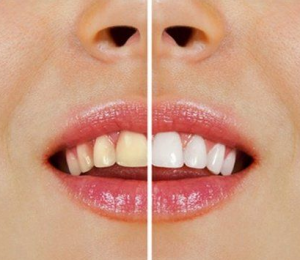
Are you a regular coffee drinker? Looking for a way to brighten your smile just a little bit more? If so, check out this awesome DIY Teeth Whitening that you can do all by yourself without having to spend tons of money on all those special treatments. Be proud of the smile that you have and Smile bigger.
What you will need:
- Hydrogen Peroxide
- Baking Soda
- Regular Mouthwash
- Toothpaste
Directions:
1. Mix 1/2 hydrogen peroxide with 1/2 regular mouthwash
2. Gargle the mixture for a minute and rinse
3. Brush your teeth with toothpaste and baking soda mixture combined (to do this mix some toothpaste with 1 tsp baking soda, and 1/2 tsp water, mix thoroughly until you reach the consistency of a paste)
4. Brush your teeth with the mixture.
It’s that simple.


