
DIY Shaving Cream Dyed Marble Easter Eggs
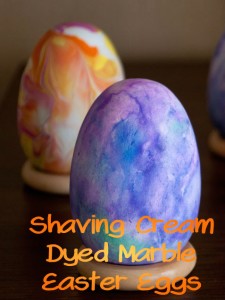
I haven’t dyed eggs with my kids yet. It seems like Easter flew up on us this year. If we don’t make Kool-Eggs, then I think we are going to do Marbleized Dyed Easter Eggs. Inexpensive, fast, pretty, and very pretty!
NOTE: Dyeing your eggs with shaving cream is for decoration ONLY since egg shells are permeable and you shouldn’t eat shaving cream. If you like to eat your eggs after dyeing them, you can do marbleizing with whipped cream instead of shaving cream. Whipped cream is a lot more expensive than buying cheap shaving cream at a dollar store, so this is an optional switch.
What You’ll Need:
- Completely cooled hard boiled eggs
- Food coloring drops in different colors
- Medium to large baking sheet, baking pan, or other container with sides
- Cheap shaving cream (or whipped cream in an aerosol can)
- Spoon
- Toothpicks
- Paper towel
- Plastic gloves, sandwich baggies or plastic wrap
- Paper plate or cheap plastic storage container (that you don’t care will get dyed)
Instructions:
- Spray shaving (or whipped) cream and spread out evenly on a cookie sheet (or other container) with a spoon.
- Dribble food coloring across the surface. Neon food coloring makes cooler looking eggs.
- Use toothpicks to swirl the colors around in the shaving cream. Do it totally randomly and be sure to pick up and restart lines into the cream. This will make the best designs.
- Take a dried, cooled hard boiled egg, and roll it around in the cream. You can use plastic gloves, or use sandwich baggies or plastic wrap as gloves to help keep the dye consistent, keep finger prints off the eggs, and will protect your fingers from dye.
- Add more cream and/or dye as needed throughout the dyeing process.
- Sit colored eggs to the side on a paper plate or in a plastic storage container and allow them to dry for at least 2 hours, but best is overnight to 24 hours. DO NOT WIPE THEM OFF, leave them in the cream and dye. If you used whipped cream, be sure to put them in the refrigerator while they sit.
- After allowing the eggs to sit, wipe the cream and dye off with paper towel. You can store in the original egg carton in the fridge or set them out as decorations.
Thanks to TotSchool for the picture!
Recipe: Fluffy Bunny Butt Cookies

Spring is here and Easter has some of the cutest and brightest holiday treats. These adorable Fluffy Bunny Butt Cookies recipe from the Pillsbury website are easy and will be a big hit at any parties or family parties this weekend. Have your kids help decorate these lil cuties!
Ingredients:
- 1 roll (16.5 oz) Pillsbury™ refrigerated sugar cookies
- 1/3 cup all-purpose flour
- 1 container (12 oz) fluffy white whipped ready-to-spread frosting
- 22 miniature marshmallows
- Spring colored candy sprinkles
- Optional: Pink gel food color
Directions:
- Heat oven to 350°F. In a large bowl, knead cookie dough and flour with hands until well mixed.
- Reshape dough into 9 x 1 1/2-inch log. Wrap dough in plastic wrap and refrigerate for 30 minutes.
- Remove plastic wrap. Cut cookie dough into 33 slices. Cut 11 of these slices into 4 equal wedges. Shape each of the wedges into ovals for bunny feet. Place cookie dough slices and bunny feet on ungreased cookie sheet.
- Bake cookies for 8 to 12 minutes or until edges are light golden brown. Let cool for 1 minute, then remove from cookie sheets and place on cooling racks. Cool completely (10-15 minutes).
- While cooling, using a medium microwavable bowl, stir frosting and 1 to 3 drops pink food color until well blended and you find the color pink you like best. Microwave frosting uncovered on High for 10 to 15 seconds or until soft, but not translucent.
- To make bunny butt, frost 1 whole cookie slice and 2 bunny feet with frosting. Place bunny feet on bottom of cookie as shown in photo. Place 1 marshmallow in center of each cookie for tail.
- Decorate bunny paws with candy sprinkles. Repeat with remaining cookie slices and bunny feet. These can be baked and frozen for up to 2 months before thawed and eaten.
FUN EXTRA: If you want to decorate more, you can add ears to your bunny by placing candy-coated almonds or jelly beans at top of each cookie.
Easter Bunny Race Cars

Saw this floating around Facebook yesterday and knew I had to share it with you all. What a fun way to make an edible spring decoration with the kids!
Ingredients:
- Large Marshmallows, cut horizontally
- Marshmallow Bunny Peeps
- Mini pretzels
- Cream-Filled Cakes (e.g. Cloud Cakes or Twinkies)
- Decorator Icing
- Frosting
- Sprinkles
Directions:
- Cut a small rectangle out of the top of the cream-filled cake about a third of the way back from the “front” of the car.
- Use the white decorator icing to adhere the bunny Peep, mini pretzel “steering wheel” and large marshmallows in place.
- Use frosting and sprinkles to decorate your car. Allow to set, then enjoy!
Kool-Eggs: Using Kool-Aid to Dye Easter Eggs
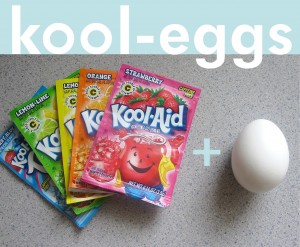
Skip the expensive and hard to use egg dying kits this year. The dye kits usually use vinegar or tablets and you have to wait to dissolve. Use just plain ol’ Kool-Aid! You can usually find Kool-Aid packets on a sale for 5 for $1 (usually less!), they smell sweet instead of chemically. All you need are hard boiled eggs, a spoon, tongs, or another way to get the eggs out of the dye, lots of paper towels, and a cup or bowl for each color. To make the dye: 2/3 cup of water for each packet of Kool-Aid and mix together.
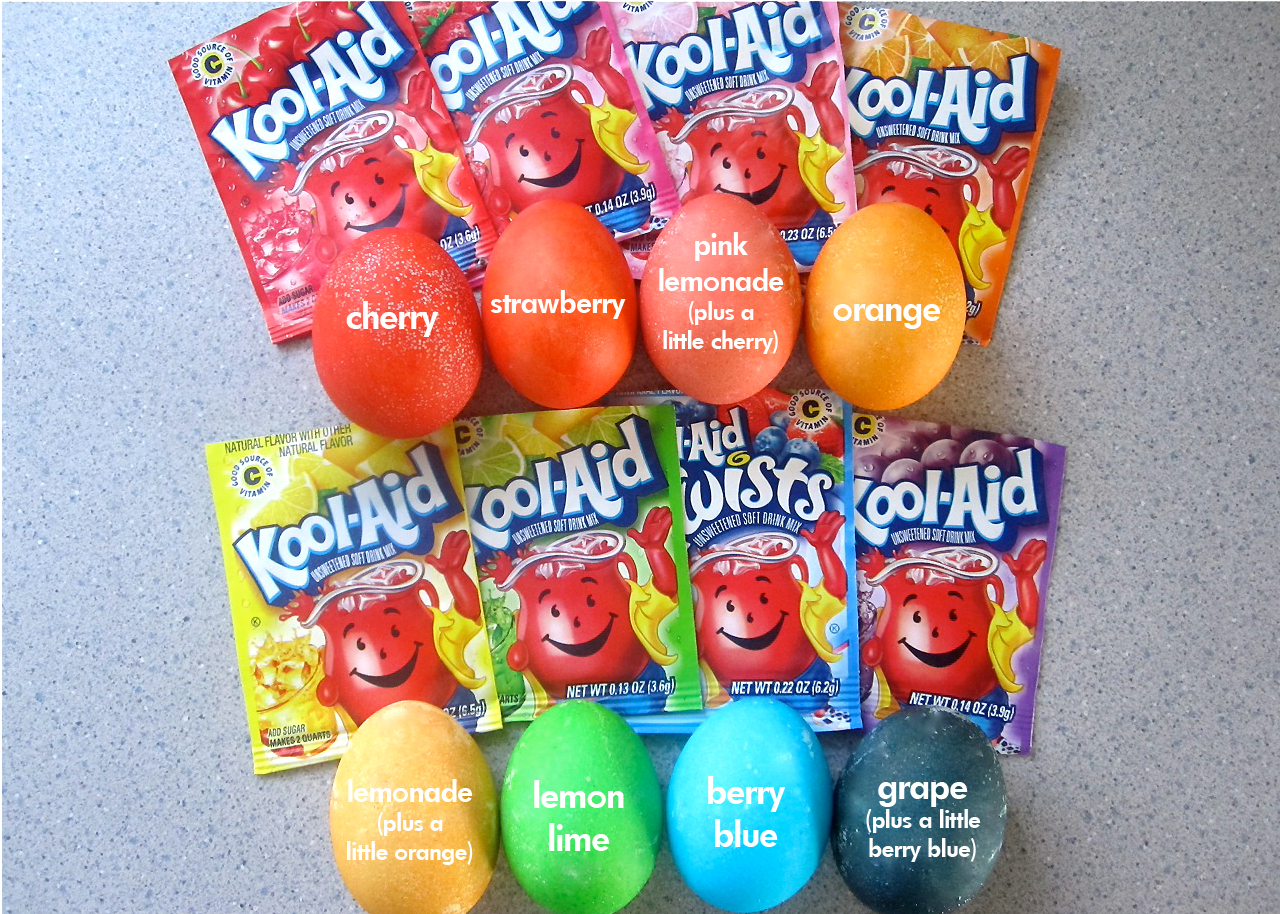
For some aid with colors, use the tutorial from Hey Jen Renee’s blog and her trial and error with the colors. Some will come out more colorful than others and some need to be mixed with other colors to get a color at all. See pic below and have fun!
Recipe: Lucky Rainbow Chex Mix
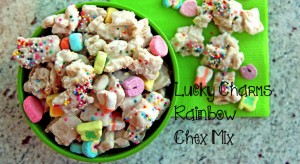
I saw this picture floating around my Pinterest page and I said literally aloud in front of my kids, “Oh no!” What I mean by that is, “Oh, no. That looks so amazing and if I make it, then it won’t make it beyond a day in this house.” So, instead, here’s the recipe from Tablespoon for YOU ALL. Lucky you, and just in time for St. Patrick’s Day!
Ingredients:
- 1 box (11.5 oz) Lucky Charms® cereal
- 6 cups Rice Chex® or Corn Chex® cereal
- 2 bags (12 oz each) white vanilla baking chips (4 cups)
- 1/4 cup multicolored candy sprinkles
Directions:
- Pour box of Lucky Charms and pick out all the marshmallows (about 2 cups). DO NOT EAT THEM. Okay, you can eat a couple. But set aside the rest to add to the mix later. Measure 2 cups of the remaining Lucky Charms cereal (without the marshmallows) into large bowl, add Chex cereal.
- Line cookie sheet with foil or waxed paper. In medium microwavable bowl, microwave white vanilla baking chips uncovered on High about 2 minutes, stirring every 30 seconds, until chips can be stirred smooth. Pour over cereal mixture in large bowl; toss to evenly coat.
- Spread mixture in single layer on cookie sheet. Immediately sprinkle with candy sprinkles. Let stand until set, about 20 minutes. Gently break up mixture; toss in reserved marshmallows. Store in airtight container and should last about a month (yeah right!).