
DIY Duct Tape Rose Pen Tutorial
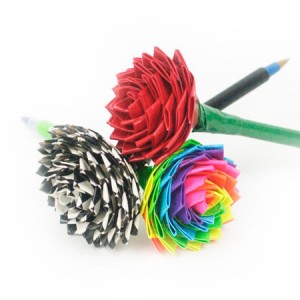
If you aren’t aware, there are dozens of designs in duct tape now. People are using it more than for just fixing pipes – they’re making projects like these really cute flower pens! This is like origami for duct tape. Make these for gifts, fun teacher presents, for decorations, and with tons of different combinations! Thanks to CraftFoxes for the tutorial. There is a visual tutorial if it will help with your craft! What You’ll Need:
- Green duct tape (for stems and leaves)
- Designed or colored duct tape (for petals)
- Plain pen
Directions:
- Take your pen and cover it in green tape lengthwise. This works best if you roll the pen across the tape, sticky-side up.
- To make petals, cut several strips of 2-inch long squares out of the colored or designed tape. Fold one edge over itself sticky side up, leaving some stickiness exposed on the side and bottom. It ends up looking like a sail on a boat because of the sticky edge left out instead of a perfect triangle.
- Take the other edge and fold it over, leaving only stickiness on the bottom of the strip.
- Wrap the petal tightly around the top of the pen stem.
- Repeat steps 2-5 with duct tape, wrapping the petals around the top. Continue until you’ve reached the size of rose you want.
- For the leaves under the base of the rose, repeat steps 2 – 4 with the green duct tape. Wrap these pieces around the stem at the base of the flower to cover up the tape edge.
DIY Jewelry Cleaner
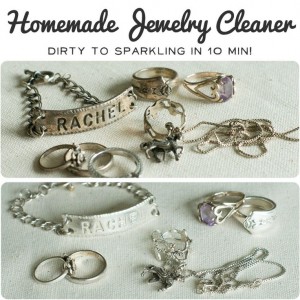
Never buy jewelry cleaner again! You can make it yourself for a fraction of the price with this recipe. The below jewelry cleaner works well for gold-filled, brass, German (nickel) silver, sterling silver, freshwater pearls, shell cameos and mother of pearl.
What You’ll Need:
- 1 tablespoon salt
- 1 tablespoon baking soda
- 1 tablespoon dish detergent
- 1 cup water
- 1 piece aluminum foil
Directions:
- Heat water in the microwave for 1 or 2 minutes.
- Cut a piece of aluminum foil that roughly covers the bottom of a small bowl (like a cereal bowl).
- Pour hot water into bowl. Place salt, soda, and dish-washing liquid into bowl. Place jewelry on top of foil and let it sit for 5 to 10 minutes. If it has dirt or debris in the little crevices of your jewelry, use a very soft toothbrush to reach in and clean.
- Rinse jewelry in cool water and dry jewelry completely with soft cloth. Discard solution after use and make a new batch next time.
How to Clean a Microfiber Couch
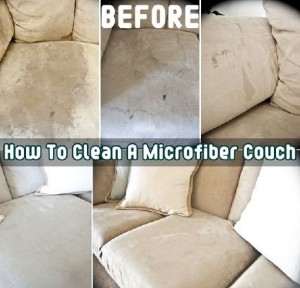
We have microfiber couches we bought right after our oldest daughter was born. She had severe GERD, then food issues, then twins were born right after that… anyway, our couches are beyond help. We need new ones, but maybe if we had seen this awesomeness, we could have saved our expensive microfiber couches, that we were assured were stain resistant. HAHA! Save yours after the stomach flu! Here’s how, for a couple of bucks with all items you can get at the dollar store!:
What You’ll Need:
- Empty spray bottle (you can get these at the dollar store)
- Several WHITE sponges (ONLY white – any other color will transfer onto your couch and make a worse stain)
- WHITE bristle brush scrubber (ONLY WHITE – see above)
- Plain rubbing alcohol (water stains microfiber, as we know, and alcohol evaporates faster so it won’t stain)
Directions:
- Pour alcohol into spray bottle, then spray the rubbing alcohol onto the microfiber, completely saturating the stained area.
- Using the white SPONGE (not brush), start scrubbing the stain right away. Scrub hard!! It will take muscle to get the stain out of microfiber. You will start to see the stain coming off onto the white of the sponge if you’re doing it well.
- If the sponge is dirty on both sides, move on to another, clean white sponge. If you continue to use a dirty one, you’ll just transfer the stain back into the microfiber.
- Once the stain is onto your sponge and off the fabric (using your best guess since it will be wet and hard to see if it’s stain or just wet), allow the fabric to dry fully. It will be hard to the touch, but that’s okay. Leave it for now.
- If the area that was stained is still dirty, repeat #1-4 until the stain is completely gone.
- Once the stain is gone and fabric is completely dry, using a swirling motion, fluff back up the microfiber fabric until it looks normal again.
EASY right? Almost too easy. I am so glad to have found this and happy to be able to share it with you! :)
Homemade Weed Killer Recipe
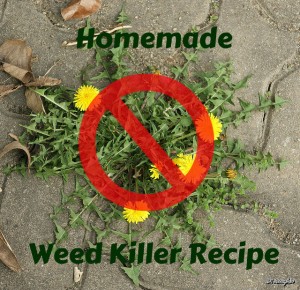
Depending on where you live, weeds are a really big nuisance and buying weed killer can start costing you a lot over the summer season, especially ones that are safe around kids and dogs. Here’s one that you can make at home that has a lot of positive reviews.
Ingredients:
- 1 Gallon of Vinegar
- 2 cups of Epson Salt
- 1/4 cup Original Blue Dawn Dish Soap
Directions:
- Mix all ingredients together in a large container by stirring so it will have less suds.
- Pour into a spray bottle or watering can.
- Pour or spray the weed killer over the weeds in the morning after the dew has dried. By evening, the weeds should be dead or wilted significantly.
DIY Patriotic Beaded Earrings
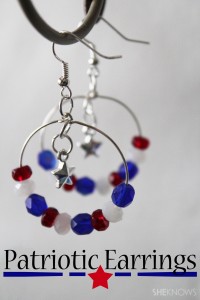
Get an extra little splash of red, white, and blue with these simple earrings from She Knows. The jewelry only takes a few minutes to make, can be worn for years, and given as gifts or a party favor. For a visual step-by-step tutorial, visit the She Knows link above.
What You’ll Need:
- Round-nosed pliers
- Jewelry pliers
- 2 Silver earring hoops
- 6 Red beads
- 6 Blue beads
- 6 White beads
- 2 Star charms
- 6 Jump rings
- 2 Earring wires
Directions:
- String the beads onto the earring hoop. Make a pattern of red-white-blue. Repeat the pattern three times.
- Using the round-nosed pliers, make a curve on the straight side of the earring wire so that it points up.
- Hook the curve onto the loop on the other end of the earring hoop. Using round-nosed pliers, twist curve into a vertical loop.
- Use two jump rings to suspend the star charm by attaching one jump ring to the top of the charm, then use a second jump ring to connect the first jump ring to the vertical loop you created in the last step.
- Use a third jump ring to connect the earring wire to the vertical loop.
- Repeat the steps above to make a second earring.
- Wear and ENJOY!