
Leftover Halloween Candy Bark

Yesterday was Halloween, so how much candy do you and the kids have leftover? If you’re like many homes across the country, you have so much left over that you think you’ll never get through it all. Instead of tossing it, make this yummy Halloween Candy Bark!
INGREDIENTS:
1 pound bittersweet chocolate, chopped
3 Butterfinger candy bars (or 8 fun-size bars), cut into 1-inch pieces
3 Heath candy bars (or 6 fun-size bars), cut into ¾-inch pieces
8 Reese’s peanut butter cups, each cut into 8 wedges
¼ cup honey roasted peanuts
3 ounces white chocolate, chopped
½ cup Peanut M&M’s (Halloween colors!) or Pretzel M&M’s or Reese’s Pieces
DIRECTIONS:
1. Line a baking sheet with parchment paper; set aside.
2. Place the chopped bittersweet chocolate in a medium bowl and microwave at 50% power in 30-second increments, stirring after each, until completely melted and smooth. Pour the chocolate onto the prepared baking sheet and, using an offset spatula, spread into a thin layer (about ¼-inch thick – a 12×10-inch rectangle). Sprinkle the melted chocolate with the chopped Butterfingers, Heath bars, peanut butter cups and honey roasted peanuts, making sure all pieces touch melted chocolate (so they adhere). Lightly press to make sure the candy adheres to the melted chocolate. Refrigerate for 30 minutes.
3. Melt the white chocolate using the same method as the bittersweet chocolate (in a microwave in intervals) until completely smooth. Using a spoon, drizzle the white chocolate over the chilled bark in a zigzag pattern. Scatter the M&M’s (or Reese’s Pieces) over the white chocolate drizzle, and again press to make sure the candy adheres to the melted white chocolate. Chill again until the white chocolate is set, about 30 minutes.
4. Cut/break the bark into irregular pieces and serve. Store leftovers in the refrigerator.
5. ENJOY!
Thanks to BrownEyedBaker for the recipe!
Halloween Witches Hats Chocolate Treats
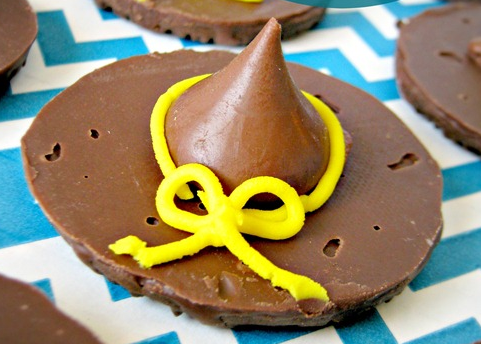
These are so easy to make and absolutely adorable. Pair them with the Witches Brooms Treats and you have yourself a cute little spread. Happy Halloween!
Ingredients:
- Fudge striped cookies
- Hershey kisses
- Chocolate icing
- Yellow or orange icing
- Decorating tips
Directions:
1. Flip a Fudge Striped Cookie Upside down
2. Put a dab of Chocolate Icing on the bottom of a Hershey Kiss
3. Decorate with a Yellow or Orange Bow
All done! Enjoy!
Monster Mouth Apple Bites

This is a fun one to make for those kids who LOVE apples & peanut butter! Get in the Halloween spirit and put together these simple Monster Mouth Apple Bites.
Ingredients
- Apples
- Lemon Juice
- Peanut Butter
- Yogurt Covered Raisins
Directions:
1. Wash the apple and cut it into 8 sections.
2. Cut each section in half again, to form the two lips. Slice off the core and seed portion.
3. Soak in the lemon water for about 10 minutes. Strain and pat dry. (if making before hand)
4. Spread peanut butter on one side of apple slices.
5. Press yogurt covered raisins into the peanut butter along the peel side to make the teeth. Place one yogurt covered raisin behind the row of teeth to help stabilize the top lip.
6. Place the top lip onto the yogurt covered raisin teeth
Have Fun!
Quick & Easy Witches Brooms Candy
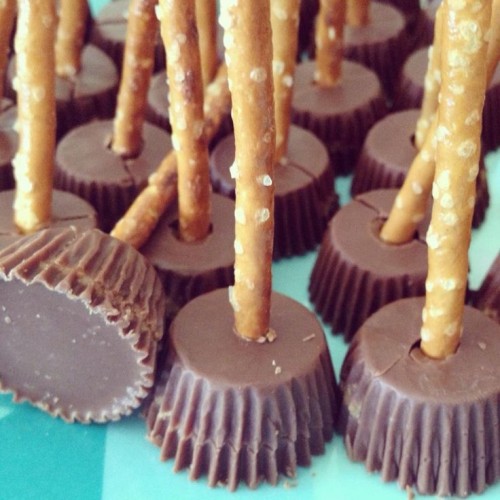
Running behind schedule and need a last minute idea for your child’s Halloween Party? Make these cute Witches Brooms! So Fast, So Easy, & you will still have people talking about your creativity.
All you need is 2 ingredients: Miniature Reese’s Cup & Pretzel Sticks. All you do is poke the Pretzel stick into the bottom of the Reese’s Cup and Voila! You have yourself a Witches Broom! That’s it! How simple is that! Enjoy!
Fresh Fruit Halloween Snacks
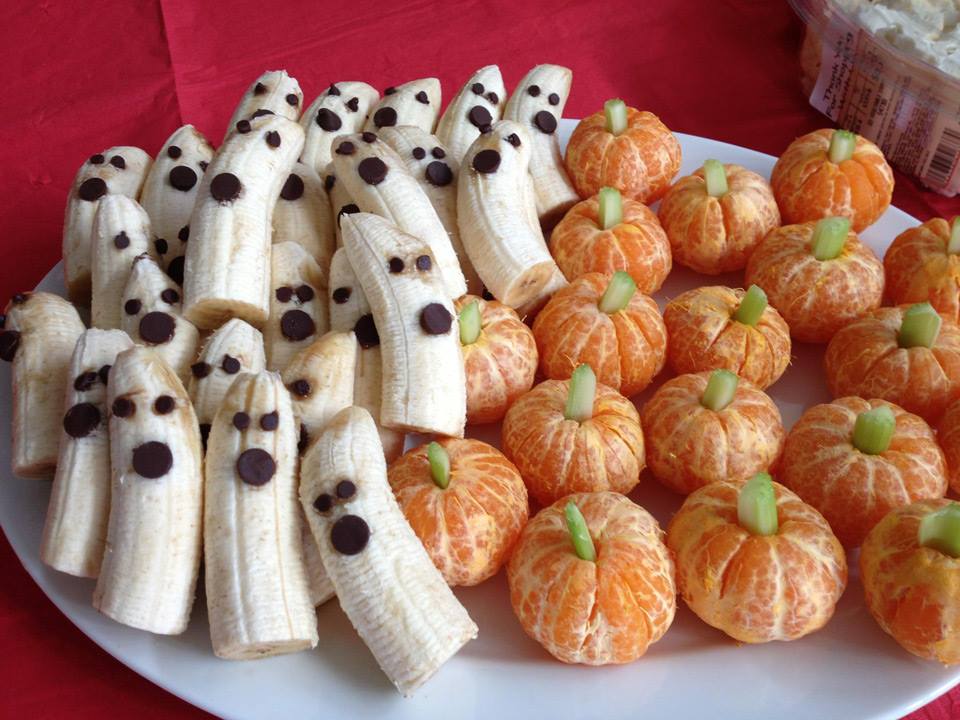
Don’t want to load up your kids with all that extra candy at the next Halloween Party? This is a great alternative to all those sweet treats.
Ingredients:
Bananas
Chocolate Chips
Cutie Mandarins
Celery
Directions:
1. Cut Bananas in half
2. Using the Chocolate Chips make the faces on the bananas to create “Ghosts”
3. Peel the Cuties
4. Cut celery into small pieces and insert into the middle of each Cutie to create the stem of the Pumpkin.
Have Fun!
DIY Halloween Cup Decorations
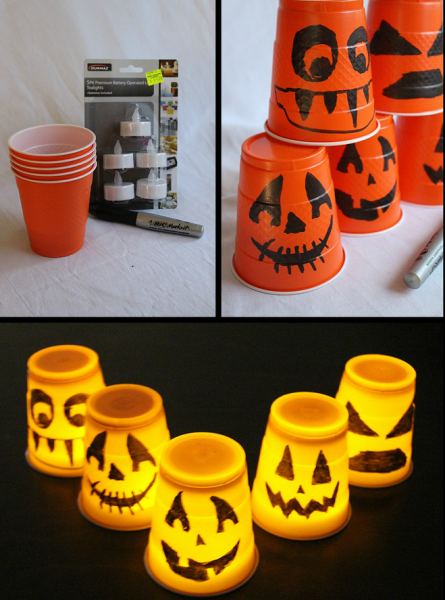
Looking for an inexpensive way to light the path to your front door this Halloween? This is such a Frugal & Fun way to do just that! The trick or treaters will surely love this one and we also think you will get compliments on your creativity as well. Happy Halloween!
What you will need:
- Battery operated tea light candles
- Orange Halloween Solo Cups
- Sharpie Marker
Instructions:
1. Draw faces on the cups, be sure you have the cups turned upside down as they will be sitting on the ground
2. Arrange them along your path as you would like to display them.
3. Place a tealight candle under each cup.
4. Watch how your your pathway lights up the night!
Have Fun!
Halloween Fruit Skewers

Having a Fun Halloween Party and want to serve up something delicious and healthy? Check out this easy, fun way to display fruit on the food table. All you have to do is make fruit skewers of your choice, poke them into a pumpkin and put a face on it! Voila! Cute, Fun Way to decorate and serve delicious snacks at your festive Halloween Party this year!
DIY Spider Pops
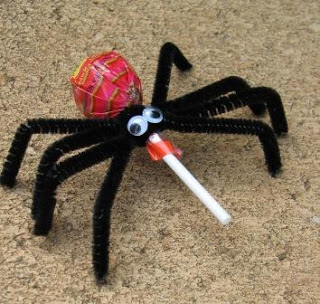
Trying to think of what to take to your child’s classroom for the annual Halloween Party? Take these Cute Spider Pops, the kids will surely enjoy! Get the scoop on how to make them HERE! What an inexpensive, yet adorable way to share sweets treats this Halloween!
DIY Fresh Orange Clove Candles
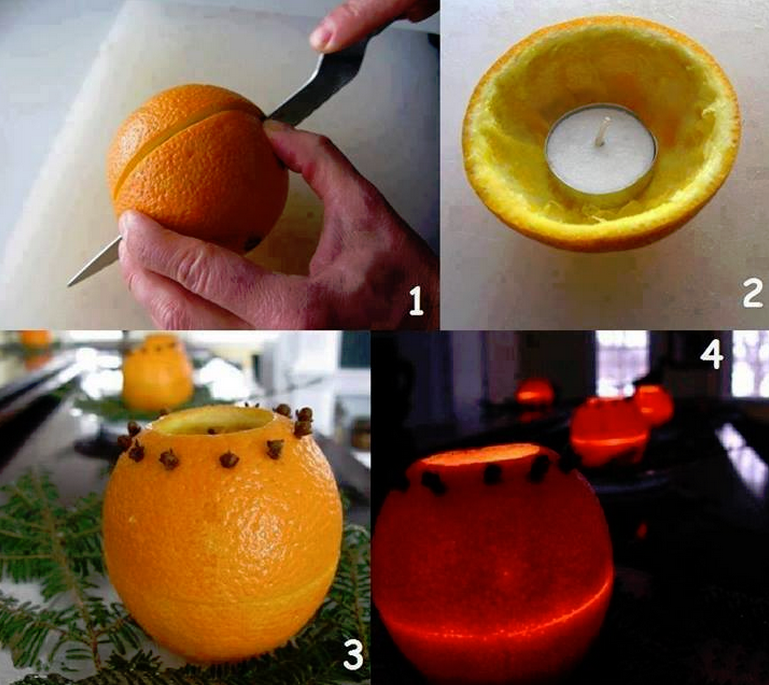
The smell of a fresh aroma in your home always makes it that much more comforting! Give your home that extra touch with this great idea for a Fresh Orange Clove Candle. It’s incredibly simple also! Simple cut an orange in half, take out the pulp of the orange, insert a votive candle and poke cloves around the top! So easy and smells amazing! You will not be disappointed.
DIY Shower Caddy for Bath Toys
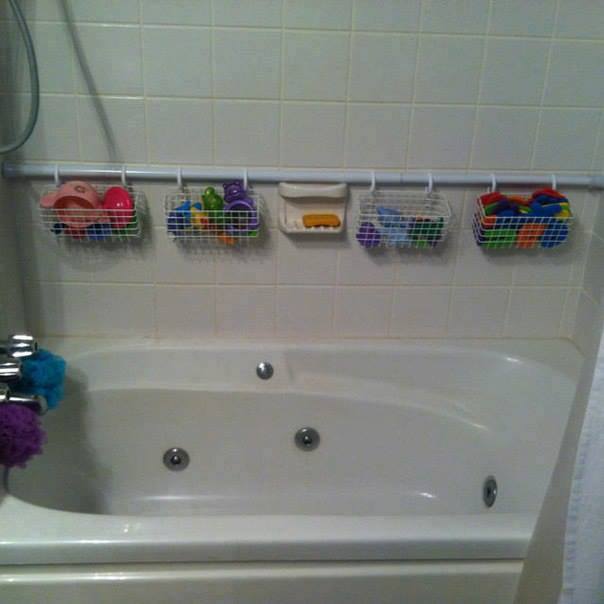
We Love awesome ideas that are inexpensive and useful! This one is a simple trick to keeping your bath toys picked up and out of the tub. It also is a way to allow all those toys to air dry and not get all moldy. YUCK! Just buy an inexpensive shower rod, with some hanging baskets. Install in your shower and you are ready to go! Problem solved!