
DIY Bunny Ears Headband

I love dressing my little ones up for Easter with cute little outfits and bunny ears. I always get them the cheap ones from Target, but I think this year I’m going to do this easy craft from Martha Stewart Baby. You can make them for kids or adults as long as you have the right size headbands!
What You’ll Need:
- Child-size headband (or adult for larger head)
- 8-by-16-inch piece of pink felt
- 6-by-6-inch piece of white felt scissors
- Pinking or scalloped shears (optional)
- Hot-glue gun
- Hot-glue sticks
- Bunny ears template
Directions:
- Measure the width and length of the top of the headband, add 1/2 inch to all sides, and cut a strip of pink felt to cover.
- Glue the felt strip onto the top of the headband, wrapping the extra material around the headband’s edges.
- Measure the underside of the headband, and cut a strip of pink felt to fit.
- Glue the strip to the underside, creating a backing that covers the edges of the top felt.
- Print out our bunny-ears template, and cut out both shapes.
- Trace the outer-ear shape onto pink felt twice, and cut along scalloped edge (or cut out with pinking or scalloped shears).
- Trace the inner-ear shape onto white felt twice, and cut out with regular scissors.
- Glue each pair of ears together with hot glue, and let dry.
- Crease each ear vertically down the middle, and press.
- Fold up the bottom flaps on either side of the notch, and attach to headband with hot glue, pulling notches closed so ears are slightly bent. Hold until glue sets.
Kool-Eggs: Using Kool-Aid to Dye Easter Eggs
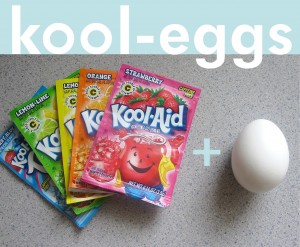
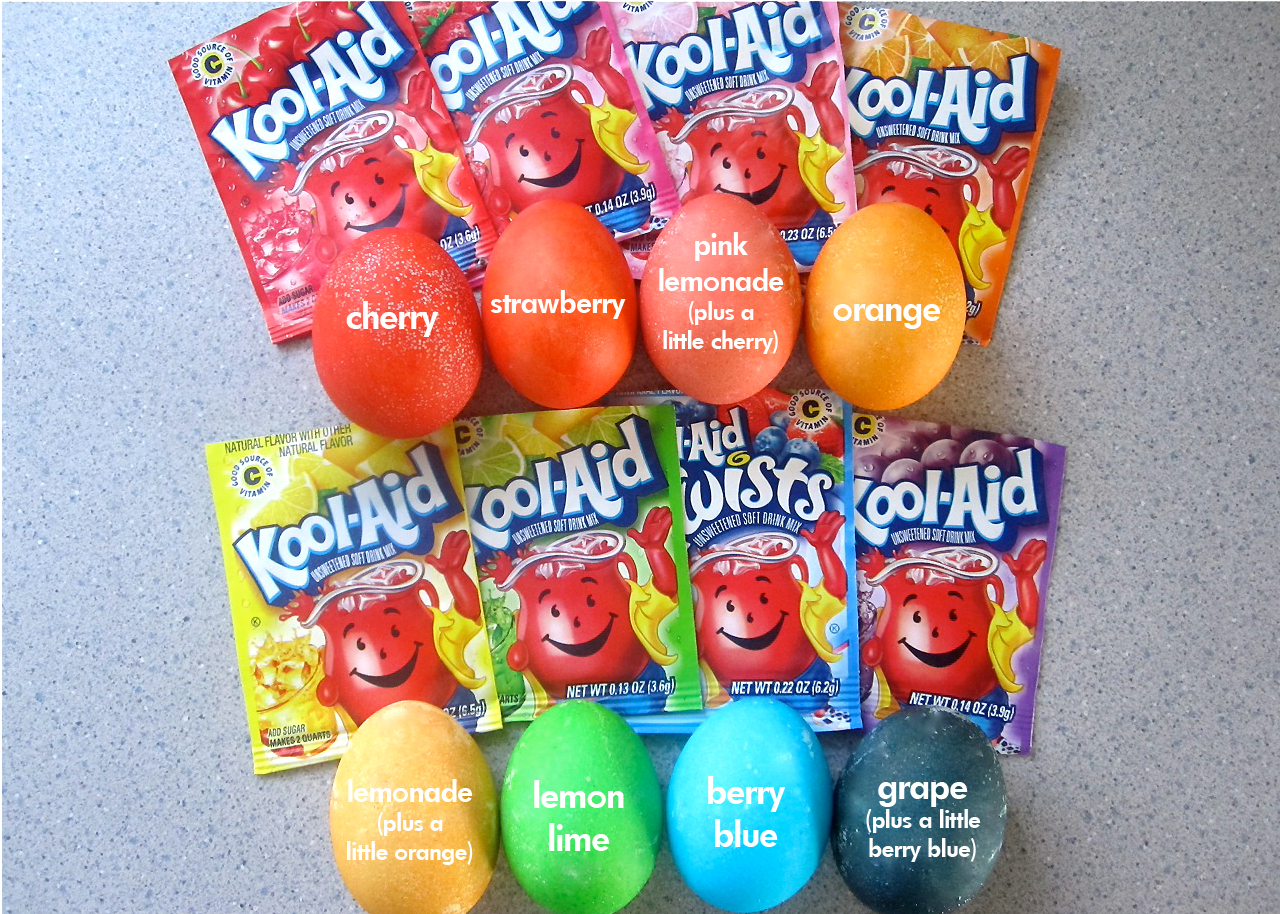
Skip the expensive and hard to use egg dying kits this year. The dye kits usually use vinegar or tablets and you have to wait to dissolve. Use just plain ol’ Kool-Aid! You can usually find Kool-Aid packets on a sale for 5 for $1 (usually less!), they smell sweet instead of chemically. All you need are hard boiled eggs, a spoon, tongs, or another way to get the eggs out of the dye, lots of paper towels, and a cup or bowl for each color. To make the dye: 2/3 cup of water for each packet of Kool-Aid and mix together.
For some aid with colors, use the tutorial from Hey Jen Renee’s blog and her trial and error with the colors. Some will come out more colorful than others and some need to be mixed with other colors to get a color at all. See pic below and have fun!
DIY Four-Leaf Clover Door Hanging
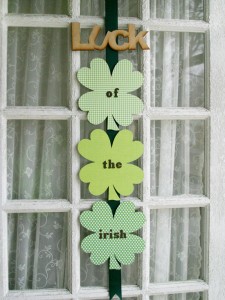
It doesn’t seem like it’s possible, but St. Patrick’s Day is only about a week away! Get your home a little bit more into the Irish spirit with this really cute and easy door (or wall if you’d rather) hanging from over at Good Housekeeping.
At your local craft store, buy either 3 or 4 wooden shamrock shapes (Note: If you can’t find a wooden “LUCK” cutout, just buy a 4th shamrock and follow the directions for how to make them). With a variety of different patterned green scrapbook paper, use spray adhesive to attach the front of the shamrock to the back of the scrapbook paper and allow to dry. Cut the shamrock out of the paper using a utility knife or scissors, then using a foam brush, apply Mod Podge over the front of the shamrocks to seal in the paper, then allow to dry. Using green scrapbook letters, spell out Luck (if needed), of, the, Irish. Last, attach the finished shamrocks onto the long piece of green ribbon using several glue dots to hold them on.
Except for waiting for the glue and Mod Podge to dry, this should only take a few minutes and can last for years!
Easy DIY Scrappy Wreath

Looking to make a spring wreath? Better yet, trying to think of a way to save some of your child’s favorite baby outfits and other stuff? This DIY scrappy wreath is the answer! Takes only a few minutes and a few bucks.
Go to the craft store and get a plain straw wreath or foam wreath. You can also save a couple of dollars and go to the hardware store and buy foam tubing, cut it into the size you want, the duct tape the two ends together.
Cut fabric out of your favorite old clothing, blankets, ribbon, or other items. Hot glue them around the wreath securely. Keep going until all of the foam or straw is covered.
Staple, tack, or glue on buttons, flowers, pacifiers, pins, earrings, necklaces, or any other decorative item you want to the wreath.
When the wreath is how you want it, you can either hang it as is, or use a long piece of ribbon or fabric, stick it through the center, and tie it in a a bow to use as the hanger.
Thanks to BluKatKraft for the picture!
Ridiculously Easy No Sew Boot Cuff Tutorial
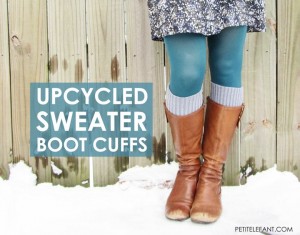
These boot cuffs are all the rage right now. You can buy a pair for $13 or more, OR you can make them yourself without needing to sew at all! Take an old sweater you don’t wear anymore (or buy one at a thrift store), cut the sleeves off, and put them on over your pants/socks. If you want to make sure it doesn’t unravel, use fabric glue to cuff the part where you cut. That’s it! SO CHEAP AND SO EASY!