


DIY Elastic FOE Headbands Tutorial

You can either spend $3 or more for one headband on Etsy or other shop, OR you can follow my directions to make adult and/or children’s sized elastic headbands for about $1 or less and in the design of color of your choice. I chose to do it on my own when I found an epic deal on Frozen and Disney Princess FOE for literally less than $1 per yard shipped on a Groopdealz or Jane steal, so I had to figure it out to surprise my girls and use my own pictures as the tutorial! The headbands literally took me less than 2 minutes to make 2-3 and look exactly like what you buy at the stores – and this is my first time making them :)
You can also make your own elastic hair ties with the tutorial I posted previously, and you can make ties with leftover FOE.
Note: Some shops take a long time to ship, so order in plenty of time if you are (or your child is) going to need to wear the headband for a special occasion.
What You’ll Need:
- Fold Over Elastic (FOE) ordered with the designs or colors you want (1 headband: 18″ for big kids & adults, 16″ for baby/toddler)
- Scissors
- Ruler or measuring tape
- Optional: Lighter or matches
Directions:
- Gather all supplies and decide which sized headbands you are making – adults and kids 4+ wear 18-in long FOE, while toddlers and babies wear 16-in long FOE. Use your best judgement on each. It’s better to cut too long then crop down than to cut too short and have to make them into hair ties.
- Measure out your first length of FOE. DO NOT STRETCH THE ELASTIC WHILE MEASURING! This will make the length inaccurate. Double check the length measurement again, then cut the elastic.
- Using the elastic you just cut as your guide, cut as many pieces of the FOE as you’d like to make into headbands.
- Fold in half the first headband and line up the edges. If they aren’t straight, cut them into a straight line.
- Now is the time you can decide to use a lighter or a match to melt the edges together to prevent fraying in the future. I didn’t do it, but I may choose to do it later.
- Holding both ends, tie the headband ends together as closely to the end as you can and tighten into as small of a knot as you can.
- Repeat 4-6 until you are finished with all your headbands. This should only take you a few minutes to make 10 or more headbands!
DIY Cloth & Disposable Baby Wipes Tutorial
Did you know the average parent uses 4,400 baby wipes and spends $150 or more EVERY YEAR on a baby? That alone is crazy, but also a majority of baby wipes aren’t biodegradable, so they are harmful to the environment. Also, they can contain chemicals like chlorine, synthetic preservatives, fragrances, and dioxin. To save money, baby’s skin, and the environment, you can make your own washable wipes with just a few ingredients and cloths.
See below for DISPOSABLE wipes directions.
What You’ll Need:
- 15-20 pieces of approx. 10″x 10″ cloth cut from old receiving blankets or shirts (many use husband’s old white undershirts)
- 3 cups warm water
- 1 cup baby wash
- 2 tsp baby oil
- Plastic container with lid or old plastic wipes container OR Spray bottle
- Optional: Lavender oil for fragrance
Note: Other recipes use ingredients like aloe vera juice, apple cider vinegar, other essential oils, soap, and more. Experiment with what you like best.
Directions:
- In a bowl, add ingredients and mix gently.
- Next you have the choice:
- In the container to store wipes, stack all the cloth into it, pour the mixture over them, then close the lid, OR
- Put the mixture into a spray bottle, then just spray baby’s bottom and use a clean, dry cloth to wipe them clean.
- When wipes are dirty, store in a plastic or wetbag, then wash with cloth diapers or as a load by themselves.
If you do not want to use cloth/reusable wipes, or you want to have disposable ones in case of really big messes, you can put all the ingredients in a large cylindrical container with a lid (i.e., washed out cleaning wipes container, like Clorox wipes, or cleaned 4 qt ice cream container), mix the ingredients, take the cardboard out of the center of a roll of paper towel of your choice and place the paper into the solution. Cover the container, shake to get the ingredients into the whole paper towel.
DIY Sea Salt Beachy Hair Spray & How-To Style Tutorial

I love the look of beach waves, but to buy a bottle of sea salt beach hair spray can cost upwards of $12. This tutorial will cost you only a couple of dollars, works just as well, and will smell even better!
What You’ll Need:
- Plastic spray bottle (you can grab these at the dollar store)
- 1 tsp sea salt (NOT table salt!)
- 8 oz water
- 1/2 tsp coconut oil, olive oil or light conditioner (coconut oil is the best and smells most beachy!)
- 3 drops essential oil of your choice
- Lemon juice (optional)
Directions:
- Remove the top from the spray bottle. Pour water into the plastic spray bottle.
- Add sea salt to the bottle. The more salt you add, the more “crunchy,” textured and beachy your hair will feel, but dryer as well.
- Add moisturizer to combat the drying factor of the salt. Use coconut oil, olive oil or light conditioner. Avoid adding more than a teaspoon because it can weigh down your hair instead of adding wavy volume.
- Add essential oil for fragrance and additional benefits of your choice. For example, rose essential oil aids hydration and peppermint helps with headaches. Choose your favorite oil based on scent and healing properties.
- Close the top of the bottle tightly and shake the bottle’s ingredients vigorously for ingredients to mix. If you don’t shake the bottle VERY HARD, the oil will remain on the surface and the salt on the bottom.
- Spray all over hair until it becomes very damp. Scrunch your damp locks with your fingers to accentuate its natural wave. Let your hair air dry. Note: If your hair is naturally straight, twist your locks to achieve better results. Twist locks of your hair into buns. Pin them on your head with hair pins. When your hair is almost dry, unwrap your locks and let them out of the buns gently. Let air dry fully.
- Style as you’d like or leave as is. Spray with a layer of hairspray for extra support.
- Store the spray bottle and mixture in the fridge when not in use. Shake very hard before each use.
DIY Head Scarf
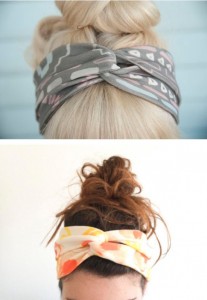
Head scarfs are super stylish right now, but to buy them already made into a headband or head scarf is pretty expensive (I’ve seen them for $20 or more just for ONE), and it limits the designs to what the creators choose. Make them yourself in literally seconds and you can make them out of your grandmother’s hand-me-downs, the cute one you saw at the thrift store, or the expensive ones. Up to you which scarf you wear, but here’s how to wear it as told by Lucky Pony.
Wrap the scarf around your head with the middle of the scarf at the nape of your neck. Twist the two ends around each other once 3. Wrap the scarf back down to the bottom of your head and knot with a bow. You can choose if you want to reverse it and have the bow at the top of your head instead – versatile head scarf instructions! Enjoy!
DIY Chocolate Mint Body Butter
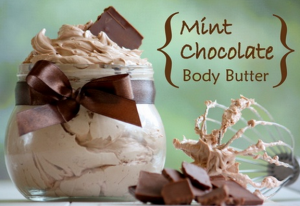
While on Pinterest the other day, I stumbled across this amazing recipe for a DIY Chocolate Mint Body Butter. I sounded like an amazing experiment I once got a container of this for a gift and know that it cost nearly $15 for a small container. This one is a little cheaper to make and you get so much more for your money. Plus you can make it with more organic/chemical free ingredients. The main recipe came from a website called mommypotamus.com. I also found another one (there was no credit on that one) and have sort of combined the two to get the best effect.
- 1/2 cup of cocoa butter (it’s listed as cacao butter sometimes.)
- 1/2 cup mango or shea butter (you can also substitute another 1/2 cup cocoa butter. It will be a little less “light” when whipped up, but it was really amazing…especially for dry skin.)
- 1/2 cup coconut oil
- 1/2 cup of jojoba or a mild olive oil. I used olive oil and that gave outstanding results and was my favorite.
- 1-2 teaspoons peppermint essential oil (the more you add the stronger the mint scent)
- 1 1/2 tablespoons pure cocoa powder (if you would prefer a “white chocolate” version that is not a bronzer, substitute arrowroot powder or non-GMO cornstarch)
- 2 teaspoons naturally derived vitamin E (optional). I pierced some vitamin E capsules and it worked well!
How To Make Whipped Body Butter:
- Prepare an ice bath by filling a large bowl with ice and fitting a smaller bowl inside. The inside bowl needs to be able to hold at least 4-5 cups of liquid. Glass works better than metal.
- Using a double boiler or a pot of boiling water with a smaller pot fitted inside, melt cocoa butter and mango butter over a low simmer. This will prevent it from scalding.
- Add coconut oil and melt until completely liquid.
- Remove cocoa butter/coconut oil mixture from heat.
- Measure 5 teaspoons of cocoa powder into a small bowl and gradually add several tablespoons of jojoba/almond/olive oil. Mix thoroughly and then add to cocoa butter/coconut oil mixture along with remaining jojoba/almond/olive oil.
- Place mixture in chilled bowl (which should still be resting above the ice bowl) and allow to cool for 10-20 minutes.
- Remove mixture from ice bath and whip very well until stiff peaks form. If after a few minutes it does not seem to be thickening return the bowl to the ice bath and whip there.
- Store in an airtight jar – Keep out of sunlight to prevent oxidation. I keep mine in the cupboard a.k.a cool dry place.
- You will also want to store it in a cool place. If your bathroom gets warm, it’s not the place to keep this.