


DIY Scented Bath Bombs
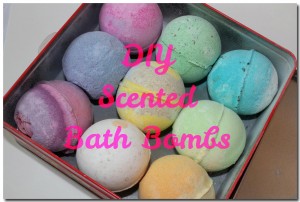
Women are super in love with bath bombs (or bath fizzies) right now. I have a lot of friends that buy them at LUSH and they’re $5 EACH. So, they’re paying $5 every time they take a bath. That’s crazy to me. Here is a really simple, natural way to make your own bath bombs from Vitacost at home in minutes and for literally a few cents each bomb!
What You’ll Need:
- ½ cup of citric acid
- 1 cup of baking soda
- 3 oz. witch hazel
- Small spray bottle
- Rubber ice cube trays or molds
- Essential oil of your choice (lavender works really well)
- ½ cup of Epsom salt or sea salt
- Cocoa butter
Directions:
- Stir together the citric acid, Epsom or sea salt, and the baking soda until very well blended. Make sure all of your dry ingredients are well combined, or your bomb may turn into more of a dud.
- Fill the spray bottle with the witch hazel and a small amount of cocoa butter. This will help bind the bomb together, and also help with moisture.
- Add a few drops of your favorite essential oil.
- Spray the liquid mixture into the dry ingredients, stirring well, until it starts to clump. When the mixture holds shape, quickly transfer it to your mold.
- Let your bombs dry for a short time (about 10 to 15 minutes), then remove them from the mold. Try lightly tapping the underside if they don’t come out easily.
- Let bombs dry overnight before use.
- Then just plop your bomb into the bathtub and be whisked away to a land of bliss!
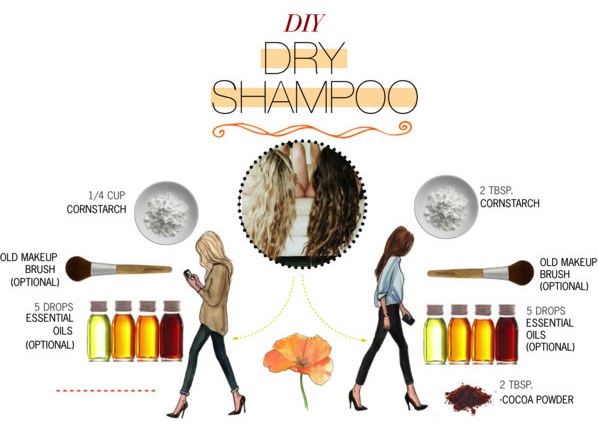
DIY Dry Shampoo For Both Light & Dark Hair
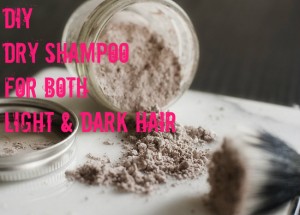
From Blossom Everyday, find this and many other tutorials and hints for style and beauty! This recipe for dry shampoo will save you A LOT of money on dry shampoo (that stuff can cost $5 for a tiny bottle!). Just store this mixture in an old plastic container or some prefer spice containers to place directly onto your head.
To make it more “your hair shade” add as little or as much cocoa powder as you need. Medium brunettes may not need as much as someone with dark hair. Experiment and enjoy!
DIY Nail Polish Remover Jar
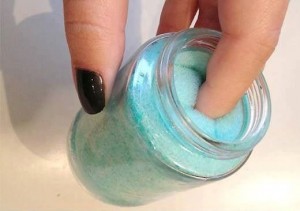
Why pay $5 or more for the nail polish remover/sponge all-in-one jar? Make it at home over and over again. It’s got to be way cleaner to replace it more often and it will be a small percentage of buying them over and over again at the store! It actually does save on nail polish remover: The amount that you pour in the jar and use 5x (or more) is the same as what you would use to remove ONE manicure! It’s also great to remove glitter polish.
What You’ll Need:
- Nail polish remover (acetone is stronger, but it dries your nails and cuticles out, so be careful)
- Dish sponge (plain, without the scrubber side)
- Baby food jar (or something small and can be resealed)
Directions:
- Cut your sponge in half directly down the center lengthwise.
- Roll your two sections of sponge together (like a cake roll).
- Push your sponge snugly into your baby food jar and fill it with nail polish remover a little bit at a time until it fills up the sponge.
- Tightly screw the lid on every time so it doesn’t dry out!
When you’re ready to use it, just stick your finger into one of the crevices, let sit for about 10-15 seconds, then rub your nail up and down a few times. For glitter, let your nail sit in the sponge for 60 seconds and check to see if it is easy to remove. If not, let it sit for another minute. Repeat.
Thanks to Bella Shoot for the pictures and tutorial!
Easy Natural DIY Lip Balm
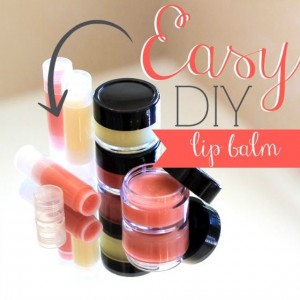
Why spend $3 or more per tube of lip balm? You can make it yourself in just minutes and for a fraction of the cost. Plus, every ingredient is all natural and safe to use over and over again! The directions below will make a couple of small lip gloss jars or tubes. You can double the recipe or stick to the ratio of 1 part beeswax to 2 parts oil to make as much as you want! Adding different oils will feel and taste different, so experiment and find what you love most.
What You’ll Need:
- 1 tsp. of grated packed down beeswax or beeswax pellets
- 2 tsp. of coconut oil
- 4-5 drops of Vitamin E oil
- 1/2 tsp. of honey
- To make colored lip balm, you’ll need some of your favorite blush or lipstick (optional)
Directions:
- Mix all the ingredients together and microwave for 10 seconds. Stir, then another 10 seconds. Do this over and over until it is fully melted and mixed together.
- Once everything is melted and mixed, IMMEDIATELY and carefully pour the mixture into the container of your choice.
- Allow to cool and fully harden (a few hours) before using or giving as a gift.
DIY Threaded Rhinestone Hoop Earrings
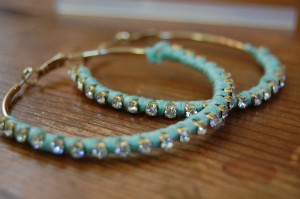
You can buy your own pair of fun threaded rhinestone earrings for $5-$15 each pair, but that gives you just ONE pair. If you want to get a pair for many different outfits or for different seasons, then you’ll go broke! Spend a few minutes and make them yourself with this tutorial from Just B.
What You’ll Need:
- Rhinestone chain (can be purchased at art supply or craft stores)
- Hoop earrings (in the same metal color as whatever the rhinestone chain comes on)
- Embroidery floss (whichever color you’d like!)
- Hot glue gun

Directions:
- Cut the rhinestone chain into 2 strips of the length of about half of the hoop earring.
- Lightly apply hot glue to the rhinestone chain and place onto the bottom half of the hoop (or if you’d like to show more rhinestone, then put it more toward the front of the hoop). Doesn’t need to be neat since the thread will be going over the glued part.
- Tie a knot around the earring on the BACK of the hoop with the floss. Put it between the first 2 rhinestones.
- Wrap the floss between each rhinestone (back and forth) making sure to wrap the side of the floss that sticks out from the knot back into the rhinestones. You don’t want to cut the end because the floss will unravel.
- When you reach the end, switch directions and go back toward the other side of the rhinestone chain. This should cover the whole chain.
- When you’re back to the other end, double knot the end of the floss and snip. Since this is the back of the earring, it will be barely noticeable.
- Put them on -TAH-DAH!!! Makes a great gift. So easy you could make DOZENS of them.