
Layered Patriotic Non-Alcoholic Drink Recipe
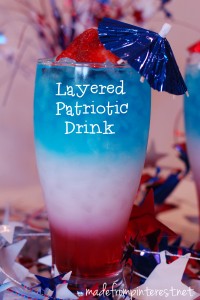
When it comes to the beautiful layered drinks, whether they are adult beverages or not, the way to get the drinks to have the layered look depends on the sugar content of each of the types (colors) of beverages. The higher the sugar content, the lower it needs to be in the glass. Thanks to Made From Pinterest for the easy (and pretty!) recipe!
- To make this beautiful Red, White, and Blue Patriotic and non-alcoholic drink, you just need Cran-Apple juice (of any brand), Sobe White Pina Colada, and Gatorade G2 Blueberry Pomegranate (the last two drinks do make a difference for sugar content and color).
- Grab your pretty glass and fill it almost to the top with crushed ice.
- Pour the Cran-Apple juice down the side of glass as close as you can to leave as little red on the upper parts of the glass as possible. Fill the red juice as high as you’d like it.
- Then pour the Sobe Pina Colada with as much as you’d like of white. You’ll see the Cran-Apple juice stays low since it’s higher in sugar content.
- Finish off the top of your drink with the Blueberry Pomegranate Gatorade.
- Add the straws and any fun patriotic decorations you’d like. Enjoy!!
Copycat McDonald’s Shamrock Shakes
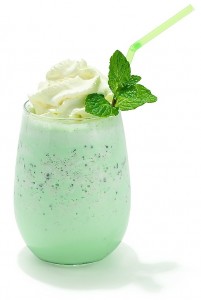
It’s that time of year, one of the best times of the year ever! McDonald’s Shamrock Shakes are back! It’s nearly a holiday in itself, but making them at home is SO easy. Here’s how to make Shamrock Shakes:
Ingredients to Make 2 Servings:
- 2 cups vanilla ice cream or 2 cups soy ice cream
- 1 1/4 cups 2% low-fat milk or 1 1/4 cups soymilk
- 1/4 teaspoon mint extract
- 8 drops green food coloring
- whipped cream can
Directions:
- Combine all ingredients in a blender and blend on high speed until smooth.
- Stop blender to stir with a spoon if necessary to help blend ice cream.
- Pour into 12-ounce cups, cover in whipped cream, and serve each with a straw.
Recipe: Nutella CrockPot Hot Cocoa
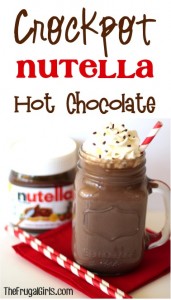
Gather around on Christmas Eve or morning and make this DELICIOUS Nutella hot cocoa using your slow cooker.
Ingredients:
- 5 cups Milk
- 1/2 cup Hershey’s Cocoa
- 1/2 cup Nutella
- 1/2 cup White Sugar
- 1 cup Hot Water
- Crockpot
Directions:
- Combine the cocoa, sugar, Nutella, and hot water in large pan. Stir, bringing to a gentle boil.
- Transfer this mixture to your crockpot, then add milk and stir.
- Cook on high for about 2 – 2.5 hours (or on low for approx. 4 – 4.5 hours), or until hot.
- Pour into mugs or Mason Jar Mugs, and top with whipped cream and sprinkles!
Thanks to The Frugal Girls for the recipe!
Starbucks Caramel Apple Cider Recipe
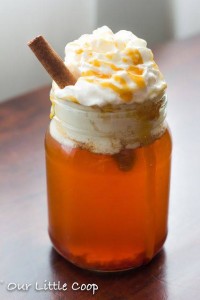
Today would be a great day to enjoy a caramel apple cider just like from Starbucks! Here’s the simple recipe:
Ingredients:
- 3 Tablespoons of Starbucks Cinnamon Dolce Syrup $9.95 for a 1-liter bottle (that’s A LOT of syrup) or you can make your own by creating a simple syrup of 1/2 cup of light brown sugar, 1/2 cup water and 1 tablespoon of cinnamon. Simmer in a small saucepan until brown sugar has dissolved. Use 3 tablespoons of this as well.
- 12oz of Treetop Premium apple juice (or any premium apple juice)
- Caramel syrup
- Whipped cream
Directions:
- Add 3 tablespoons of cinnamon syrup into your mug
- Add 12oz of apple juice, mix and warm
- Top with whipped cream
- Drizzle with caramel syrup
- Enjoy!
Thanks to Our Little Coop for the recipe!
DIY Cold Brewed Coffee
Have you ever wondered how to make some delicious tasting coffee for cheaper than what you can get it at your local shop? Well, I have recently discovered Cold Brewed Coffee. I was skeptical at first, but after some research and giving it a try, I will never go back to hot drip coffee. It is *gasp* better than Dutch Bros or Starbucks! And so much cheaper! Here is what I do:
- Measure out 1/3 cup coffee grounds (coarse are the preferred grind, apparently, but I only have fine ground which has worked just fine for me) and 1 1/2 cups cold water.
- Add both to a container that you can cover (with a lid or saran wrap). I used a pitcher with a lid.
- Cover and let sit for 12-24 hours. I put it in the fridge, but I’ve also seen some who put it on the counter.
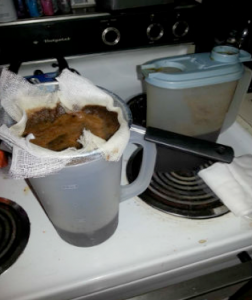
- After your time is up (the longer you let it set, the more caffeine it will have, and the richer it will be) use a second pitcher or container and strain it. I used a mesh strainer that fit just right on top of my pitcher and cheesecloth (but I bet a coffee filter would work fine too).
- Then enjoy!
I serve mine over ice and add flavored creamer. Or you can skip the ice and add milk and caramel syrup. I have a friend who blended it with vanilla ice cream and ice (which sounds delicious! If you want to add sugar, sugar won’t dissolve well since its cold, BUT I would recommend making a simple syrup which would blend nicely. (Dissolve sugar on the stove in boiling water and store in a squeeze bottle or other container) Then you can add it to your cold brewed coffee. You can also serve it hot; just nuke it in the microwave!
Why would someone want cold brewed vs. hot brewed coffee? It is richer, more caffeinated and has less acidity! Coffee usually can sometimes give people heartburn from the acid, but us coffee drinkers need our caffeine in the morning and this is the perfect fit. This stuff doesn’t give heartburn and it gives even more caffeine! Plus, it’s so delicious! You also don’t need a coffee pot on your counter! Just put that space taking machine away in the cupboard to save space for other things in your kitchen. Another bonus, it’s cheap! The straining does take some time, but make up a big batch and it will last you 2-3 days so you don’t have to strain every morning. You could also set it up in the morning then do your straining before you go to bed (which should give it at least 12 hours to set) so you just have to pour and enjoy in the morning!
I was a loyal Dutch Bros Coffee drinker. (If you are not familiar with Dutch Bros, you should move to the west coast, as it is fabulous!) This cold brewed coffee is so much better than any coffee shop I have ever tasted, and if you know me that is saying a lot!
By Tiffany, Fun 2B Frugal Contributor