
Flip Flops for .99 cents at Kmart
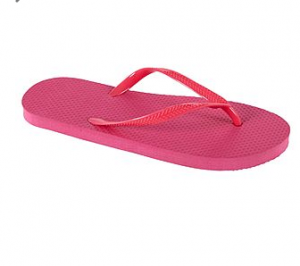
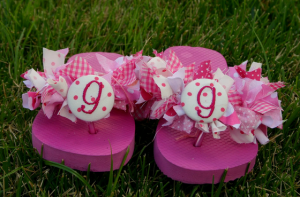
Right now you can score a great deal on flip flops at Kmart. Look for this both online (while supplies last) and in store. I just visited the local Kmart last night and they had tons of these. If you are a crafty person, these are awesome to decorate!
So the deal is hot right now so hurry! Kmart has several flip flops on sale, starting at just $0.99! Head on over to Kmart and type in the name of the sandals below in the search box, then click “Search” to find the perfect pair!
Browse through all the flip flops by typing “flip flops” in the search bar. Then sort the items from lowest to highest price. This will give those that are .99 cents. Then you can choose to ship them (not the best deal) or pick them up in store.
When you do this, basically and employee acts as your personal shopper and picks up the items and holds them for you at the layaway desk. You just head in and pick them up! It is super easy! I used this service for some of my Christmas shopping and it was wonderful!
FUN Craft Ideas
Birthday Parties
Tips for saving on Birthday Parties
FUN Kid Crafts
DIY Projects
Holiday Ideas
How to make easy Easter basket grass
FUN Kid Activities
Tips For Saving On Kids Birthday Parties

One of my favorite things to do is plan a birthday party. I have loved doing it for as long as I can remember. It’s FUN to get family and friends together and celebrate someone you love. Now that I have three kids of my own, I look forward every year to throwing them a birthday bash! However, because I am a very frugal woman, I look for the best ways to save on everything I need for the party. Having said that, I want a good deal on the cake, decorations, even the party favors!
Tip #1 Get Creative
Be creative with your theme. Don’t just choose a color and be done with it! Your child has a favorite character, movie, or book, so choose one of those! Once you choose a theme, you can do so much! One thing I suggest is to surf Pinterest! They have so many great ideas and you can make your own birthday board and pin EVERYTHING you like. Once you feel like you have enough options to choose from, go and look through your board.
Tip #2 Plan Ahead
This might sound crazy to some people, but I plan a party months in advance. Why? Because it’s saves me money. If I were to wait last minute to get all my party supplies, it would cost me a lot of money. Full price! Ahhh! That would not be very frugal now would it?
Tip #3 Take Advantage of Sales
Now I’m not just talking about your weekly grocery sales, because that would not give us much to work with for a party. Even though you will be stocking up on food items with your grocery sales, I want you to look at other sales. Office supply stores have awesome sales when it’s back to school season. This is when I like to stock up on most of my party favors. They put the prong folders on sale for as low as $0.10 (I did find them FREE this year) and if you are planning on 10 kids, that’s only $1 out of pocket for each folder! You are probably wondering what the heck you are going to do with those folders. You can’t just pass out folders and say thanks for coming! I am showing examples of my daughter’s 2nd birthday, where the theme was Elmo or Sesame Street. I got a Sesame Street coloring book that was on sale at a dollar store for 90% off. So the book was only $0.10! I could have grabbed each kid a book but since I already had the folders and the kids were so young, I decided to split the book up. I took a few pages at a time and hole punched them and made individual coloring books for the kids. Wow! I’ve only spent $1.10 so far for 10 kids. Let’s keep going.
I also want you to focus on after holiday sales. Even if the sale is months away from the event, you can get items for pennies on the dollar! After Easter is when I found the coloring books for only $0.10. They were ‘Spring’ so they were marked down with the Easter items. After Valentines Day you can find several party favor items and most of those already come in a bundle pack! Another place that is my favorite for after holiday sales is Party City. Oh my goodness they have some great stuff and when it’s on clearance I get so excited! 
In the picture above you can see the homemade coloring books I made. Since most of the kids there were around two, I set up a coloring station so as the guests arrive they could sit and color while we waited for everyone. (This is right after Launa chopped all her hair off. I am better with scissors than that!) You can see a glimpse of the huge Sesame Street banner I hung on the wall. It was HUGE! Guess what? I found it at Party City when they were having one of their clearance sales. Because I chose a theme well in advance I was able to grab this several months before the party. Okay, now add $0.75 to the bill. Usually when Party City has their clearance sale, they advertise it in the windows. Most of the time things are marked down super low and then you take an extra % off the sale price. Love that sale! This year the cheapest I’ve seen a 24 count crayon box has been $0.25. For the Elmo party I also got crayons at the Party City sale. They were only $0.10 per box! Hey, they still colored! I was only able to get 10 boxes, so I split each box in half to ensure everyone got a crayon bag and that they could take it home with them.
The two pictures below are of the party pinata. Oh yes, we have a pinata at every birthday! Now, I got this at a clearance sale. Usually I make my own pinata, I’ll do a separate post for that. But when I saw this pinata on sale for just $1.25, my wheels were turning. It originally had Bratz on it, whoever they are. But, that was just a quick fix! Since the outside was pink I just had to choose a pink Sesame Street character. Abby Cadabby! I completely covered the Bratz and it worked for our theme! Of course I filled it with Halloween candy and other FUN holiday clearance finds. Her birthday is in September, so candy was just starting to go on sale.
*So, look through the holiday sales! Pay attention to the back to school sales! Get creative!


Tip #4 Make Your Own Party Games & Decorations
This goes back to the get creative part. Just think about all the normal party games you would do. For this age, a bean bag toss was a must! Instead of having a boring bean bag toss, we incorporated a character! I made a giant Cookie Monster face and cut a big hole for his mouth so the kids could feed Cookie Monster cookies! I found some fabric at Walmart that looked like chocolate chip cookies for only $1 and I sewed little cookie bean bags for the kids to use. This was a hit! And it totally stayed in the theme. 
Other FUN birthday games are musical chairs, pin the tail on the donkey, and a balloon pop. Of course I’m thinking on my kids age level. You can do more advanced games for older kids. Scavenger hunt, obstacle course, and craft activities.
Tip # 5 Make Your Own Cake
Like I said before I absolutely love throwing a party, so with that means I don’t want a boring cake! If you are stumped on what type of cake to make, just Google it! So many people have made fantastic cakes that they are proud of and they’ve put the picture on the web! You can find so many ideas! If you are scared to go big, just do a sheet cake and pipe something on it. It doesn’t have to be perfect, but by baking it yourself, you are saving at least $20 if not more!


For the Elmo cake I got a little carried away! I explained my idea to my husband and he was like, oh no. He always does that. But, being the wonderful man that he is and not wanting me to fail, he made me a cake stand from scratch. He used scrap wood we had from my previous projects. It was really awesome. I built the cake around it and had so much FUN doing it. I had even more FUN looking at it when I was done!
You don’t have to do a stand up cake for it to be FUN. If you make it yourself, one you get practice and two you get a sense of accomplishment! I won’t show you some of my first cakes! Only my family will have those memories!
Also, cake goes on sale and you can pair a coupon with it for a great price. I stocked up on my cake well in advance and when making your own cake it’s best to make the icing from scratch. So, I also stocked up on powdered sugar and butter.
For the kids party drinks I used Apple & Eve juice boxes that were Sesame Street! It was great! They were even on sale and I got them for FREE using coupons!


So let’s go over the total for this party, shall we?
1. Party Favors (Coloring Books & Crayons) $1.10
2. Pinata Bags (Everything included) $7.25
3. Decorations (All made from poster board & construction paper) $3
4. Games $1
5. Cake (stand included) $10
6. Eating supplies (I also got these on clearance) $5
7. Snacks & Drinks $6
Total Party $33.35 *This is an over estimate!
I hope you are now excited to have your own birthday bash and save money doing it! You will be surprised how many supplies you already have on hand when planning. I am planning a party right now and I can’t wait to share it with you. I’m excited just thinking about it! I am also keeping track of every expense so I can see how well we do!
*Do you have any do-it-yourself birthday tips? Please share them with us! I love new ideas!
Mason Jar Piggy Banks

So remember a few weeks ago when I posted the awesome coupon for the mason jars? Well, we have done a few projects with them! The one I am sharing today is a piggy bank mason jar. I think it’s very important to teach my kids the value of money early and being frugal with what you have. They each got three mason jars. We then divided them for Tithing first, to thank the Lord for everything he has given us. Then Saving, because we need to save before we spend. And lastly Spending, because whether you like to admit it or not, that part is FUN! Do you want to do the craft too? Just follow the steps below!

1. Gather your mason jars.
 2. Grab any scraps around the house. This can be scrapbook paper, tissue paper, wrapping paper, or fabric. I also used ribbon.

3. Cut your paper or fabric to fit around the mason jar. Then cut pieces to fit on top of the lid.

4. Use glue, any type will do. The best is probably Modge Podge, but I was out so I used craft glue. Also get a sponge brush to apply the glue to the jar.

5. Apply the glue to the jar using your brush.

6. Wrap the cut fabric around the jar.

7. Cut a slit in each top so that you can drop coins through. I used the top of my craft scissors. (My husband tried for almost an hour using all sorts of things. He couldn’t get it so I took over! :) )

8. Apply glue to the tops and place the cut circles on. I then used a box cutter to make a slit through the fabric.

9. Make your labels. You don’t have to copy mine, you can make whatever type you want!

10. Apply your labels using the glue and sponge. You are done!

I added ribbon to my daughter’s per her request!


Easter Basket Ideas
Easter is fast on its way and it’s always FUN to get a little crafty! This year instead of buying that annoying Easter grass, (you know what I’m talking about, the stuff that gets everywhere and is obnoxious to clean) get creative!
Here is what you need:
Colored paper of your choice (I used whatever was lying around the house)
Shredder
That’s it!


Take the paper and shred it! I did the entire length of the paper, but to get smaller pieces just cut the paper in half first. Now you are ready to add it to your Easter basket! FUN & FRUGAL!
