
How to Cook Pumpkin Seeds
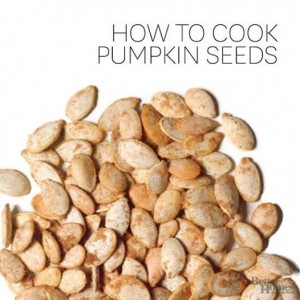
Most families like to save their pumpkin seeds from the pulp of their jack-o’-lanterns and allow them to dry. Then which recipe is the best for those pumpkin seeds? This 5-star rated recipe from Food.com is PERFECT and everyone will love it – simple, delicious, and traditional. Enjoy!
Ingredients (Makes 1 cup of seeds):
- 1 1/2 cups pumpkin seeds
- 2 teaspoons melted butter (olive oil or vegetable oil also work well) or 2 teaspoons melted oil (olive oil or vegetable oil also work well)
- salt
- garlic powder (optional)
- cayenne pepper (optional)
- seasoning salt (optional)
- cajun seasoning (optional)
Directions:
- Preheat oven to 300 degrees F.
- It’s okay to leave some strings and pulp on your seeds (it adds flavor), but be sure to clean off any big chunks.
- Toss pumpkin seeds in a bowl with the melted butter or oil and seasonings of your choice.
- Spread pumpkin seeds in a single layer on baking sheet.
- Bake for about 45 minutes, stirring occasionally, until golden brown.
Recipe: Copycat Cracker Barrel Hash Brown Casserole
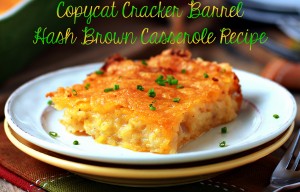
One of my favorite restaurants for breakfast is Cracker Barrel, and I mean beyond the giant checker board and triangle peg games. Cracker Barrel’s Hash Brown Casserole is my favorite restaurant breakfast food. I am thrilled to have found how to make it at home!
- 8 Tbsp cold unsalted butter, divided
- 4 Tbsp all-purpose flour, divided
- ¼ tsp poultry seasoning
- ¼ tsp onion powder
- ¼ tsp garlic powder
- ½ tsp kosher salt
- ½ tsp fresh ground black pepper
- ½ cup milk
- 1 cup low-sodium chicken broth, divided
- ½ cup chopped onions
- 1 (26 oz) package frozen shredded hash browns
- 1 (8 oz) package shredded colby cheese
Note: You can cut the casserole in half and bake into two 8×8″ casserole dishes, then freeze or save for later use.
- Preheat oven to 375 °F.
- In medium saucepan over medium heat, melt 2 tablespoons butter. Once butter is melted, add 2 tablespoons of flour and all listed seasonings. Whisk to create a paste. Add milk, whisking as you pour. Whisk until completely combined.
- In a quart sized mason jar combine 2 tablespoons flour and chicken broth. Seal tightly and shake the living tar out of your mixture. You will create a smooth flour mixture for thickening your sauce called a slurry.
- Slowly pour slurry into mixture, whisking constantly. Bring to a boil and cook for 2 minutes, stirring constantly.
- Pour soup into 9×13 casserole dish. Add remaining 6 tablespoons butter and onions. Stir until butter is melted. This will also start to cool your soup. Add cheese and frozen hash browns. Mix well with a spoon.
- Bake 25 minutes or until the top is golden brown. Note: You can add more cheese to the top of the casserole in the last 10 minutes of baking if desired.
- Let cool slightly, cut into 12 pieces, serve and enjoy!
Recipe: Easy Ragu Stuffed Peppers
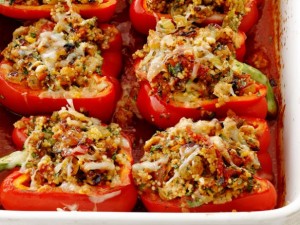
It’s nearly fall and we’re all looking for warm, simple, and filling meals. Here’s an easy recipe for Ragu Stuffed Peppers from The Food Channel that can also be great to be in a tailgating potluck!
Ingredients:
- 4 bell peppers (red, yellow or a mix), halved lengthwise with seeds removed
- 2 tablespoons extra-virgin olive oil
- Kosher salt
- About 3 cups Ragu sauce (or equivalent)
- 1/2 cup couscous
- 3/4 cup golden raisins
- 3/4 cup grated asiago or fontina cheese
- 4 teaspoons red wine vinegar
- 1/2 cup chopped fresh parsley
- 2 tablespoons tomato paste
Directions:
- Preheat the oven to 450*F. Toss the bell pepper halves with 1 tablespoon olive oil and 1/2 teaspoon salt in a large microwave-safe bowl.
- Cover bowl and microwave them until the peppers soften, 10 to 12 minutes.
- Mix the Ragu (or other sauce), couscous, raisins, 1/2 cup cheese, 3 teaspoons vinegar, the parsley and 1/4 teaspoon salt in a bowl.
- Whisk the remaining 1 tablespoon olive oil and 1 teaspoon vinegar, the tomato paste and 3/4 cup water in the bottom of a large nonreactive baking dish.
- Carefully move the peppers, cut-side up, to the baking dish & fill with the couscous mixture. Sprinkle with the remaining 1/4 cup cheese.
- Cover the dish with foil and bake until the peppers are tender and the filling is hot, or about 20 minutes.
- Transfer the stuffed peppers to plates and drizzle with the cooking liquid from the dish.
Recipe: Gluten-Free Coconut Banana Bread
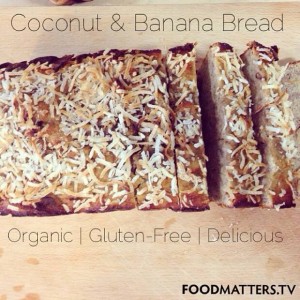
From the book, Food Matters, comes a delicious and wheat and gluten-free bread that can be used for breakfast and dessert! In my opinion, you could toast it and also use it as french toast!
Ingredients:
- 2 bananas; at least 1 heaped cup of chopped banana
- 1/4 cup coconut oil, melted
- 4 organic free-range eggs
- 4 fresh dates, pitted and chopped
- 1 tbsp pure maple syrup or raw honey
- 3/4 cup coconut flour
- 1/2 tsp aluminium-free baking powder
- 1/4 tsp unrefined sea salt
- 1/2 tsp cinnamon powder
Directions:
- Preheat oven to 350F. Mash bananas with the chopped dates.
- In another bowl, whisk the eggs until fluffy and then combine with the mash. Stir through the oil and maple syrup or honey. Add the dry ingredients and combine well.
- Transfer the batter to a loaf pan, greased and lined. The mixture will be quite thick; flatten and smooth with a spatula.
- Bake 35-40 minutes. Ready when a knife comes out clean and the edges are browned. Eat while still warm, or allow to cool completely on a wire rack before storing in an airtight container in the fridge.
Note:
It’s best to use overripe bananas in banana bread! Coconut flourit doesn’t have the glycemic load of grain flours, has no gluten or anti-nutrients, but it also doesn’t yield the ‘fluffiness’ of regular glutenous flours, so it might take some getting used to. This recipe gives the best bread texture without using wheat.
Recipe: Red, White & Blue-Berry Trifle
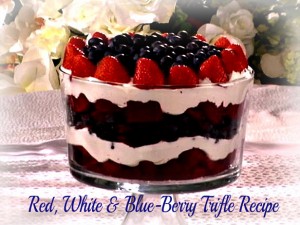
If you’re looking for a delicious dessert for Memorial Day or Independence Day that has simple ingredients and LOTS of fresh and juicy summer berries, you will love this Red, White & Blue-Berry Trifle. Make it any time of year!
Ingredients:
- 1 box red velvet cake mix (Note: Instead of red velvet cake, use 1 box chocolate cake & a bottle of red food coloring)
- 1 (16oz) tub whipped topping
- 2 pints blueberries, washed
- 1 pint strawberries, tops cut off, washed
Directions:
- Bake red velvet cake mix according to package directions. Allow to cool.
- With a serrated knife, cut the cake into 1-inch square pieces.
- Line the bottom of the trifle bowl with half of the cake squares.
- Using a spatula, spread about a 2-inch layer of whipped topping on top of the cake squares.
- Layer about 1 1/2 pints of the blueberries on top of whipped topping.
- Layer the remaining cake pieces on top of the blueberries to create a second layer of cake.
- Using a spatula, spread remaining whipped topping over the top layer of cake.
- Decorate the perimeter (along the bowl sides) with the strawberries by placing the strawberries cut side down.
- Sprinkle the remaining blueberries on top of the trifle inside the strawberry perimeter.