DIY Head Scarf
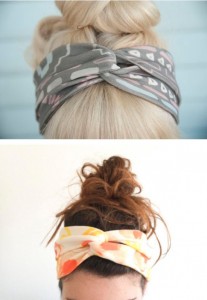
Head scarfs are super stylish right now, but to buy them already made into a headband or head scarf is pretty expensive (I’ve seen them for $20 or more just for ONE), and it limits the designs to what the creators choose. Make them yourself in literally seconds and you can make them out of your grandmother’s hand-me-downs, the cute one you saw at the thrift store, or the expensive ones. Up to you which scarf you wear, but here’s how to wear it as told by Lucky Pony.
Wrap the scarf around your head with the middle of the scarf at the nape of your neck. Twist the two ends around each other once 3. Wrap the scarf back down to the bottom of your head and knot with a bow. You can choose if you want to reverse it and have the bow at the top of your head instead – versatile head scarf instructions! Enjoy!
DIY Bunny Ears Headband
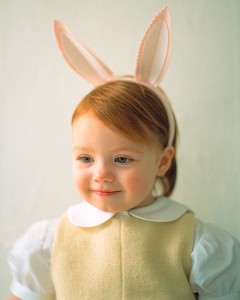
I love dressing my little ones up for Easter with cute little outfits and bunny ears. I always get them the cheap ones from Target, but I think this year I’m going to do this easy craft from Martha Stewart Baby. You can make them for kids or adults as long as you have the right size headbands!
What You’ll Need:
- Child-size headband (or adult for larger head)
- 8-by-16-inch piece of pink felt
- 6-by-6-inch piece of white felt scissors
- Pinking or scalloped shears (optional)
- Hot-glue gun
- Hot-glue sticks
- Bunny ears template
Directions:
- Measure the width and length of the top of the headband, add 1/2 inch to all sides, and cut a strip of pink felt to cover.
- Glue the felt strip onto the top of the headband, wrapping the extra material around the headband’s edges.
- Measure the underside of the headband, and cut a strip of pink felt to fit.
- Glue the strip to the underside, creating a backing that covers the edges of the top felt.
- Print out our bunny-ears template, and cut out both shapes.
- Trace the outer-ear shape onto pink felt twice, and cut along scalloped edge (or cut out with pinking or scalloped shears).
- Trace the inner-ear shape onto white felt twice, and cut out with regular scissors.
- Glue each pair of ears together with hot glue, and let dry.
- Crease each ear vertically down the middle, and press.
- Fold up the bottom flaps on either side of the notch, and attach to headband with hot glue, pulling notches closed so ears are slightly bent. Hold until glue sets.
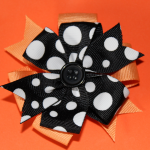
DIY: Handmade Turkey Hair Bows
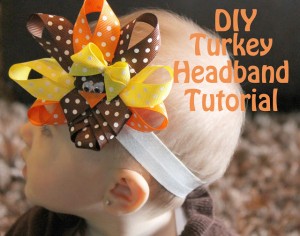
I don’t know about you, but I know I’ve spent $10 or more for Thanksgiving turkey bows. I found a really simple tutorial so that you don’t have to pay more than a buck or two for them. You could even make them as gifts or sell them if you’d like!
What You’ll Need:
- Glue gun
- Scissors
- Brown 5/8 ribbon ( patterned or plain)
- Yellow 5/8 ribbon
- Orange 5/8 ribbon
- Wiggly Eyes
- Headband or hair clip
- Optional: thin wire
Directions:
- Cut strip of brown ribbon about 2″ long, fold in half and glue the two ends together on the inside part (the part not showing) and press. Set it aside.
- Cut 3 more brown ribbons: 4″, 4.5″, and 5″. Put glue on the end of each ribbon on the side you want showing to create a curve like an oval or O, press and set aside all 3.
- Grab the first 2″ ribbon you folded inside the smallest loop bow that you created in #2 and glue inside.
- Glue each ribbon inside of the next size larger (see picture below). This creates the turkey’s body.
- Cut another 3″ ribbon and glue as in #2 to make the turkey’s head. Glue to the body.
- Now time for the feathers: Cut 3 orange, 2 yellow, and 2 brown into 5.5″ strips. Loop around and cross at the very ends. Glue the ends together on the side that you want showing (they look like the feathers in the first picture).
- Glue the feathers like this and in this order: orange in the middle of the body behind the head/body, then two brown to each side, 2 yellows beside/below the brown, then 2 orange very last.
- Use a small triangle of orange ribbon as the beak and glue to the head. Then attach two wiggly eyes above it.
- You can stop there or create a “girly” turkey and make a bow for the turkey bow. Cut a strip of yellow ribbon and make it into an X. Wrap the wire in the middle to create a “bow”. Glue to the side of the turkey’s head.
- Glue to headband or hair clip. DONE! It is easier to create than it is to type out the directions. :)
Thank you to Mommy’s Little Sunshine for the great tutorial!