
DIY Nail Polish Remover Jar
Why pay $5 or more for the nail polish remover/sponge all-in-one jar? Make it at home over and over again. It’s got to be way cleaner to replace it more often and it will be a small percentage of buying them over and over again at the store! It actually does save on nail polish remover: The amount that you pour in the jar and use 5x (or more) is the same as what you would use to remove ONE manicure! It’s also great to remove glitter polish.
What You’ll Need:
- Nail polish remover (acetone is stronger, but it dries your nails and cuticles out, so be careful)
- Dish sponge (plain, without the scrubber side)
- Baby food jar (or something small and can be resealed)
Directions:
- Cut your sponge in half directly down the center lengthwise.
- Roll your two sections of sponge together (like a cake roll).
- Push your sponge snugly into your baby food jar and fill it with nail polish remover a little bit at a time until it fills up the sponge.
- Tightly screw the lid on every time so it doesn’t dry out!
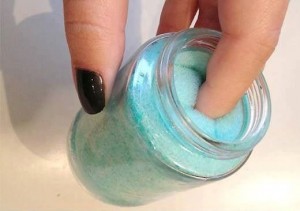
When you’re ready to use it, just stick your finger into one of the crevices, let sit for about 10-15 seconds, then rub your nail up and down a few times. For glitter, let your nail sit in the sponge for 60 seconds and check to see if it is easy to remove. If not, let it sit for another minute. Repeat.
Thanks to Bella Shoot for the pictures and tutorial!
Leave a Comment
I’m looking forward to tryingbyour brand of remover.