
DIY: Handmade Turkey Hair Bows
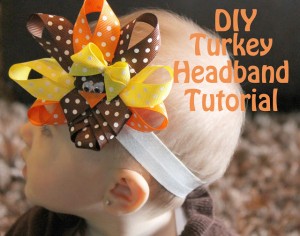
I don’t know about you, but I know I’ve spent $10 or more for Thanksgiving turkey bows. I found a really simple tutorial so that you don’t have to pay more than a buck or two for them. You could even make them as gifts or sell them if you’d like!
What You’ll Need:
- Glue gun
- Scissors
- Brown 5/8 ribbon ( patterned or plain)
- Yellow 5/8 ribbon
- Orange 5/8 ribbon
- Wiggly Eyes
- Headband or hair clip
- Optional: thin wire
Directions:
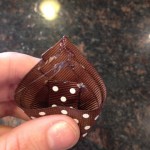
- Cut strip of brown ribbon about 2″ long, fold in half and glue the two ends together on the inside part (the part not showing) and press. Set it aside.
- Cut 3 more brown ribbons: 4″, 4.5″, and 5″. Put glue on the end of each ribbon on the side you want showing to create a curve like an oval or O, press and set aside all 3.
- Grab the first 2″ ribbon you folded inside the smallest loop bow that you created in #2 and glue inside.
- Glue each ribbon inside of the next size larger (see picture below). This creates the turkey’s body.
- Cut another 3″ ribbon and glue as in #2 to make the turkey’s head. Glue to the body.
- Now time for the feathers: Cut 3 orange, 2 yellow, and 2 brown into 5.5″ strips. Loop around and cross at the very ends. Glue the ends together on the side that you want showing (they look like the feathers in the first picture).
- Glue the feathers like this and in this order: orange in the middle of the body behind the head/body, then two brown to each side, 2 yellows beside/below the brown, then 2 orange very last.
- Use a small triangle of orange ribbon as the beak and glue to the head. Then attach two wiggly eyes above it.
- You can stop there or create a “girly” turkey and make a bow for the turkey bow. Cut a strip of yellow ribbon and make it into an X. Wrap the wire in the middle to create a “bow”. Glue to the side of the turkey’s head.
- Glue to headband or hair clip. DONE! It is easier to create than it is to type out the directions. :)
Thank you to Mommy’s Little Sunshine for the great tutorial!
Leave a Comment